Homemade Spaghetti

Ok, so this isn’t beer or BBQ related, but it sure is good!  Most folks like spaghetti, and if you’re reading this, you probably like to cook stuff from scratch, no Ragu here, and definitely no store bought pasta!

Spaghetti has been around a long time and there are many variations on how to make it.  I’ve been tweaking this recipe for my sauce since I was in my teens.  My mother first showed me how she made homemade sauce in the very same pot I’m using for this update.  If this pot could talk, we’d all gain 10 pounds from all it had to tell!

I start out by browning 1.5 pounds of my homemade Italian sausage. It’s pretty lean, so I tend to add about 1 Tbs of olive oil to the pot towards the end of the browning, then I add around 8oz of sliced, raw, mushrooms, 2 BIG yellow onions chopped, how ever much freshly minced garlic I feel like,  and one whole, deseeded, green bell pepper chopped up.  I also add some fresh basil and oregano to taste.  If fresh aren’t available, I use the dried stuff.  Now, WARNING, basil and oregano can overpower your sauce’s flavor very easily.  If you’re not sure how much to use, add a little at this stage, and then taste a bit later and see if you need more.  If so, add it to the simmering sauce, let it simmer a bit longer and taste again….

image

Yep, I leave the sausage crumbles in the pot to sauté with the veggies.  Once the onions begin to get a bit translucent, I pour in 2 15oz cans of tomato sauce (store bought sadly), and 1 small can of tomato paste.   I stir all of that in really well and increase the heat to medium high.  The temperature of the sauce will slowly rise up to boiling, once you’re at a boil, add a large bay leaf and some black pepper.  Lower the temperature down and let the sauce simmer for at least 2 hours, uncovered, after an hour, I generally quarter 4 Roma tomatoes and add then to the pot as well. Stirring now and then will be required to make sure you don’t scorch your sauce.

image

After a couple of hours, the sauce should have thickened a bit and should be smelling wonderful!  Now it’s time to add some cheese to the mix, not the stuff in a bag, shred your own Parmesan and Romano.   How much?  Well, that depends upon you and yours!  We (actually the bride) are cheese freaks, so I add a bit more than most.  I’d say, add some, stir around, let sit for a bit, taste, and decide if you need more.

image

Once your sauce is as cheesy as your kids believe you are, cover the pot and gently simmer while you make your pasta.  No, not while you boil the bagged pasta from Krogers, while you make your homemade pasta!  From scratch.  Fresh pasta dough recipes abound on the net, so I’m not posting mine since I use a different one each time.

image image

Once the homemade pasta dough has been cut, it’s time to boil it.  Ok, another warning, if this will be your first time making fresh pasta, remember this, it only needs to boil for a couple of minutes!  Drop the fresh pasta into salted boiling water, after a minute, sample a piece, if it isn’t ready, give it another minute and test.  Most of the pasta I make takes no more than 3 minutes to cook.  Once it’s cooked, drain it, but don’t rinse, pour it into a bowl, add some dried basil and oregano, and about 1-2 tsp of olive oil, and then toss all together.  Your pasta should resemble the pic below.

image

Ah yes, the time has come!  Let’s marry these 2 up and have a great meal!  We generally place a fair amount of pasta on a plate, then add sauce to the top, with a little more cheese, and serve with some garlic toast!

image

Yeah, that looks good!

Oh, about that bay leaf, you might want to remove it from the pot prior to serving the sauce….

Questions, comments, critiques?  Drop me a line!

Until next time, Bone Appetite!


Snacks sticks are a must have!

The boys and I love making homemade sausage, but our favorite to make is snack sticks!   Not the greasy Slimmy Jimmy things you get at the gas station on a road trip, I’m talking snack sticks with real meat and nice spices.

These critters are perfect for a quick snack, freeze easily, and almost anyone can eat them!  Toss a couple of packages of these into a cooler with some beverages of choice and enjoy while fishing or hunting as well!

We start all of our snack sticks with good lean beef and add just enough pork fat to make them moist, but not have greasy fingers when eating.  All of the meat is ground in our grinder and then the spices are mixed in by hand. This is really getting into your food!

Grinding away

Grinding away

Fine grind

Fine grind


Lean beef with very little fat showing

Lean beef with very little fat showing

Notice that the picture above is mostly all red meat, very little white is showing because you only have about 20% fatty meat in the mixture.

Mixing in the seasonings

Mixing in the seasonings

The meat and seasonings are mixed by hand until the meat begins to get very sticky, at that point you know that the meat has released its myosin. Myosin is already in the meat and as you mix it, it begins to be released from the meat which makes it bind together better and provides a very uniform sausage product. If your meat mixture isn’t sticky, mix some more!

After the mixing is complete, it’s time to stuff the casings. I used 22mm collagen casings for this batch so that the sticks will have the “snap” when you bite into them, however, you can use natural sheep casings if you want to.

All stuffed and ready to rest in the frig.

All stuffed and ready to rest in the frig.

After stuffing the links, we coil them up, put them in a ziplock bag, and let them rest in the refrigerator for at least 24 hours.  This allows for all of the seasonings to really meld together well.  The links above are around 3 feet in length each, these will get cut down to a smaller length after smoking and cooking.

Once the time in the frig is complete, they are taken from the bag and hung on a rack to dry a bit and come to room temperature.  This is safe to do since you’re using a cure in your meat mixture.

Hang to dry a bit and come to room temperature.

Hang to dry a bit and come to room temperature.

When the sausage links come from the refrigerator, they’ll have some condensation on them.  These need to dry on the exterior really well before smoking. Hot smoke hitting moisture turns into creosote, and that’s bad!  Creosote tastes nasty and has some carcinogenic issues as well, but we’ll be fine, because the next step is to put the links into a smoker that’s preheated to around 130 degrees with just heat, no smoke. Run at this temperature for an hour and the casings will dry really well.

Into the smoker to dry for a bit

Into the smoker to dry for a bit

After drying for an hour, it’s time for smoke!  Ramp the temp up to around 180 and apply smoke for a couple of hours or until you get an internal temperature of 155 in the sausage.

We're smoking!

We’re smoking!

In the picture above, you can see that I have a very light smoke. Heavy white smoke will also make for creosote, a thin light colored smoke is what you’re after.  Also note that I have a temperature probe in the meat and another in the smoke chamber, these provide me with my temperatures without having to constantly open the door.

Once I have reached my internal temperature of 155, I pull them from the smoker and let them cool on the rack once again. This gives the exterior of the links a wrinkled effect, if you don’t want them to look wrinkled, just dip the links into cool water as soon as possible after pulling from the pit.  That will leave the casings fairly smooth.

Smoking and cooking complete!

Smoking and cooking complete!

Notice the darker color and how much slimmer the links are now after smoking!  They are also quite stiff as you can tell be the ones resting on the end of the rack. At this point, you can cut them up into the lengths you want and package!  These freeze really well and are a perfect snack or quick protein fix!

Here is a recipe I’ve used in the past for some good snack sticks:

  • 5-pounds lean beef
  • 1-pound fatty pork butt
  • 7 grams Cure #1 (grams, not spoons!)
  • 5-Tbs powdered milk
  • 3/4 cup dark brown sugar
  • 3/4 cup Worcestershire sauce
  • 3/4 cup soy sauce
  • 1.5 tsp dry mustard
  • 1.5 tsp course ground black pepper
  • 1.5 tsp red pepper flakes (optional)

Grind the meat fine and refrigerate while mixing the seasonings.

Mix all dry seasonings into the wet seasonings very well. Pour seasoning mixture over the ground meat and mix very well by hand until all seasonings have been distributed and the meat is very sticky.

For cooking, follow what I did above and you’re good to go!

Until next time, Bone Appetite!


Homemade Canadian bacon

As many of you have probably realized by now, I would rather make something from scratch than buy it in a store if I can.   Today I’ll show what I was up until the wee hours of the morning finishing cooking; my version of homemade Canadian bacon…

Ok, before I get email telling me that I made back bacon, loin bacon, or whatever bacon; I realize that, however, for sake of argument, and to make it where everyone knows what I’m talking about, we’ll call it canadian bacon.

I know I’m gonna get scolded, but I didn’t take any pics of the brine making or dropping the meat into the big stainless pot to soak for a few days…  I’ll do my best to describe how it went.

I started out making the brine that I use. You can vary from the recipe and experiment with the flavors your family likes, this one is perfect for us for an all around CB brine.

Ingredients:

  • 12-pound pork loin
  • 2-gallons good cool water
  • 1-cup kosher salt ( do not use iodized salt of any form)
  • 2-cups brown sugar
  • 10 grams Cure #1
  • 4-crumbled bay leaves
  • 8-juniper berries crushed
  • 8-cloves of garlic crushed
  • 2-cloves crushed
  • 4-Tbs rubbed sage
  • 2-Tbs fresh ground black pepper

Put all of the above into a large, non-reactive pot, place it on the stove on high, bring to a boil, and then remove from the burner and allow to cool.  The brine solution needs to cool to room temperature, and then be placed into a refrigerator until cooled to 40 degrees F.   Cooling will take a while, so go do something else for a while. To get to 40 F, it’ll be all day, or overnight.   So, get out the pork loin and trim off as much fat as you can. Also, look for little pieces of bone that may be left from the butchering process.  Once that’s complete, cut the loin into manageable sizes that will fit into your non-reactive pot or container you’ll be using to cure the loin in.

Now, I say a non-reactive pot and/or container, why?  Because the stuff your putting into the pot can leach out a very nasty metallic taste into your brine and ruin everything!  What’s non-reactive you ask?  Glass, stainless, plastic, and enamel coated pots or containers will all work fine.

Ok, now that the brine has chilled down to a minimum of 40 degrees F, you can place the meat chunks into your brine solution.  In order to keep them submerged, place a plate or other object on top of them.  Now, put the container in the frig and leave it alone for 2 days. After 2 days, open the frig, get out the container, and move your meat chunks around a bit. Now put it back in the frig and leave it alone for another 2 days.

After your 4 days are up, pull them out of the container and put them into another container. Fill the new container with water and allow to soak for about 1 hour. This removes a bit of the saltiness and loosens up any brine gunk that may be on the meat.

After your hour is up, remove them from the water and give a final rinse. Pat them dry and cut off a very thin piece of each end. Toss the very thin end pieces in the trash. These pieces will be very salty!

now slice off a piece or 2 that are about 1/8″ or so thick and place them into a skillet over medium heat. This is the saltiness test. Once the pieces are cooked through, taste them. If too salty, soak another hour and test again.  Repeat until you get what you want.


Fresh from the brine

Fresh from the brine


Saltiness fry test. Note the neutral color prior to smoking.

Saltiness fry test. Note the neutral color prior to smoking.

Ok, now that we have the taste we want, it’s time to cook this critter!  You can smoke it, cook with indirect heat on the grill, or stick it in the oven.

To smoke it, set the smoker at 225 degrees F and cook until you get an internal temp of 150.   Same with the grill using indirect heat.

If cooking in the oven, set it at 200 degrees F and cook until you hit 150.

I recommend smoking, it really gives a great flavor to what you’ve already created.   It took just over 2 hours for me to hit my target temp.

Fresh from the smoke!

Fresh from the smoke!

One the cooking is complete, I like to slice it all up and package it for easy use later.

All sliced and ready to package up.

All sliced and ready to package up.

After packaging it all up this morning, #2 son and I decided we needed to really see how good it was!

Canadian bacon and cast iron go nicely together!

Canadian bacon and cast iron go nicely together!


Breakfast is ready!

Breakfast is ready!


The boy approves!

The boy approves!

It was pretty darn good!

Questions, comments, or suggestions?  Drop me a line!

Until next time, Bone Appetite!

As promised, 2 sausage recipes

Yeah, I’ve been AWOL for a few days, I know… I’ve come to the conclusion that working for a living really interferes with my BBQ and sausage making!

It’s things like the picture below that are making me tardy for my 2nd real passion in life! The first passion in my life is my bride that tolerates my madness for this hobby!

20130209-220537.jpg

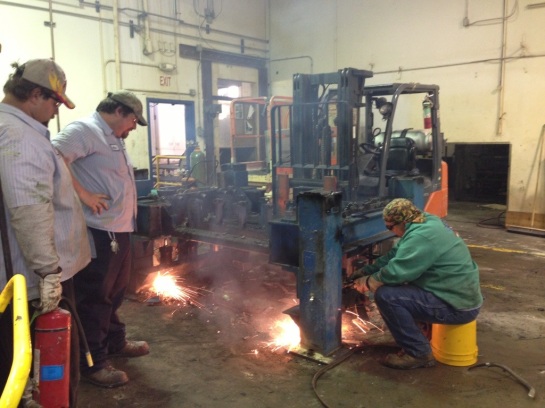
Yep, the fat boy in the green jacket is yours truly! But, ya gotta love it when you have a fellow standing behind you with a fire extinguisher in hand! I love to smoke stuff, but I want to avoid being smoked! Love my helper!

But, on to the meat of this blog today. As I stated in my last post, I’ll be sharing a couple of recipes. The first will be for my version of Swedish potato sausage, and the next will be for my hot links. Both are recipes that have proven to be crowd pleasers over the years.

Now, I normally only go with grams for measurement, but the hot link recipe is one that’s been handed down to me and I stick with the original recipe. Granted, the Tender Quick wasn’t an original part of the recipe, but I add cure to ALL sausage that will be cold smoked! You should as well…

Swedish Potato Sausage
1 pound pork butt
1 pound beef (I use chuck roast)
1 pound potatoes (peeled and washed)
25 grams kosher salt (do not use iodized salt!)
6.5 grams white pepper
2 grams all spice ( ground to a powder)
35 grams onion
125 mL water
Grind meats, potatoes and onions through 3/8 plate
Mix spices with water and mix into meat
Then stuff into hog casings
To cook; you can poach, grill, or bake until and internal temp of 165f is reached. Best served with lingonberry preserves if you have some!

Hot Links
2.5 pounds of pork butt
2.5 pounds of chuck roast (or other beef with a little fat)
5 Tbs smoked paprika
2.5 Tbs Morton’s Tender Quick (or 5.5 grams of Cure #1)
2 Tbs chili powder (I use my homemade powder listed in a prior post)
1.5 Tbs garlic powder
125 mL dark beer (open the beer about 2 hours prior to use so it becomes flat)

Grind meats through a 1/8″ plate 3 times. You want the meat to be completely emulsified.
Mix all spices into beer
Mix spice juice into the meat thoroughly
Stuff into hog casings
Smoke at ~150 degrees for 3 hours
Cook in oven or poach until internal temp of 165 is reached. You can also grill or hot smoke since this is a cured sausage.

Now, when mixing the spices into the sausage, you need to let the sausage mixture tell you when you’re done mixing. When you first start mixing, only a little bit of the sausage mixture will stick to your hands. As you continue to mix you’ll notice that the sausage gets really sticky and begins to really stick to your hands. When it becomes really sticky, that means that the myosin point has been reached. You can now stop mixing. Now, if your meat is good and cold, as it should be, this could take 10 minutes of mixing or more! Trust me, you want to mix to that point!

If you have any questions, let me know, if you make the sausages above, let me know how they turned out!

Made sausage over the weekend! Freezer is happy!

My first sausage creation session of 2013 went well in my opinion, Candis may have a differing opinion given the state of the kitchen, but that’s another story!

i started the day off on Saturday making Swedish potato sausage.  Since that one is our favorite, I tend to give it my full attention.  Just over 9 pounds of that flavor was made in total!

imageimage

Folks that have had the potato sausage I make ask me how much of each ingredient I add for when it comes to meats and potatoes…  Equal amounts of each!  3 pounds of pork, beef, and potatoes were used for this batch.  Now, the 2nd pic, the one with the bowl, shows how I mix the dry spices before adding to the sausage.  Mix the dry spices into the liquid you are  using for the recipe.  By using a whisk to mix the dry spices into a liquid prior to adding to the meat you are almost guaranteed a perfect mix into your sausage.  Yes, recipes will be coming shortly!

Now, the star of the sausage making this weekend was the hot links!  I specifically made those links for the guys that I’m working with to demolish half of the factory we are currently working in.  Last week, one of the guys stated that he loved a good hot link in lieu of a regular hotdog, I accepted the challenge, and we’ll have hotlink dogs on Thursday of this coming week!

I make my hotlinks with a 50/50 mix of pork and beef with a few strategic spices added in. Over the years, I’ve found that a good hotlink is best started out as being ground for a wiener!  Smooth meat, almost the pink slime folks are freaking out about!

image

The above pic is the first grind of both meats combined.  You can see the fat between the lean meat in this picture.  Now, even though I’m grinding through a 1/8″ plate, the definition is there.  So, we need to grind the meat again to emulsify it more.

image

With the grind above, you should see that everything is mixed/ground well together and is ready to have the spices added, and be finally mixed prior to stuffing.

Well, since I was a lone wolf in the kitchen, I failed to get a picture of the stuffing process, but I’m sure you get the idea of what was involved.

Now, after stuffing, the links needed a bit of smoke to give them some flavor…

image

There were 3 layers of the links in my smoker on this batch.  I smoked the critters with hickory wood and never went over 100 degrees F in the pit.  The only thing done in the pit at this point was to smoke them with a true, almost clear, smoke.  Once the smoking was done, I pulled the links from the pit, cut them into individual links, placed them on a cookie sheet, and cooked them in the oven until an internal temperature of 165 degrees F was met.  As soon as the thermometer told me they were at the internal temp required, I pulled them from the oven and dropped them into the sink full of ice water to stop the cooking action.  I then packaged them up and placed them into the freezer.

This is what the links looked like fresh from the oven, prior to the ice water bath….

image

Major difference in color and taste for sure!  Nice smoke flavor and cooked slowly so that the fat doesn’t leave the link!


Overall, it was a great day!  I had fun, I made good food, and most of all, Candis didn’t divorce me over the state of the kitchen.

The recipes for the potato sausage and hot links will be in my next post.

Sausage making 2013 has begun!

As I said yesterday, I’m out of sausage, and that’s just not right!  So today I went and got all the fixins to remedy that problem!

On the sausage making menu I have:

  • Scrapple (not really sausage, but good for breakfast)
  • Gilmer dogs – hotlinks are what most call them
  • Potatis korv – Swedish potato sausage, our favorite

So, as of now, all the meat is cut into chunks and chilling for the grind, the pork is simmering for the scrapple, and the spices are measure out!

I’ll post pictures later tonight!

Holy cow, we’re out of sausage? How did this happen?

I’m a pretty easy going guy.  As long as I have easy access to Diet Coke, Copenhagen Long Cut, and good things to eat, I’m good to go…

Well, tragedy has happened here at the Taylor home!  Last night Candis and I reached into the freezer for a quick and easy meal of some sausage and I was only able to pull out a single vacuum package of chicken sausage and a vac pack of potatis korv!  We are now completely and totally out of sausage in the freezer here at the house!
I know, some of you are now saying that its good we are out of sausage since sausage is high in fat, bad for you, tastes good so you should spit it out…  We’ll, the sausages I’m talking about are actually healthy alternatives to the fatty types one gets in a grocery store.  These one of the things we eat during the work week when we try and eat “good”.  Sausages made from chicken (yes the dreaded white meat), and sausages made with minimal fat beef and pork as well.  When you fry up a piece of my homemade breakfast sausage you have to add oil to the pan since it’s so low in fat.  Not to mention my sausage doesn’t have all of the “other stuff” in it.  You know, the things on the ingredient list that requires a dictionary to pronounce and an encyclopedia to begin to understand.
So, this weekend will be one that my bride dreads!  Sausagefest ala Charlie will be happening in the kitchen!  I have got to restock our freezer!
Yes, we can cook other things during the work week like boneless skinless chicken breast, or even some sort of fish, but I want something that tastes good!  White meat chicken sucks since I have to chase each bite with a drink of water or tea!  Fish to me only tastes good if its covered in ketchup and I eat a forkful with an onion slice!
I can eat sausage slices one piece at a time without a chaser!  I loves me some sausage!  The initial bite into the perfectly done casing is wonderful, and then your teeth get into the almost sinful texture  and flavor at the center of the link that only a homemade sausage can provide!
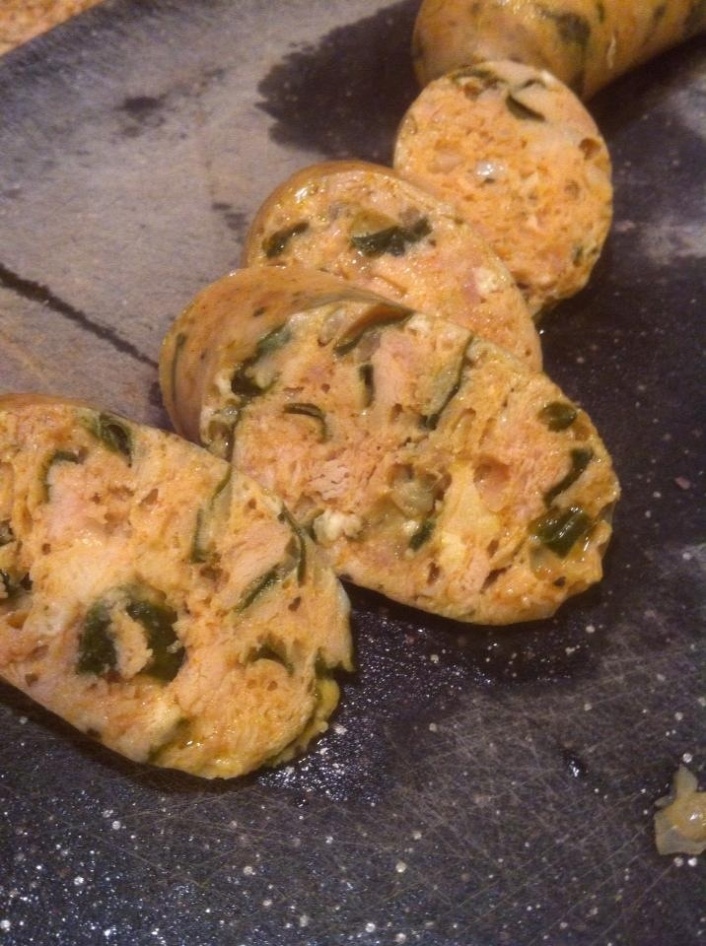
The pics below show my chicken with spinach and feta cheese sausage prior to cooking and after cooking!  Not greasy and not too bad for you either!
Image
 Image
So, I’m eating boneless skinless chicken breast tonight, but you can bet your pit that I’ll be making sausage this weekend for the freezer…  My bride may be able to live off of white meat chicken, but I’ll supplement my diet with some homemade goodness compliments of the pig come Saturday!
Now, the real dilemma begins;  what type of sausages will I make this weekend?  I’m debating about what I want to do and whether or not I want to try and recreate something from my youth…  Gilmer dogs come to mind!  Now, not many folks will understand what that means, but a Gilmer dog in my youth was spectacular!
At Williams drive in, located on highway 156 in Justin, Texas, back during the 70s/80s/90s, you could go in and ask the “nice” lady behind the counter for a hotlink with cheese and onions, and she would provide you with a handful of goodness served on a bun and wrapped in that thin white paper stuff that doesn’t absorb any grease at all!  That, was called a Gilmer Dog!  Now, I don’t know where the “Gilmer Dog” name came from, but that’s what they were called back then, and me and quite a few others still refer to them as such!
We shall see what transpires with the final list of links and patties, but I’m certain that sausage shall be made!