Went to an interesting market today! Strange foods I’ll probably try!
I’ve been AWOL for a while since starting a new real job and trying to be a good boy, but I’m over the being good thing.
Earlier today I decided I wanted to start curing a pork belly to make some homemade bacon (that’ll be a different post). A friend of mine said that the Asian market on Spring Creek here in Plano had some good bellies at a decent price. So I looked it up, found the web site, looked at the pics, told Candis bye, and hauled ass to what I figured was gonna be an adventure! Oh my, the things I have seen!

Being the carnivore I am, I headed straight to the meat department, I wasn’t disappointed! What part of the pig do you want? The picture below, shows pig liver, pig heart, pig kidneys, and pigs feet! I’ve been looking for pork liver for years to use in my boudin! Score! Oh yeah, pig bung as well!

The next section was just nuts, seriously, nuts, balls, testicles, whatever word you have for them! Below, I present you with rooster fries and lamb balls! Beef didn’t make it into the picture.

Now, I’ve cleaned and eaten a LOT of chicken, but damned if I’ve ever seen anything on the bird that looks like that! Looks like you fry em up! I wonder, do they taste like chicken?
OK, on to the fish and seafood section, I doubted anything here would surprise me, I was wrong! What kind of fish or seafood do you want? I identified fresh water and saltwater fish, I also found things I couldn’t identify! Below are some items I found.


Hmm, you want that fish head whole or just half of it? How fresh is the pompano? I think one winked at me!
Calamari squid and large squid looked pretty good! I was tempted.. Now, white bass are how much a pound? My friend Paul would have made a killing as a fishing guide if he had charged by the pound!
i saw most of the “normal” fish we find on a menu, but some others really caught my eye. Ribbon fish, lady fish, raw sardines, raw anchovies, and even largemouth bass, yep, the ones in the local lakes! All fish can be fried by them free of charge.
Want crabs? Dungeness and blue crabs can be had live, or cleaned and frozen. Oh yeah, they’ll steam them for you free if you want!

Ok, everything so far has been interesting, but I really want some feedback about how to eat the items we’re about to discuss….
Squid with fish paste. Ok, does it need to be cooked? Is it finger food or something you add to a dish?

Marinaded duck feet. Now, this one was in a refrigerated display with many items ready to eat. Are these ready to eat? Not much meat.

Silky chicken. Ok, it has a black skin, it was a LOT smaller than the 4 pound regular chicken I bought for 5 bucks, and this sucker costs how much? DAYUM, this must be a very rare yardbird!

Raw pork blood, not cooked, raw! Um, why? I really want to know! Sorry for the bad picture, I was getting strange looks just being in the store, when I took pictures, they frowned at me.

Well, let’s talk jerky! I assume that’s what this is, it’s all salted and dried…
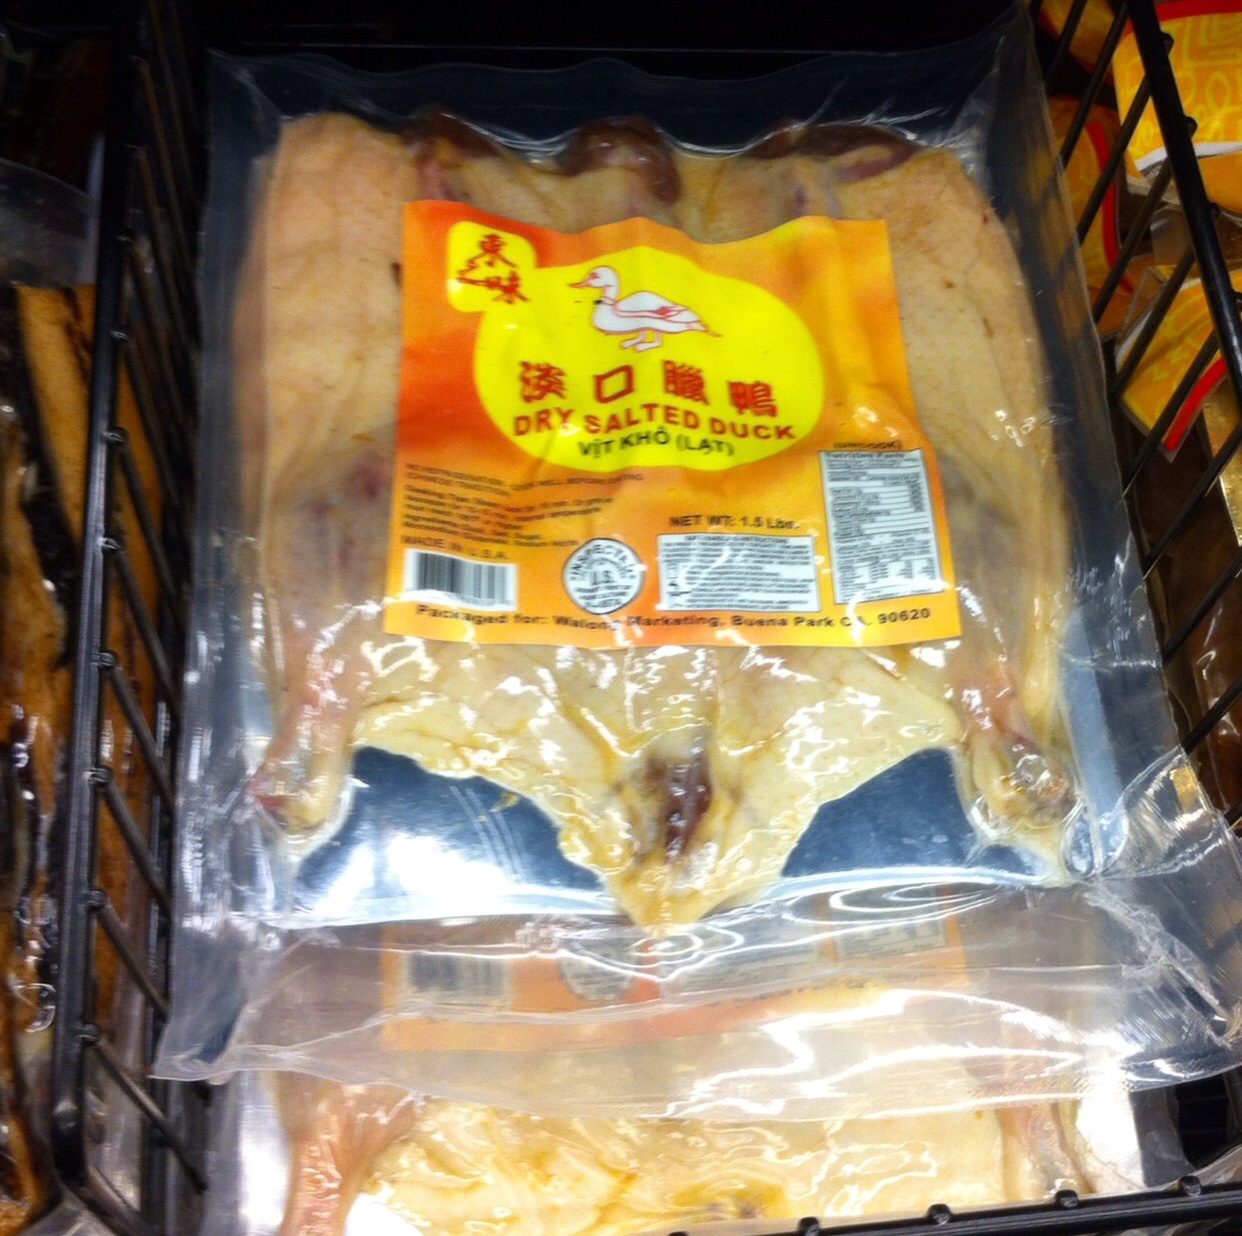


Dried duck, dried squid, and dried octopus! I doubt it’s eaten like jerky, probably used once rehydrated, but still an interesting find. Any information on these and their use(s)?
Ok, last one, WTF is this and what’s it used for?

Over all, I was IMPRESSED! However, there was NO cheese to be found! I wanted to get some for Candis. Do Asians not eat cheese?
I also think that Mark Davis and I need to go crazy in this store while Candis and Allie eat at McDonalds!
Questions, comments, secret recipes? Gimme a shout!
Until next time, Bone Appetite!
Homemade Spaghetti
Ok, so this isn’t beer or BBQ related, but it sure is good! Most folks like spaghetti, and if you’re reading this, you probably like to cook stuff from scratch, no Ragu here, and definitely no store bought pasta!
Spaghetti has been around a long time and there are many variations on how to make it. I’ve been tweaking this recipe for my sauce since I was in my teens. My mother first showed me how she made homemade sauce in the very same pot I’m using for this update. If this pot could talk, we’d all gain 10 pounds from all it had to tell!
I start out by browning 1.5 pounds of my homemade Italian sausage. It’s pretty lean, so I tend to add about 1 Tbs of olive oil to the pot towards the end of the browning, then I add around 8oz of sliced, raw, mushrooms, 2 BIG yellow onions chopped, how ever much freshly minced garlic I feel like, and one whole, deseeded, green bell pepper chopped up. I also add some fresh basil and oregano to taste. If fresh aren’t available, I use the dried stuff. Now, WARNING, basil and oregano can overpower your sauce’s flavor very easily. If you’re not sure how much to use, add a little at this stage, and then taste a bit later and see if you need more. If so, add it to the simmering sauce, let it simmer a bit longer and taste again….

Yep, I leave the sausage crumbles in the pot to sauté with the veggies. Once the onions begin to get a bit translucent, I pour in 2 15oz cans of tomato sauce (store bought sadly), and 1 small can of tomato paste. I stir all of that in really well and increase the heat to medium high. The temperature of the sauce will slowly rise up to boiling, once you’re at a boil, add a large bay leaf and some black pepper. Lower the temperature down and let the sauce simmer for at least 2 hours, uncovered, after an hour, I generally quarter 4 Roma tomatoes and add then to the pot as well. Stirring now and then will be required to make sure you don’t scorch your sauce.

After a couple of hours, the sauce should have thickened a bit and should be smelling wonderful! Now it’s time to add some cheese to the mix, not the stuff in a bag, shred your own Parmesan and Romano. How much? Well, that depends upon you and yours! We (actually the bride) are cheese freaks, so I add a bit more than most. I’d say, add some, stir around, let sit for a bit, taste, and decide if you need more.
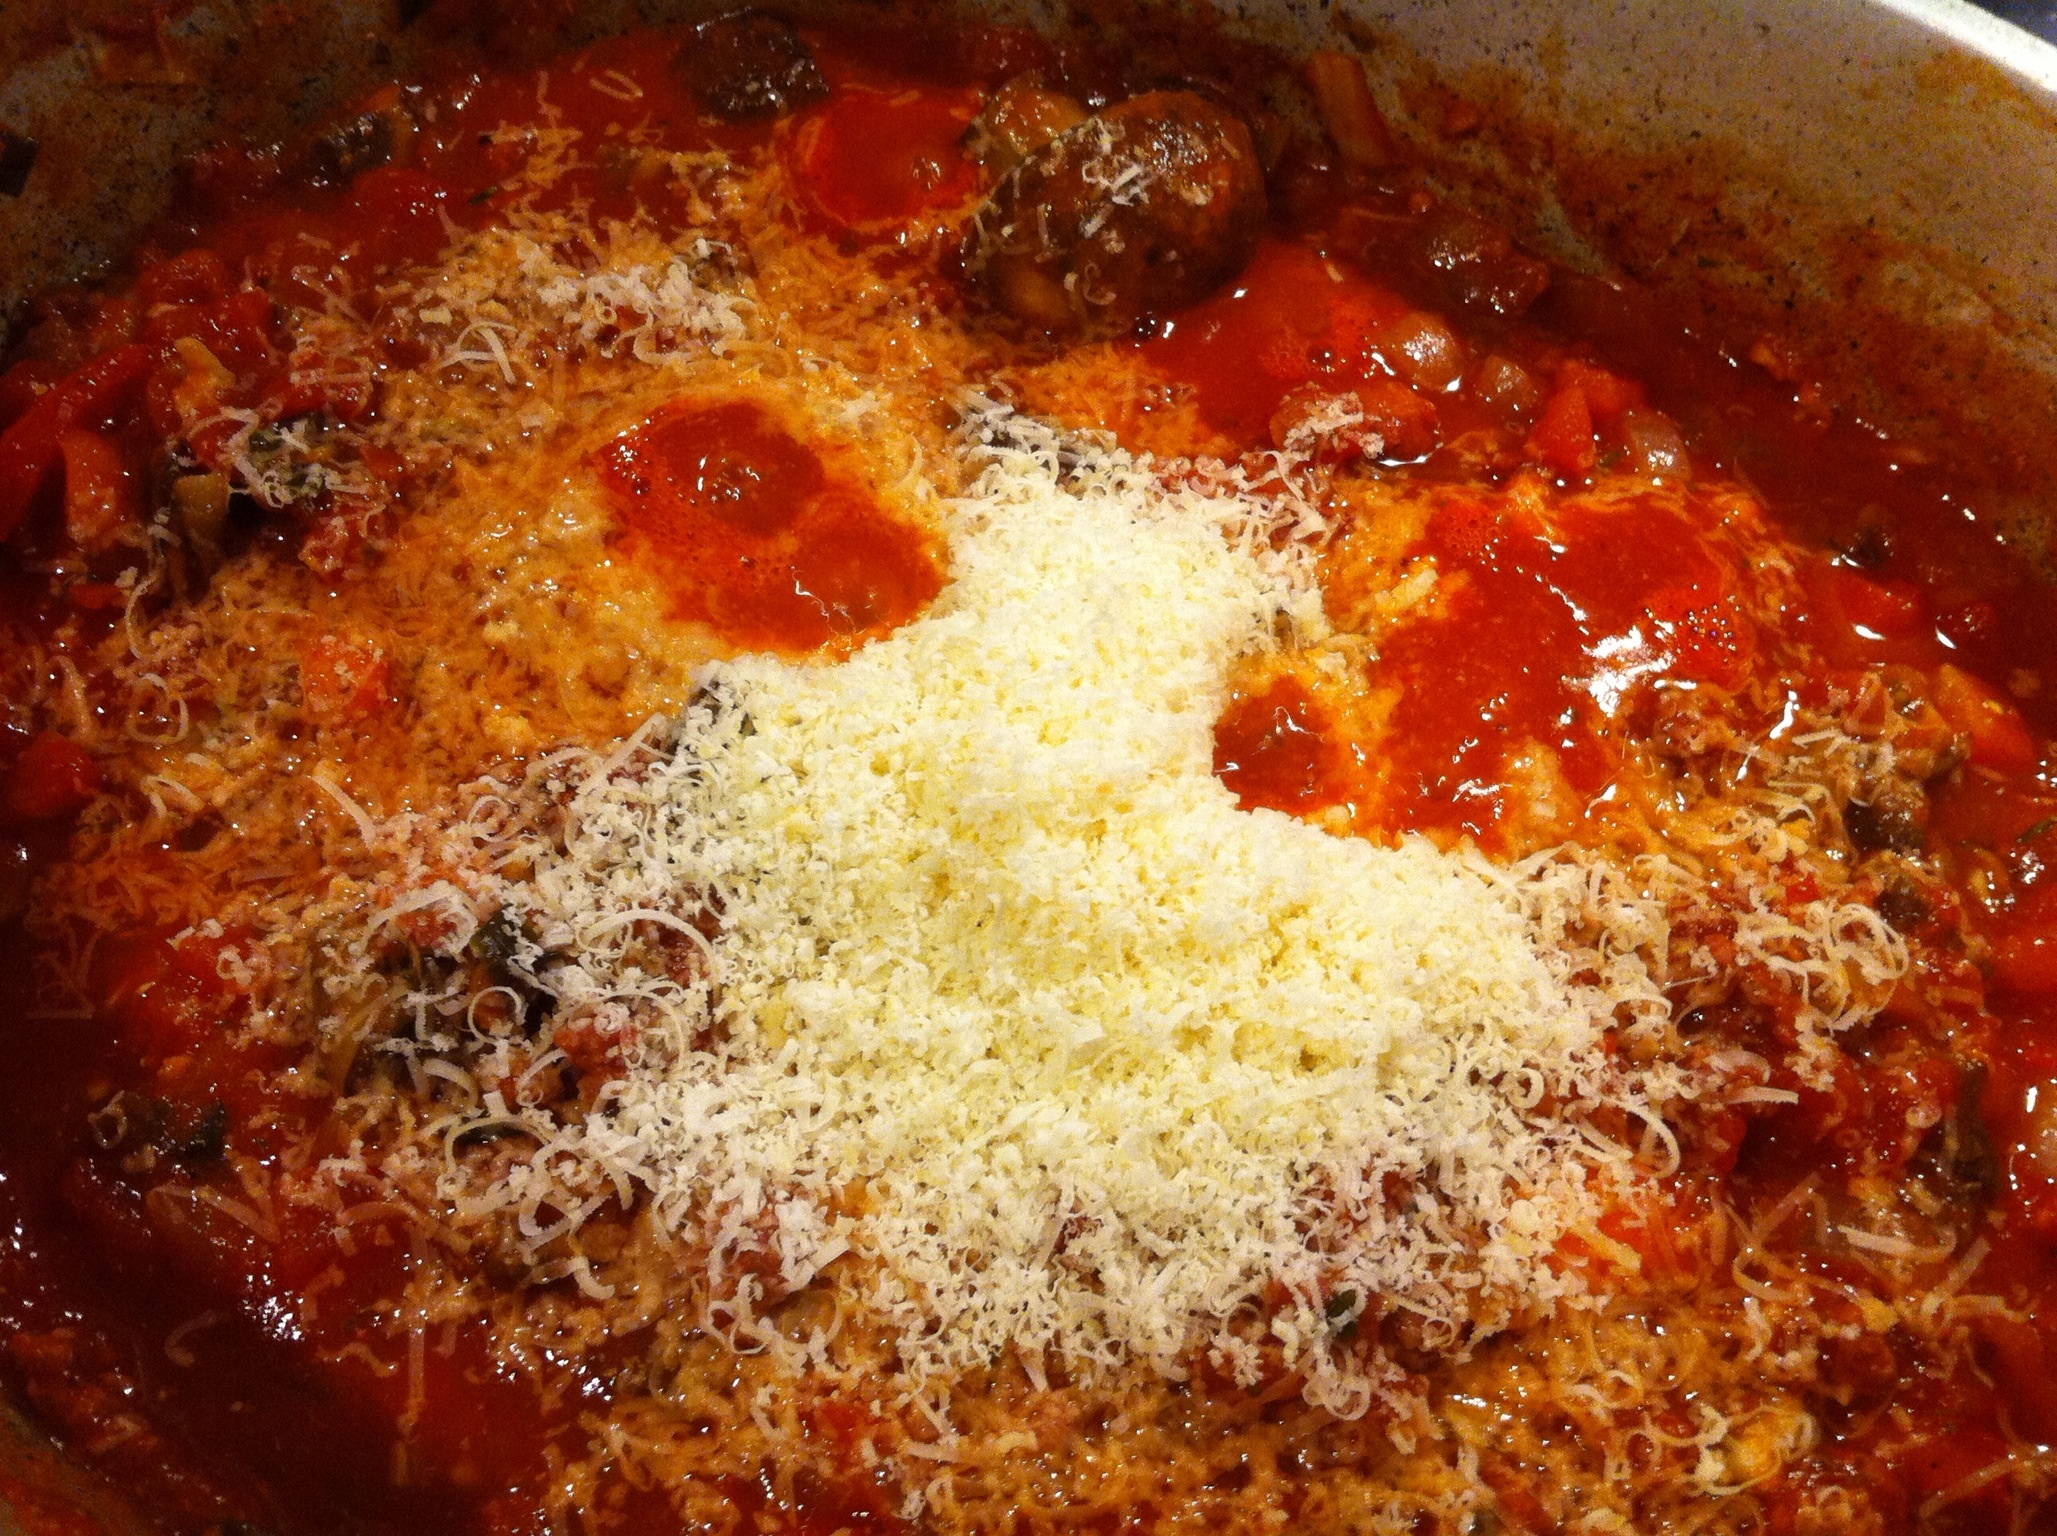
Once your sauce is as cheesy as your kids believe you are, cover the pot and gently simmer while you make your pasta. No, not while you boil the bagged pasta from Krogers, while you make your homemade pasta! From scratch. Fresh pasta dough recipes abound on the net, so I’m not posting mine since I use a different one each time.
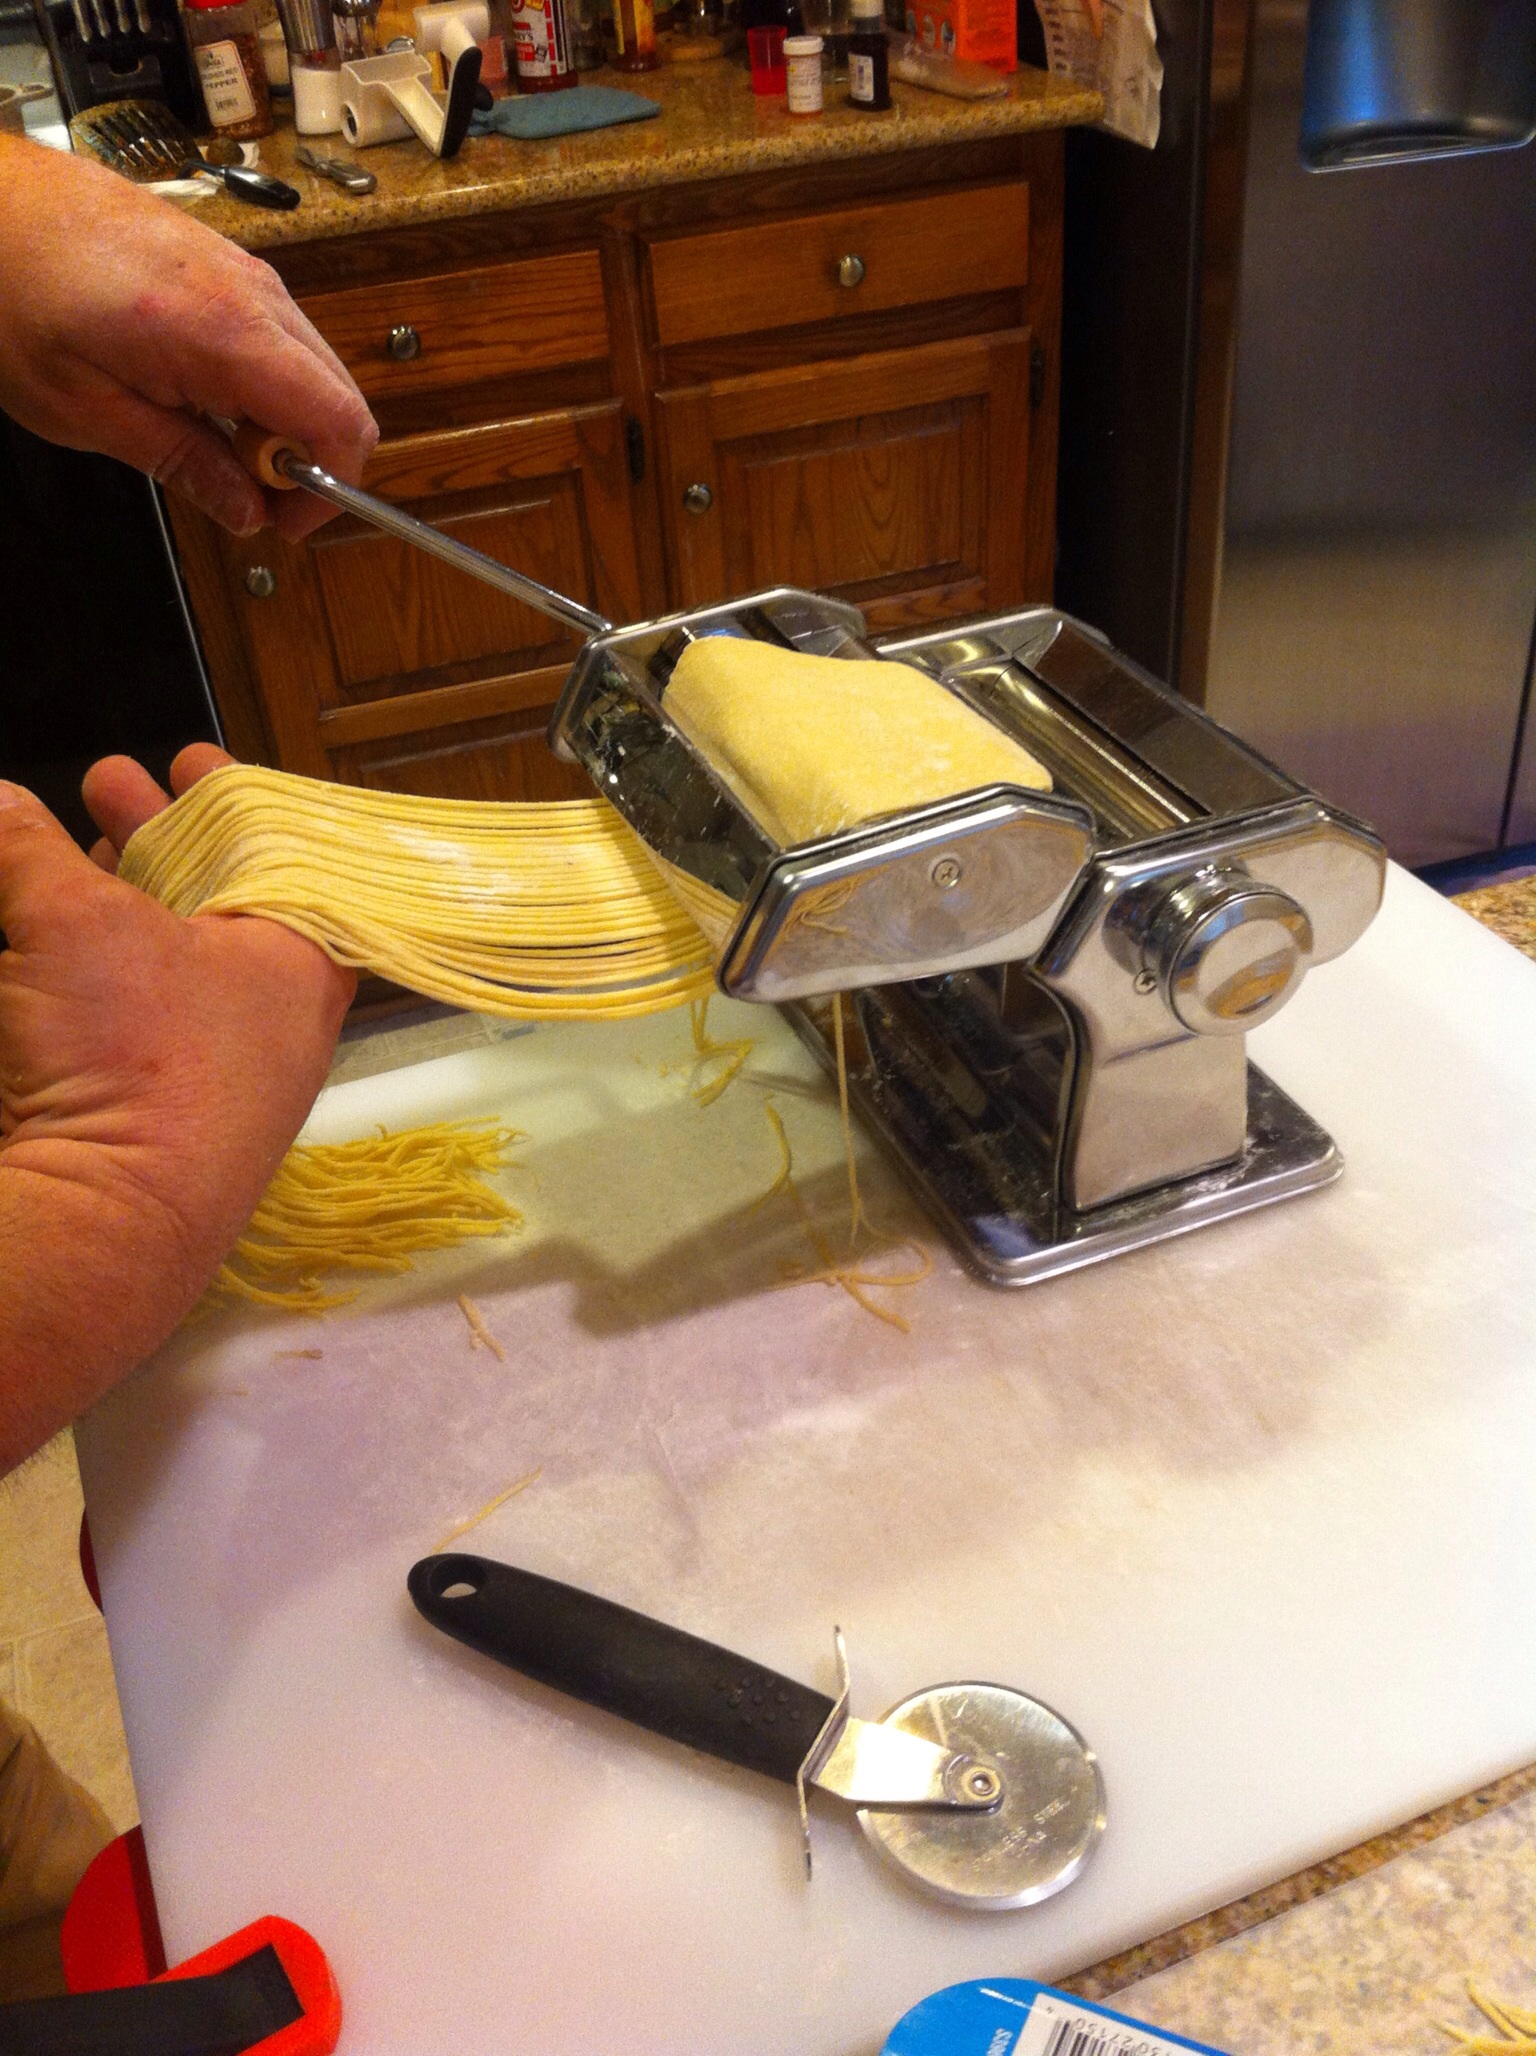

Once the homemade pasta dough has been cut, it’s time to boil it. Ok, another warning, if this will be your first time making fresh pasta, remember this, it only needs to boil for a couple of minutes! Drop the fresh pasta into salted boiling water, after a minute, sample a piece, if it isn’t ready, give it another minute and test. Most of the pasta I make takes no more than 3 minutes to cook. Once it’s cooked, drain it, but don’t rinse, pour it into a bowl, add some dried basil and oregano, and about 1-2 tsp of olive oil, and then toss all together. Your pasta should resemble the pic below.

Ah yes, the time has come! Let’s marry these 2 up and have a great meal! We generally place a fair amount of pasta on a plate, then add sauce to the top, with a little more cheese, and serve with some garlic toast!

Yeah, that looks good!
Oh, about that bay leaf, you might want to remove it from the pot prior to serving the sauce….
Questions, comments, critiques? Drop me a line!
Until next time, Bone Appetite!
Chipotle Infused Cooking Oil
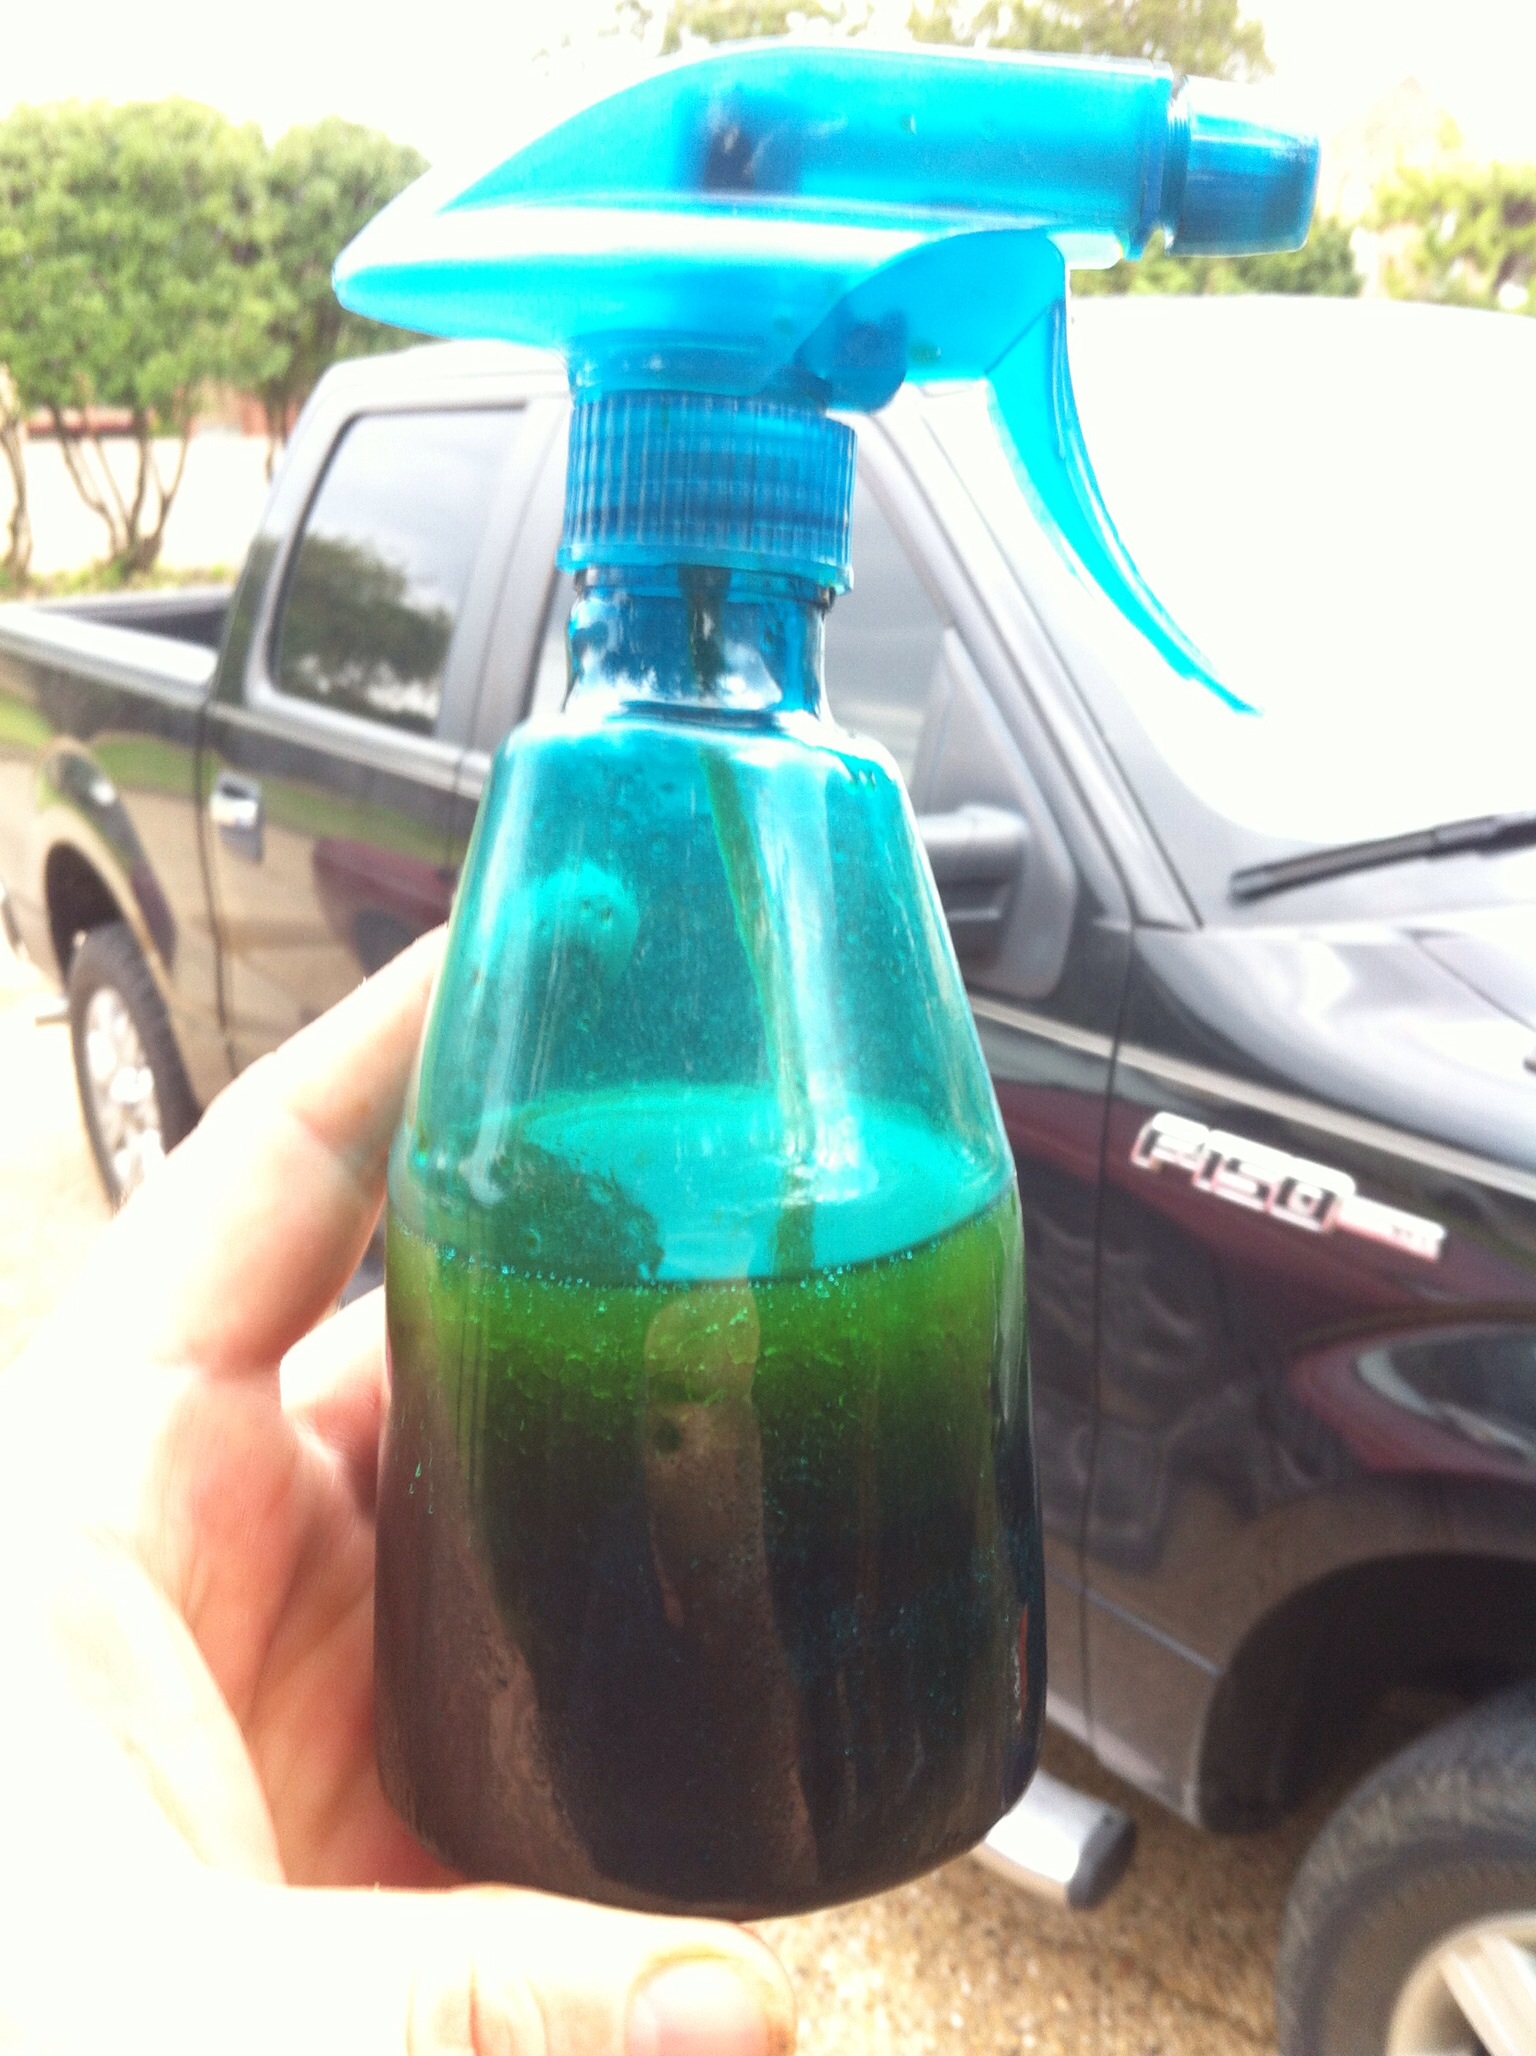
Not long ago I smoked a LOT of jalapeño peppers to make them into dried chipotle peppers. I made a little chipotle seasoning with some of the powder, but I made chipotle infused cooking oil with the rest!
For those of us on a budget, this will make for a terrific holiday gift! You’re not cheap, you’re creative!
This oil is very pretty to look at, smells fantastic, and tastes GREAT when used in moderation. By moderation I mean, a little of this oil added to MOST of the regular oil called for in a recipe, very distinctive bite to this stuff!
Now, let me be very clear, what I mean is this, if the recipe calls for 2-Tbs of oil, use 2-Tbs of normal oil and add about 4-6 DROPS of this!
Making this oil is simple, the waiting is the hard part!
Ingredients required:
2- Tbs chipotle powder
2- cups regular non-flavored cooking oil
1- Tbs regular paprika (for color if needed/wanted)
OK, dump the above dry ingredients into a bowl. Then heat your oil, in a separate pot, to 160 degrees (just get close, it isn’t rocket science).

After getting into the 160 range, using a whisk, stir the oil into your dry ingredients. Whisk this around until your arm starts to hurt, or for about 3 minutes, whichever comes first.

After the whisking is done, cover the bowl with BBQ duct tape (aluminum foil), and set it on the counter top out of the way. Ignore it for 24 hours, then remove the foil, whisk it all around for a couple of minutes, and cover it back up.
Repeat this process for 7 days.
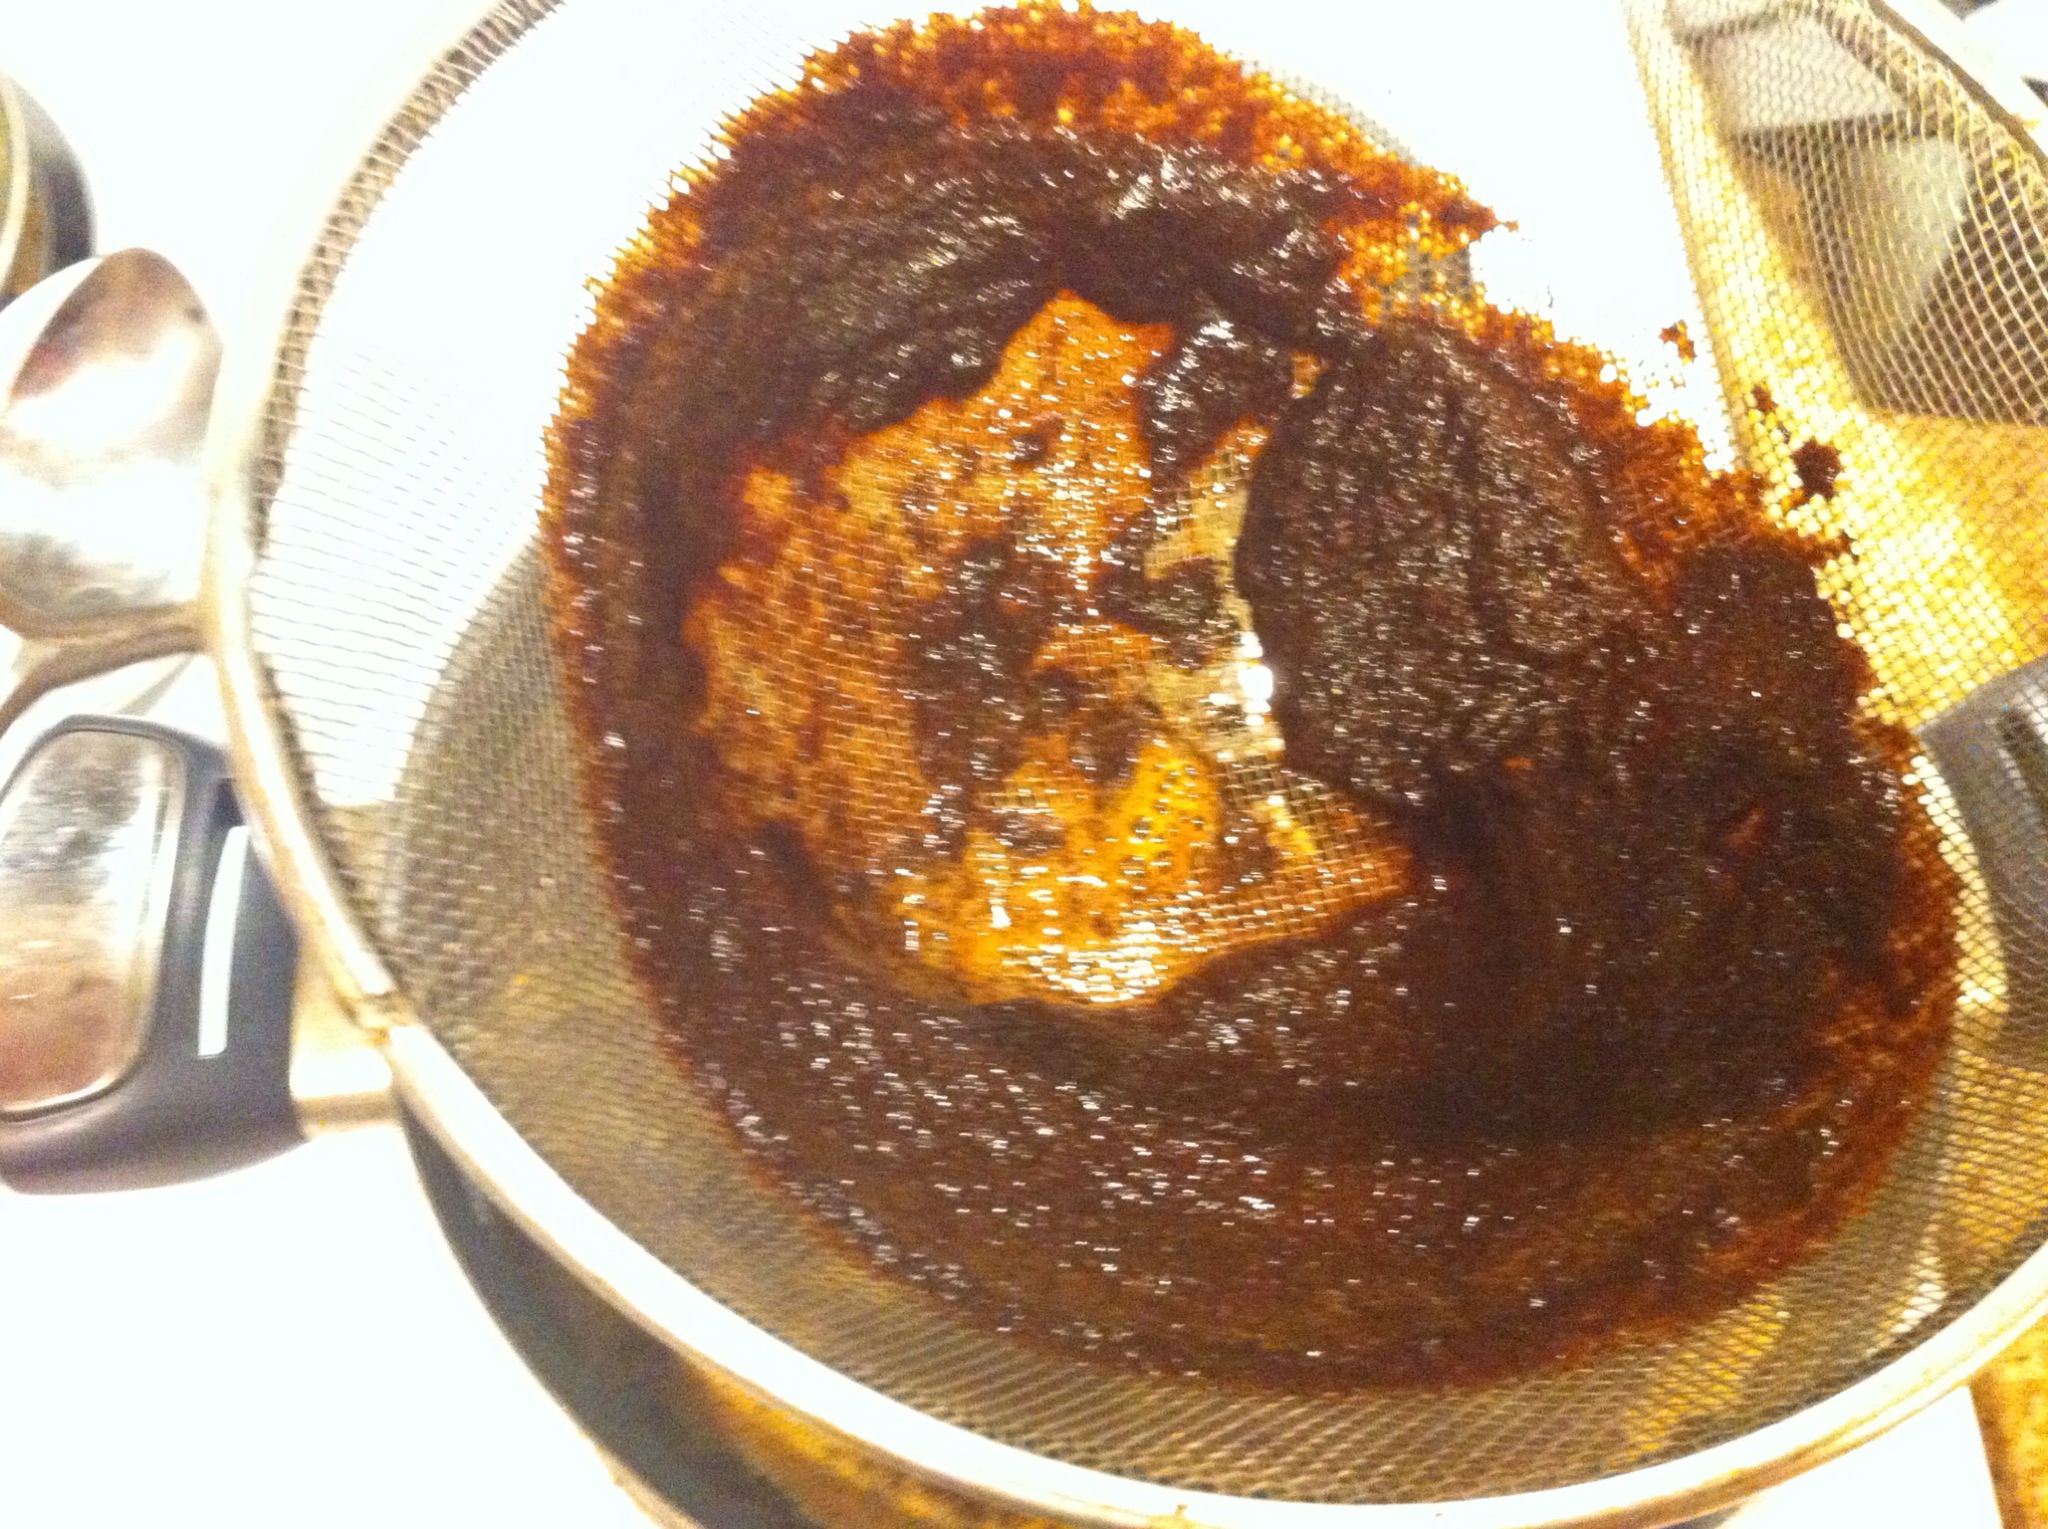
After 7 days, you’ll need to strain out all of the solids left over. I use cheese cloth and a fine strainer.
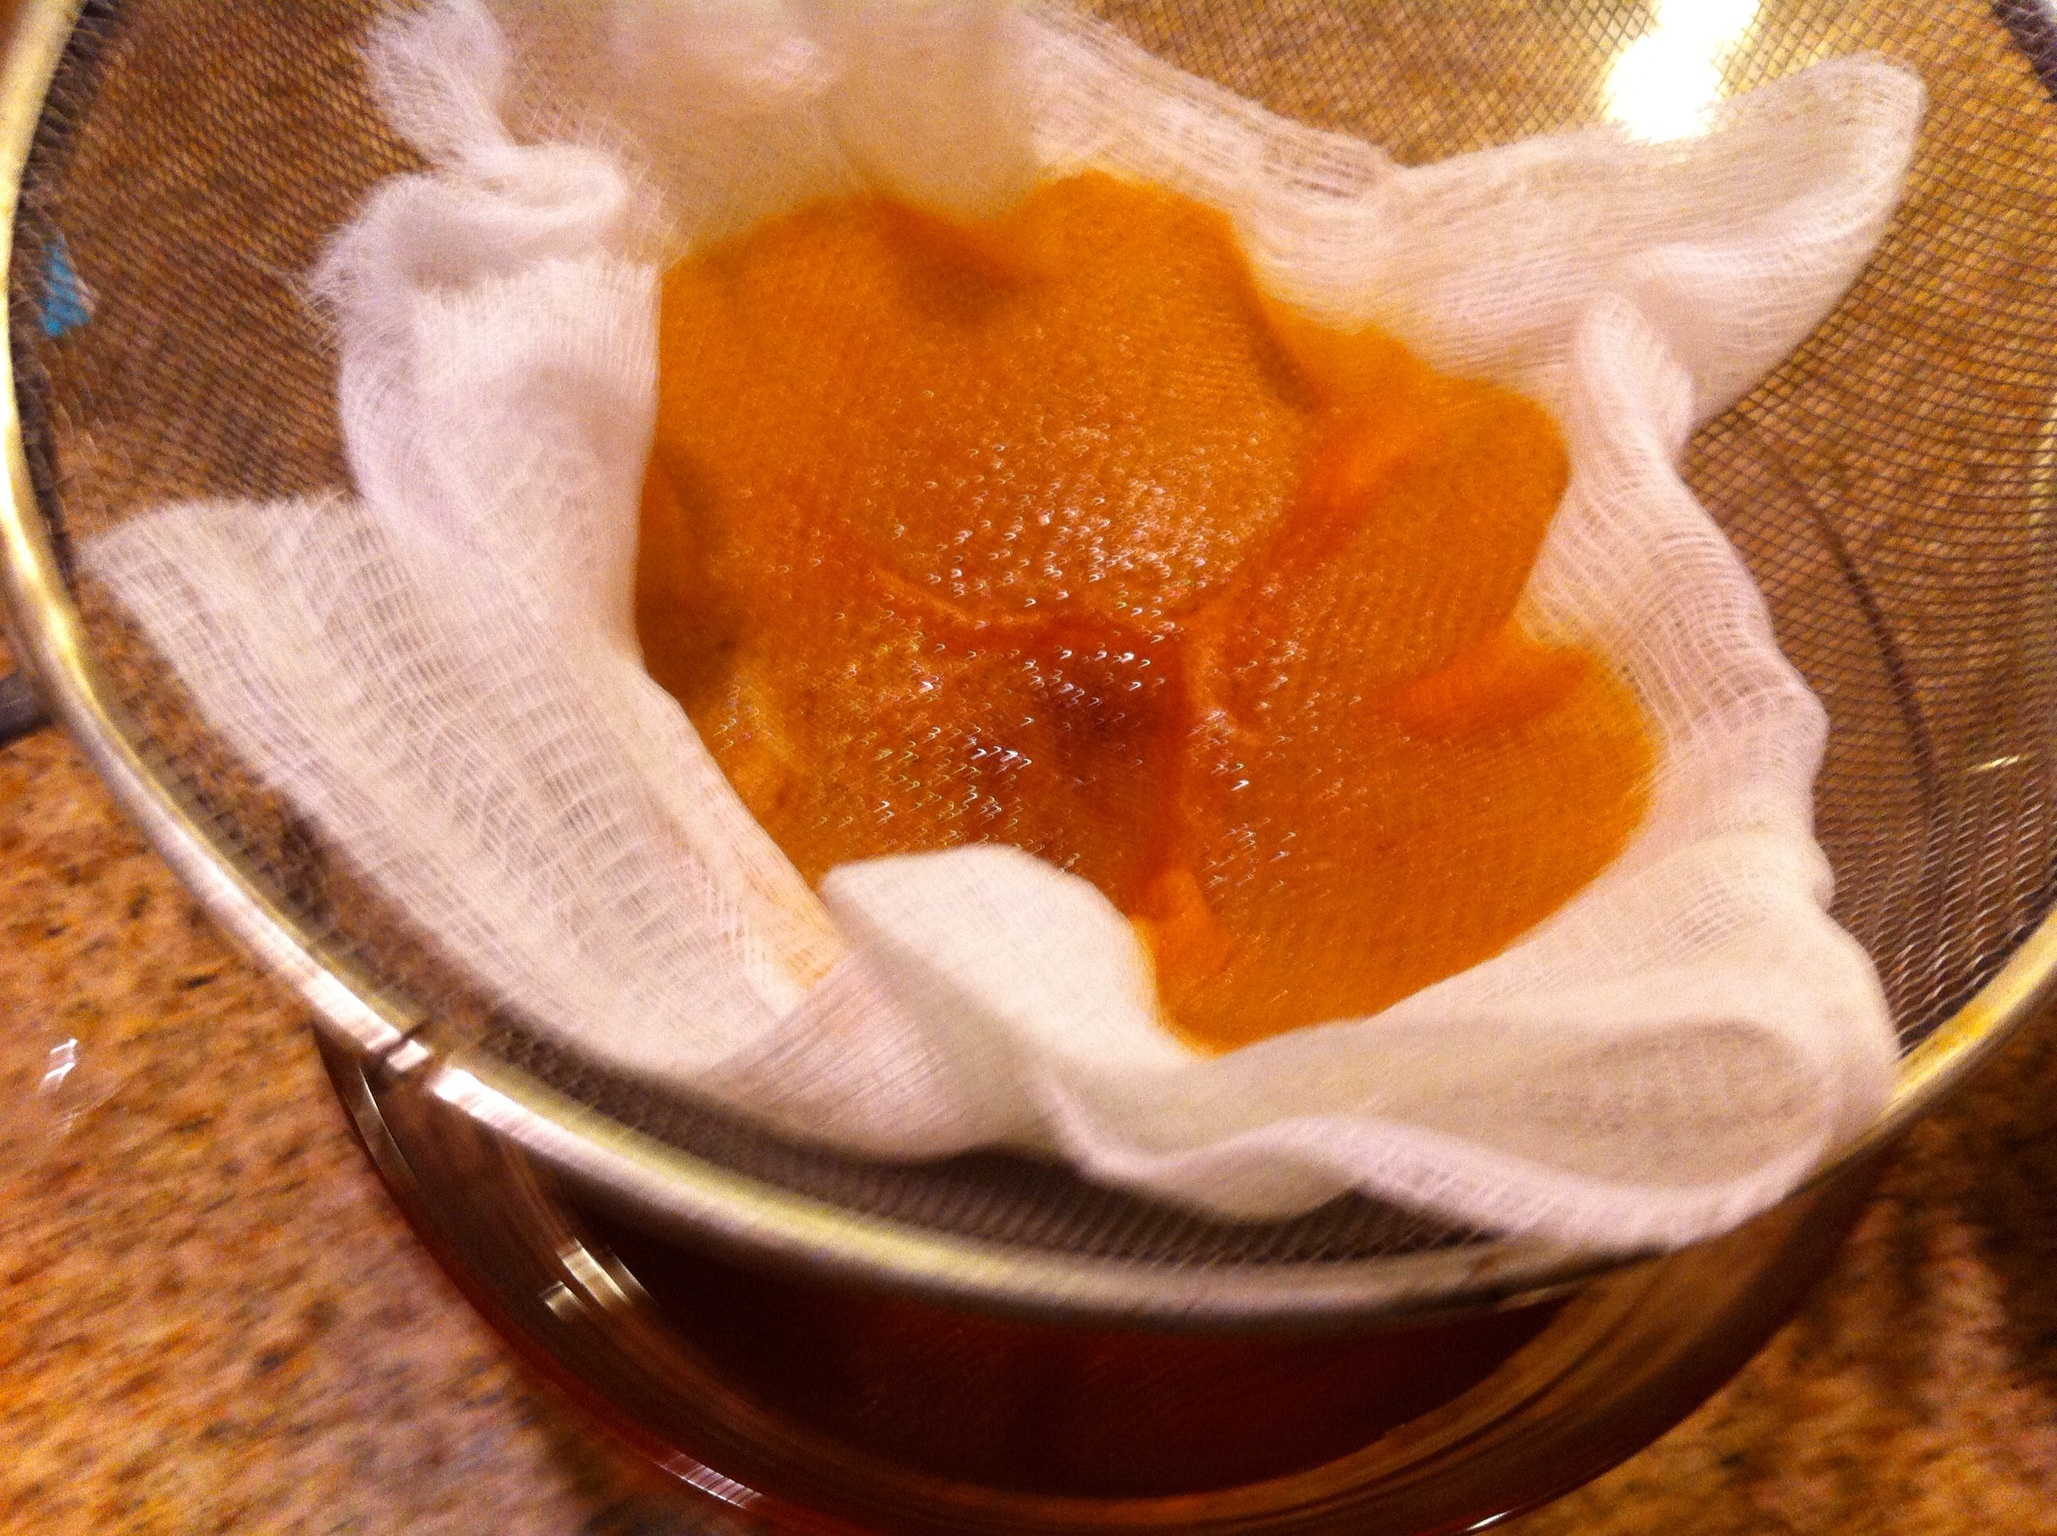
You should have a beautiful looking, and smelling, cooking oil staring at you! Ignore the cheese cloth threads floating in my oil, I’m adding some fiber to my diet!

Now, you’ve made a pretty and tasty oil, you need to bottle it up and share some with family and friends! Sexy bottles can be found on the internet, some beverage stores, and maybe even in the kitchen cabinet! I ordered these online. The first pic is of the bottled oil, the 2nd pic shows what the oil I used looks like before and after 7 days!


Well, that’s all for this time, as usual, if you have questions or comments, gimme a shout!
Until next time, Bone Appetite!
Homemade Salsa!
We love salsa when we go out for Mexican food, but our homemade salsa gets used on a lot more than chips! After a recent trip to the Farmer’s Market in Dallas, we scored all we needed to make a batch!
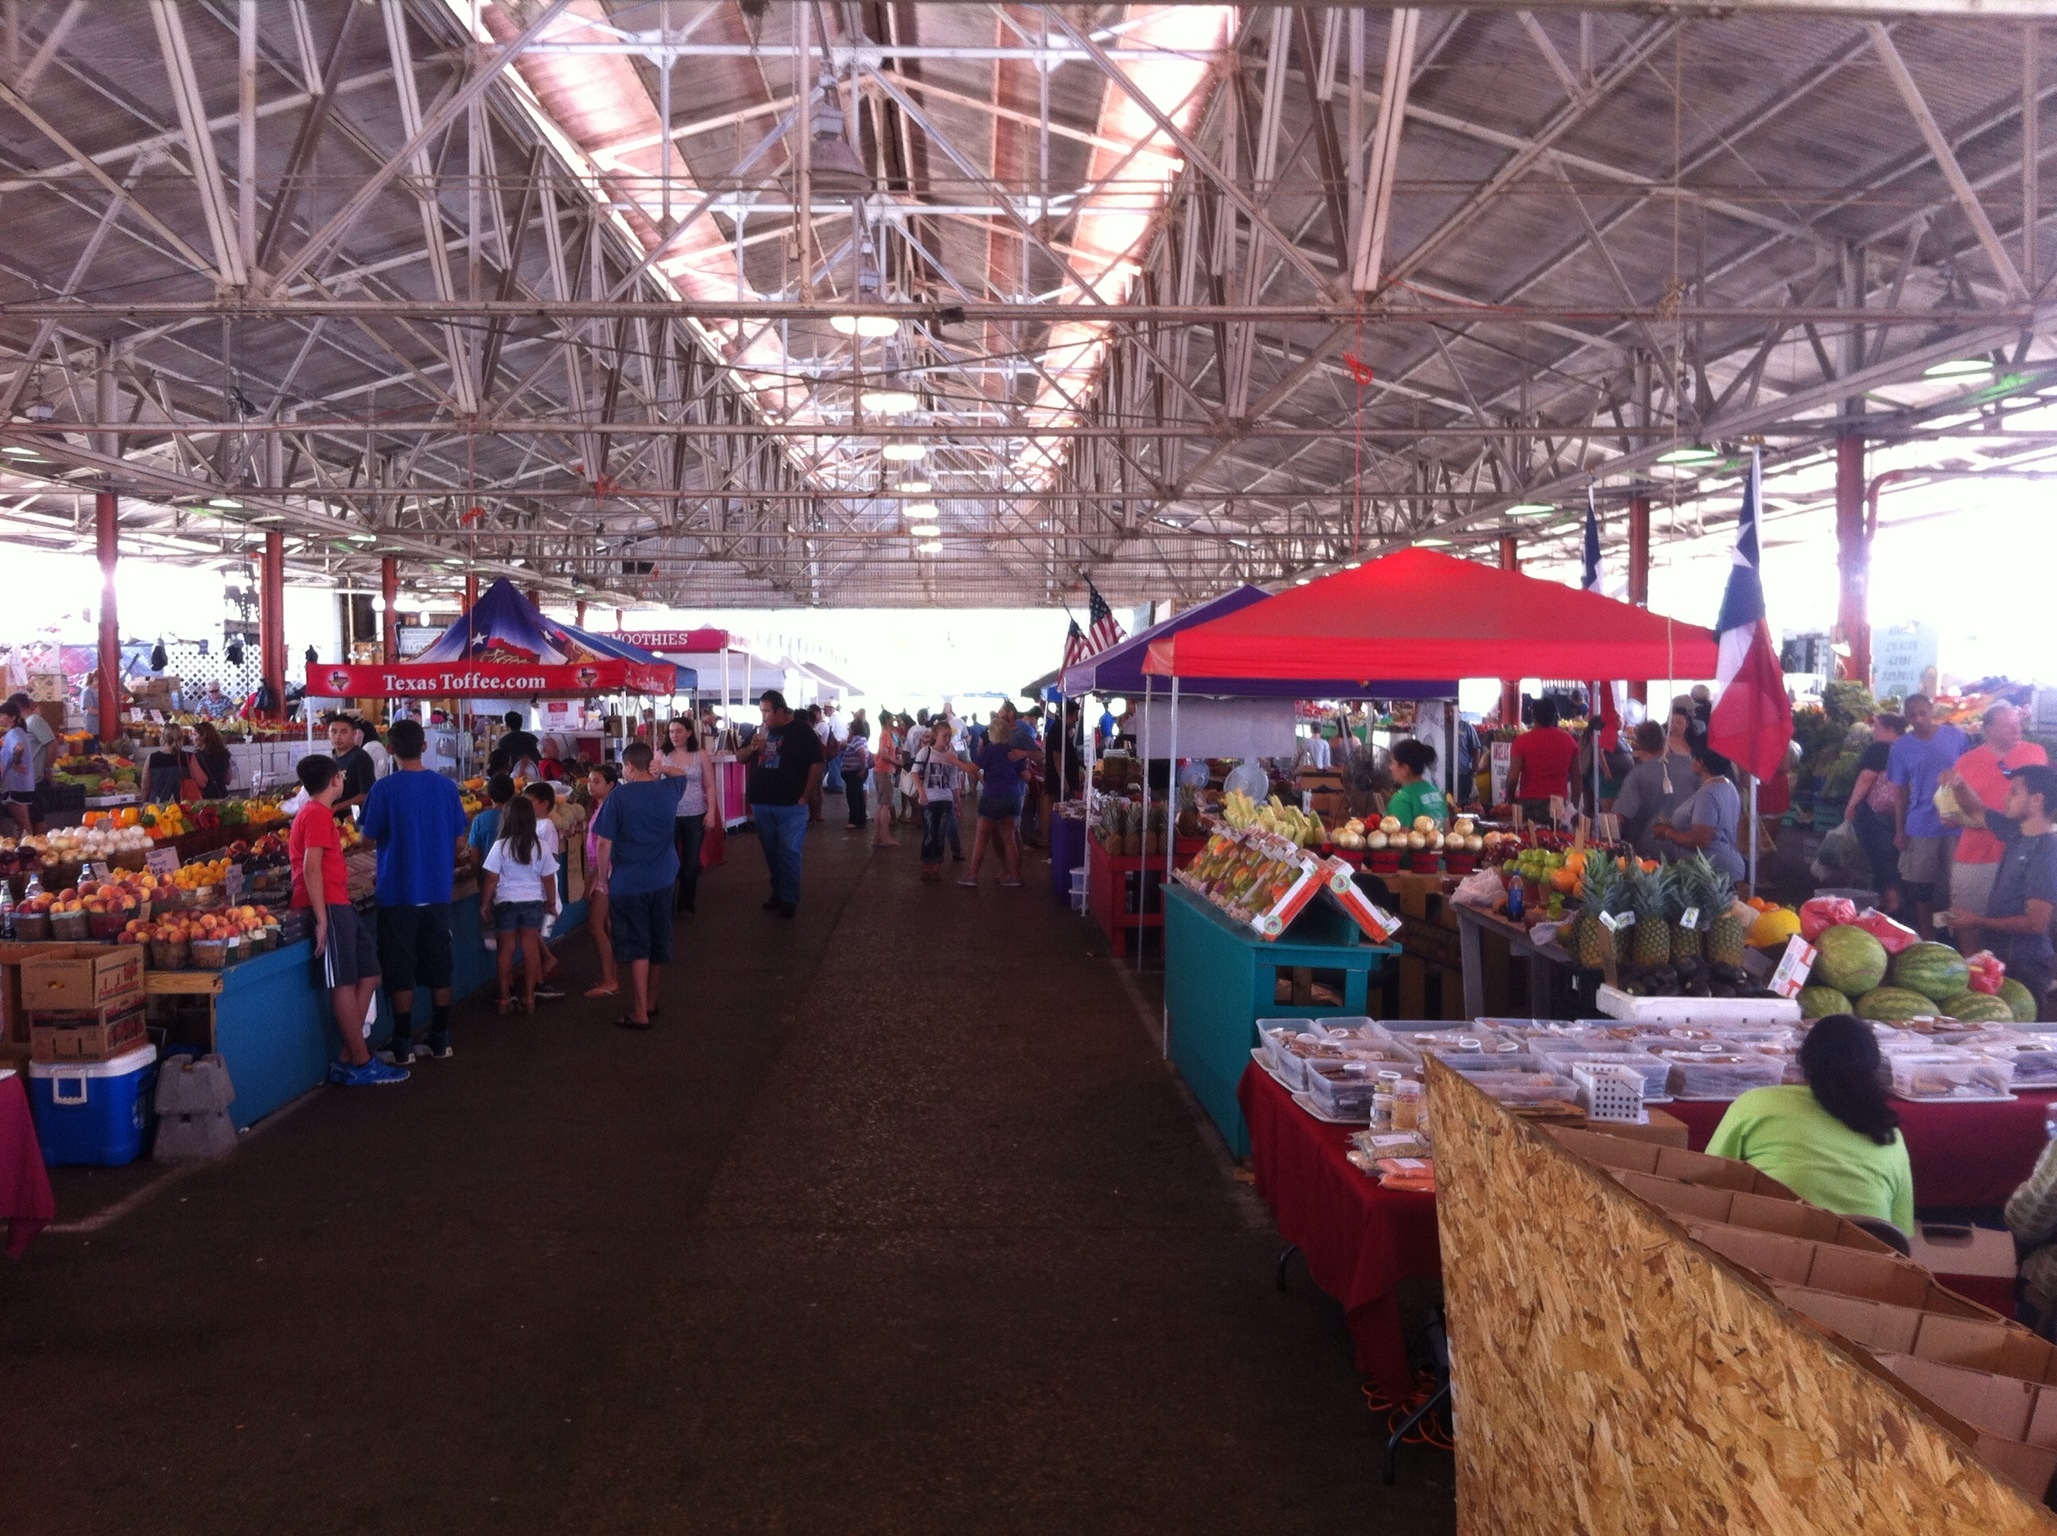

Yes, that’s an entire flat of Roma tomatoes, and it doesn’t make as much salsa as one would think! This flat and the veggies to the left of it only made 12 pints of salsa, but it’s some good stuff.
We start out by peeling the skins off of the tomatoes, I missed getting a pic of this process since we were both busy dropping, chilling, and peeling. What am I talking about? Well, drop the tomatoes, a few at a time into boiling water, let them sit for a few seconds, pull them out and drop into an ice water bath to stop the cooking effect, and then peel the skin which has been loosened by the hot/cold baths. A small “x” cut into the bottom of the tomato will assist in the skin peeling.
After peeling, cut the top of the tomato off to remove the stem area. Place a few tomatoes into a food processor and pulse a few times until you get the chopped size you want in your tomatoes. Continue until all tomatoes are chopped.
Place the chopped tomatoes into a colander and allow them to drain a bit. If you want a salsa with a lot of liquid, skip this step. We like a thick salsa, so we drain ours overnight in the frig. Some say that the juice is pretty good to drink, I don’t like it so it goes down the drain.
Now the fun begins, chop, chop, chop! All of the ingredients are chopped up and then mixed together in in a very large pan. We chop all of the veggies with a knife and cutting board. Using the food processor chops them too fine for our taste.
Once mixed up, we slowly heat it to a simmer and allow it to cook for about 20 minutes.

Heat the salsa mixture at a simmer for 20 minutes.
While the salsa is simmering, we typically sterilize our jars, lids, and rings in boiling water. This step is very important to make sure you don’t have any uninvited critters growing in your jar of salsa!

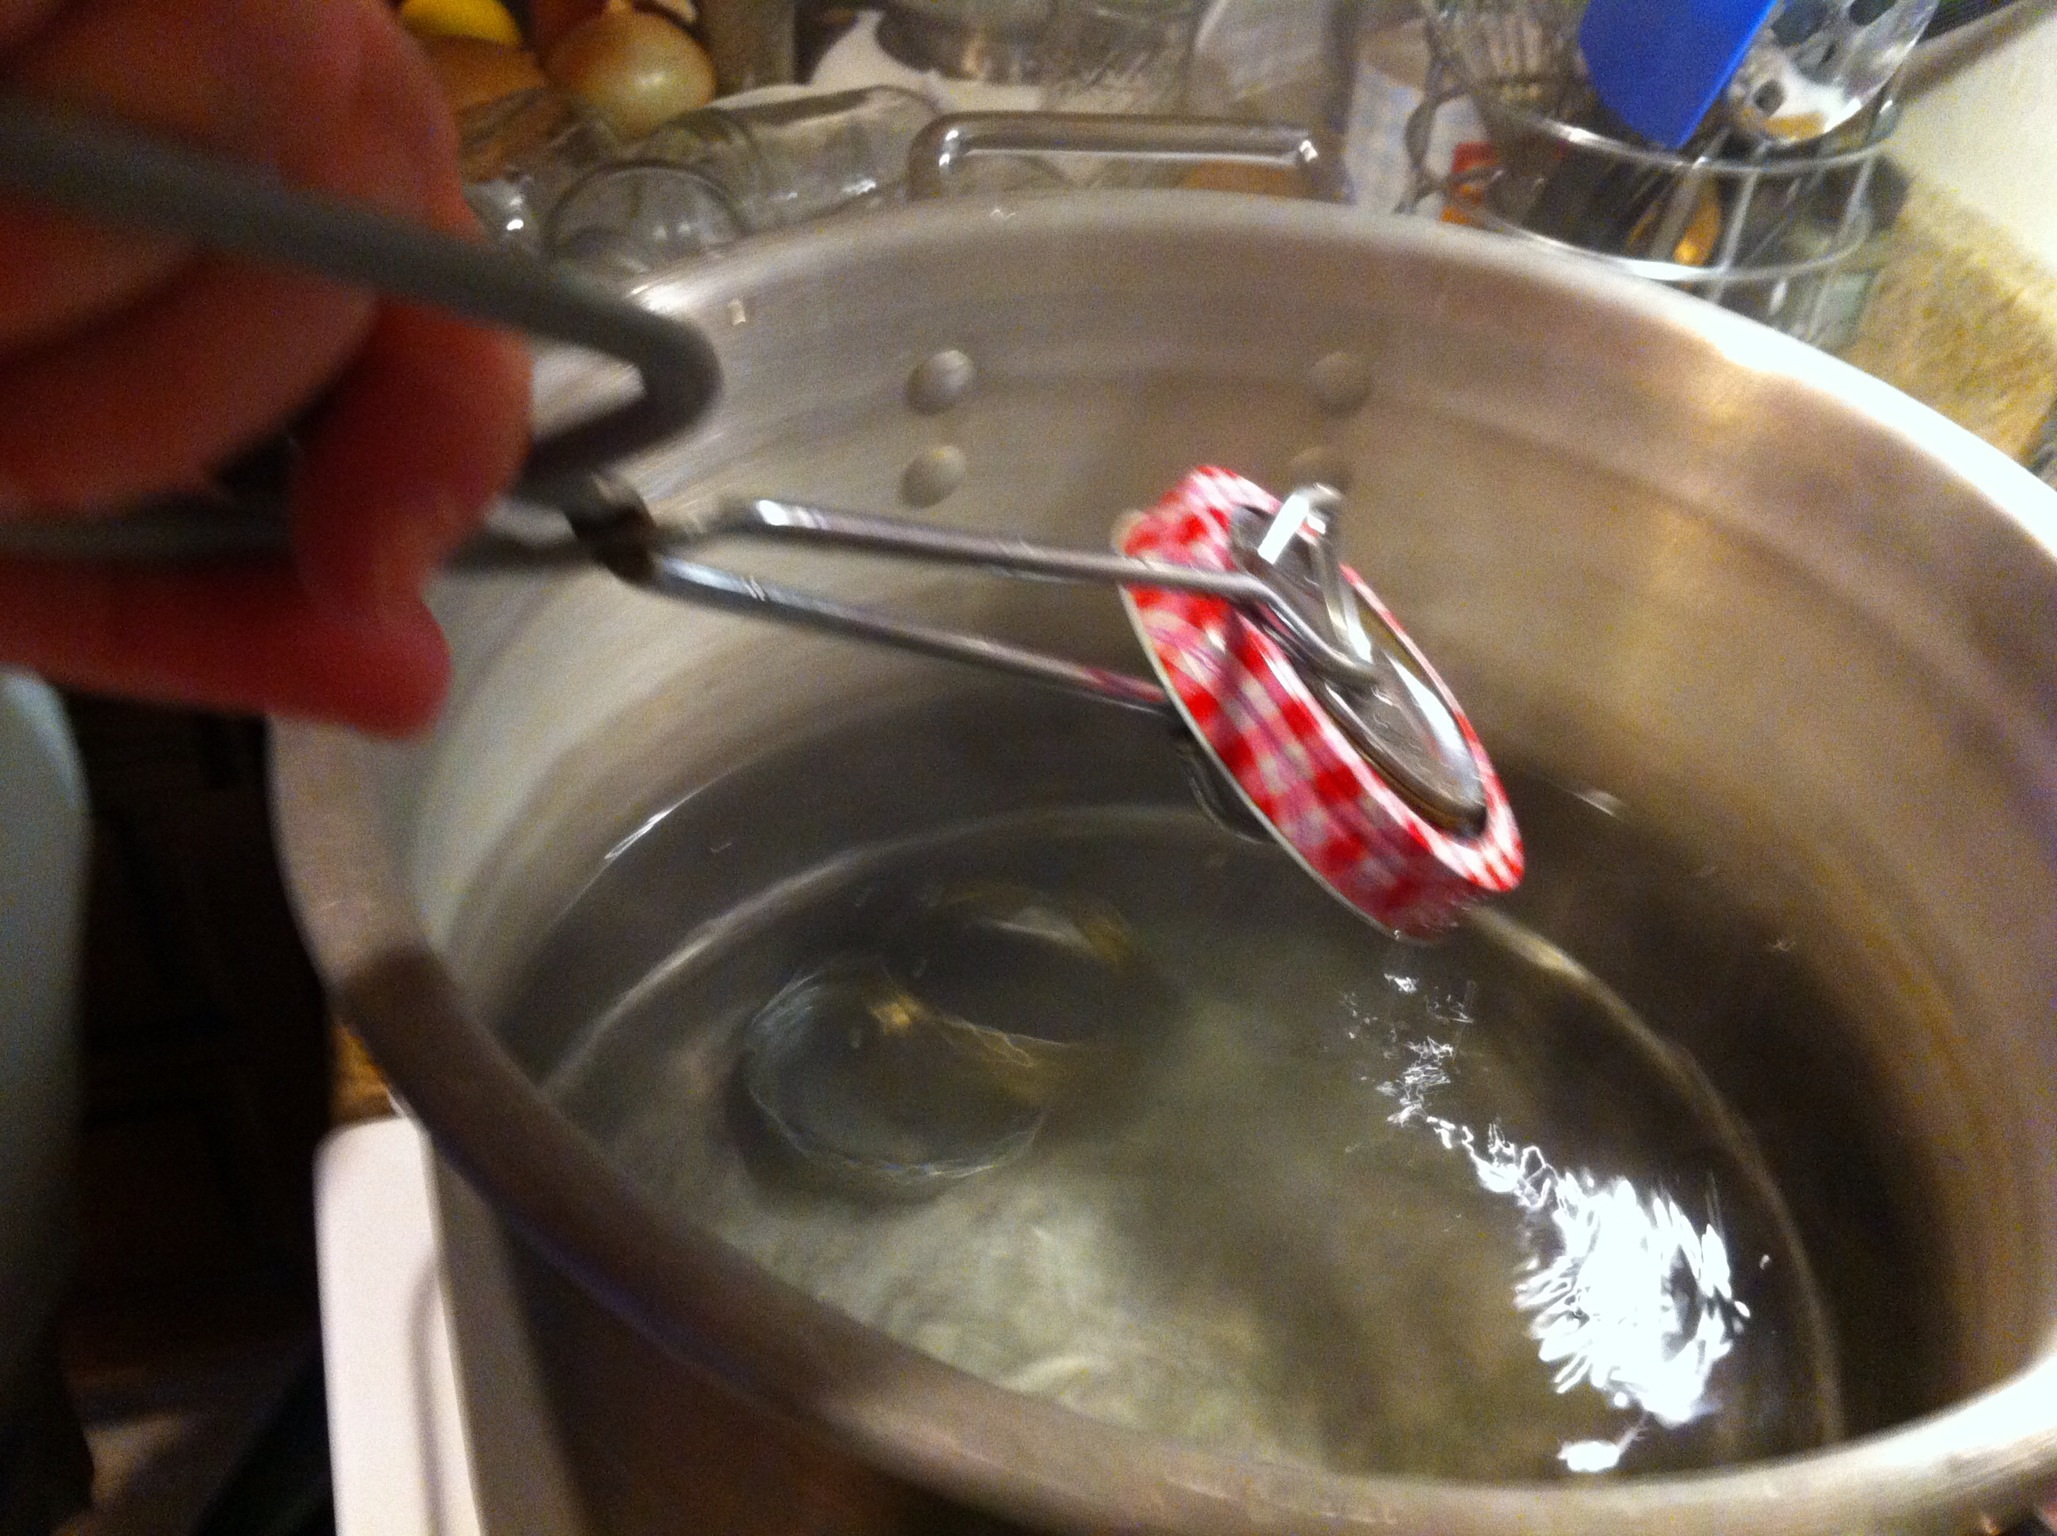
The jars are boiled for 15 minutes to sterilize, the lids and rings are dropped in for just a minute or 2, much longer and damage to the seal can occur.
Now that the jars, lids, and rings are sanitized, it’s time to fill em up! Oh, by the way, the funnel, spoon, and tongs were sterilized as well in the boiling water.
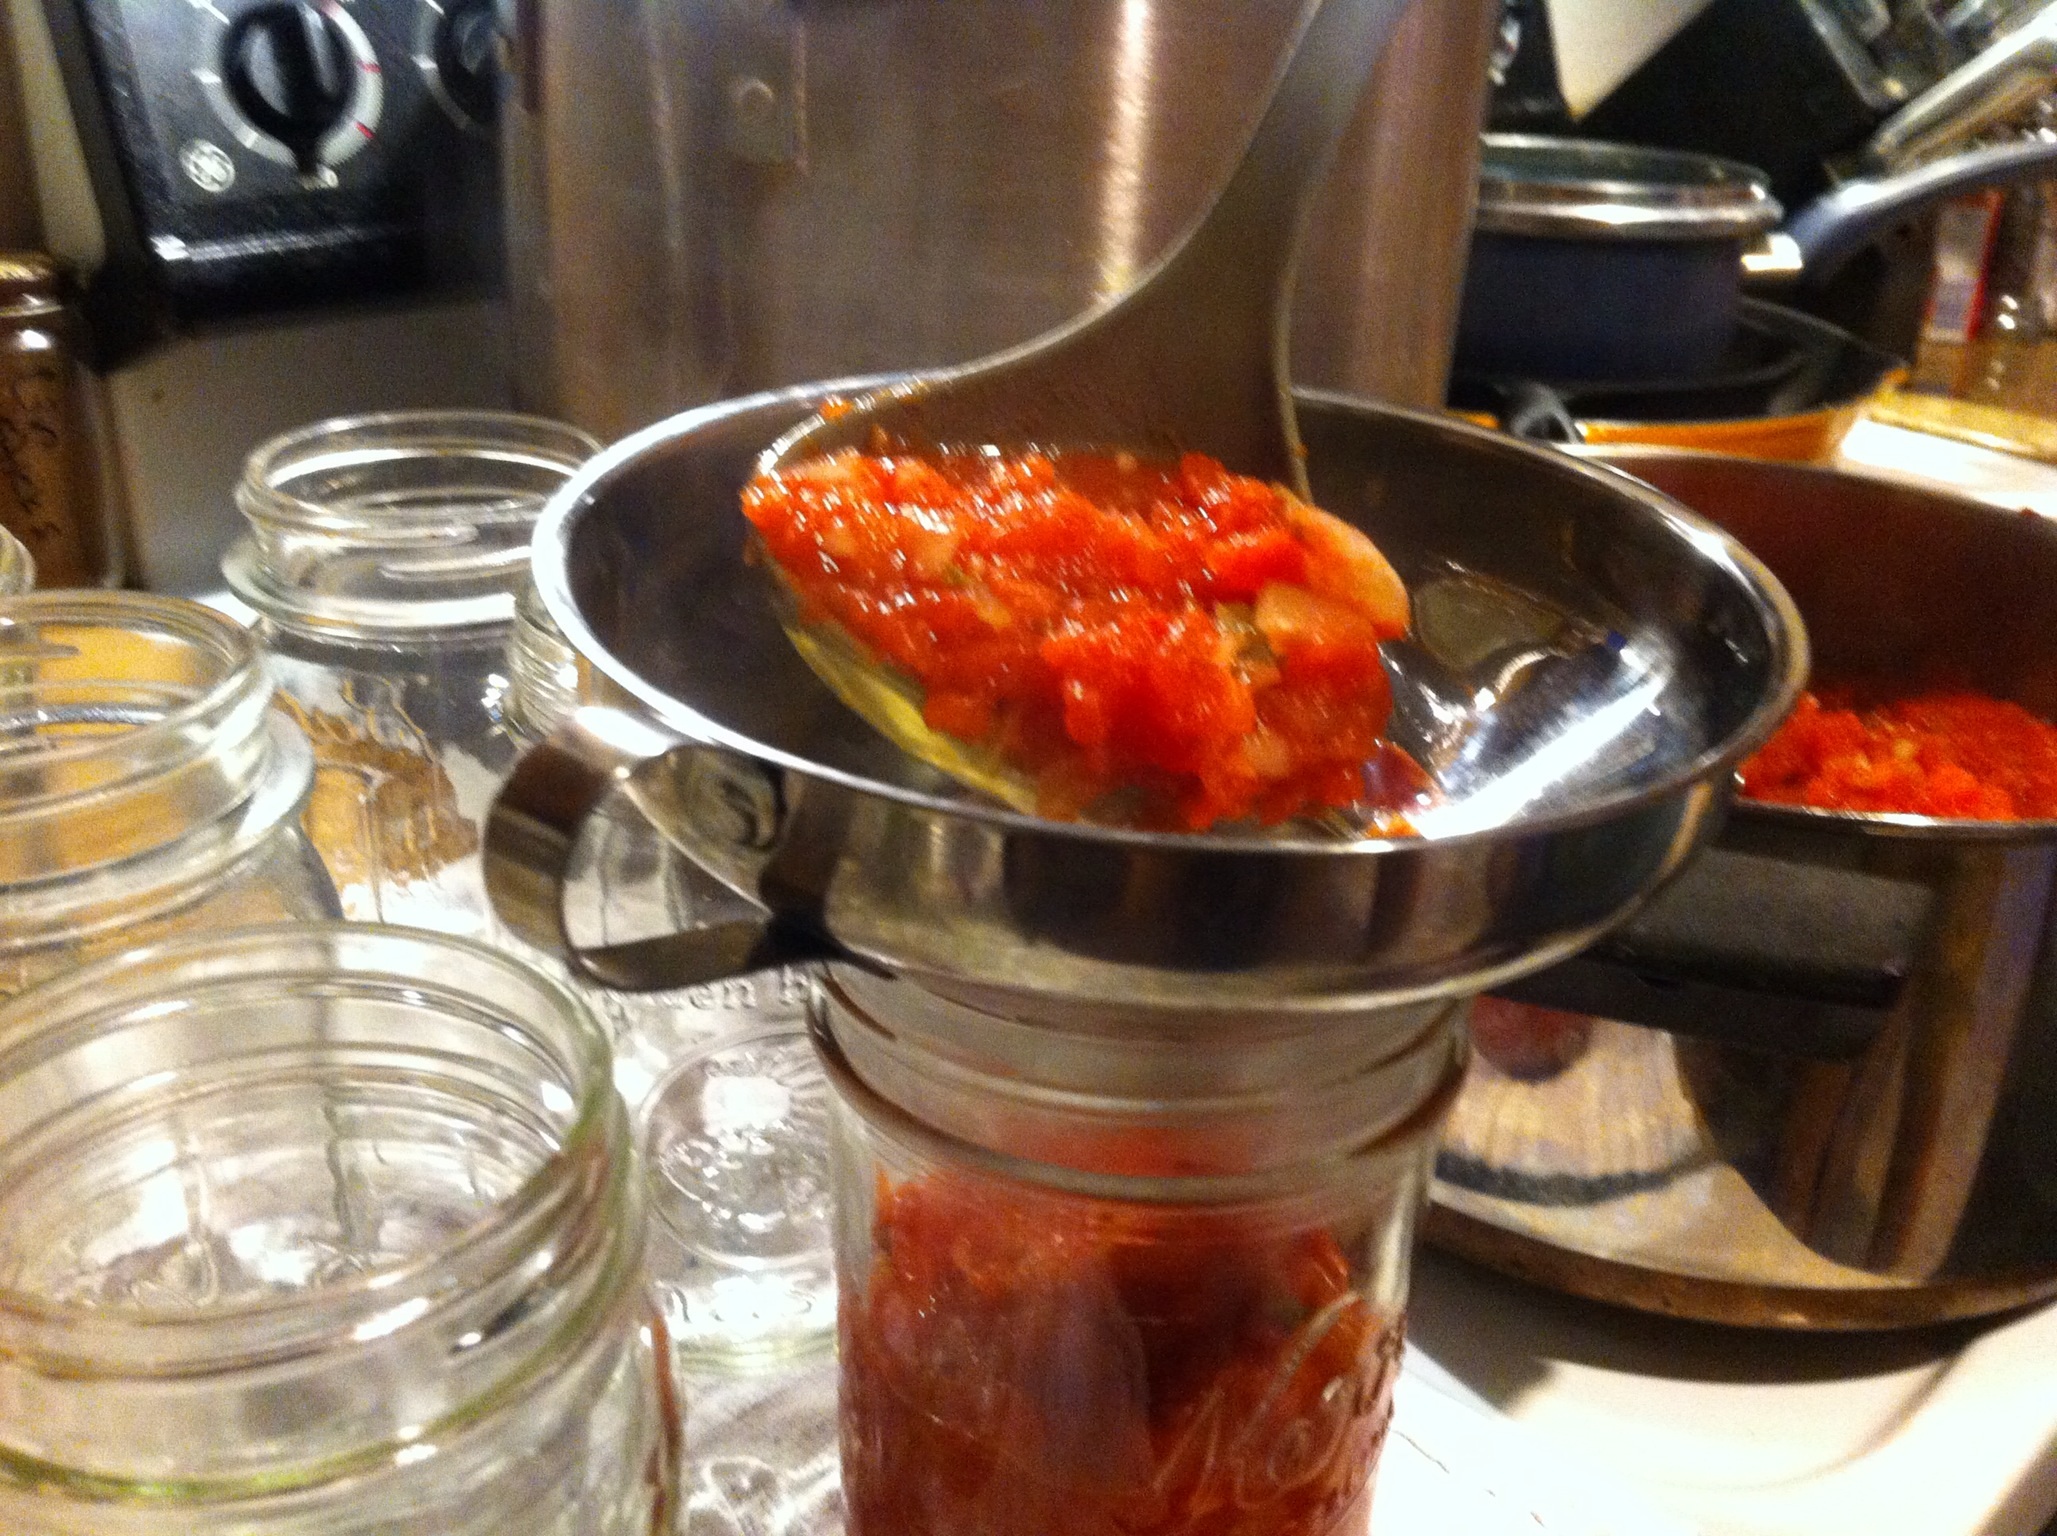
Once your jars are filled, place the caps on top and then gently screw down the ring. The ring doesn’t need to be tight at this point, just snug for now.

Now it’s time to put the filled and capped jars back into the boiling water. This water bath will last for another 15 minutes. This time we are looking to heat the contents of the jar up enough to take out any of the remaining critters that may be in there. It also assists in placing a vacuum inside of the jar to seal it for long term storage.

Ok, here’s the hard part, after taking them from the water bath, just let them sit and cool off. If this is your first time canning, don’t freak out when you hear a POP come from the kitchen after the jars begin to cool. That’s the vacuum inside of the jar pulling the lid down into a full seal. I though my jars were cracking my first time!
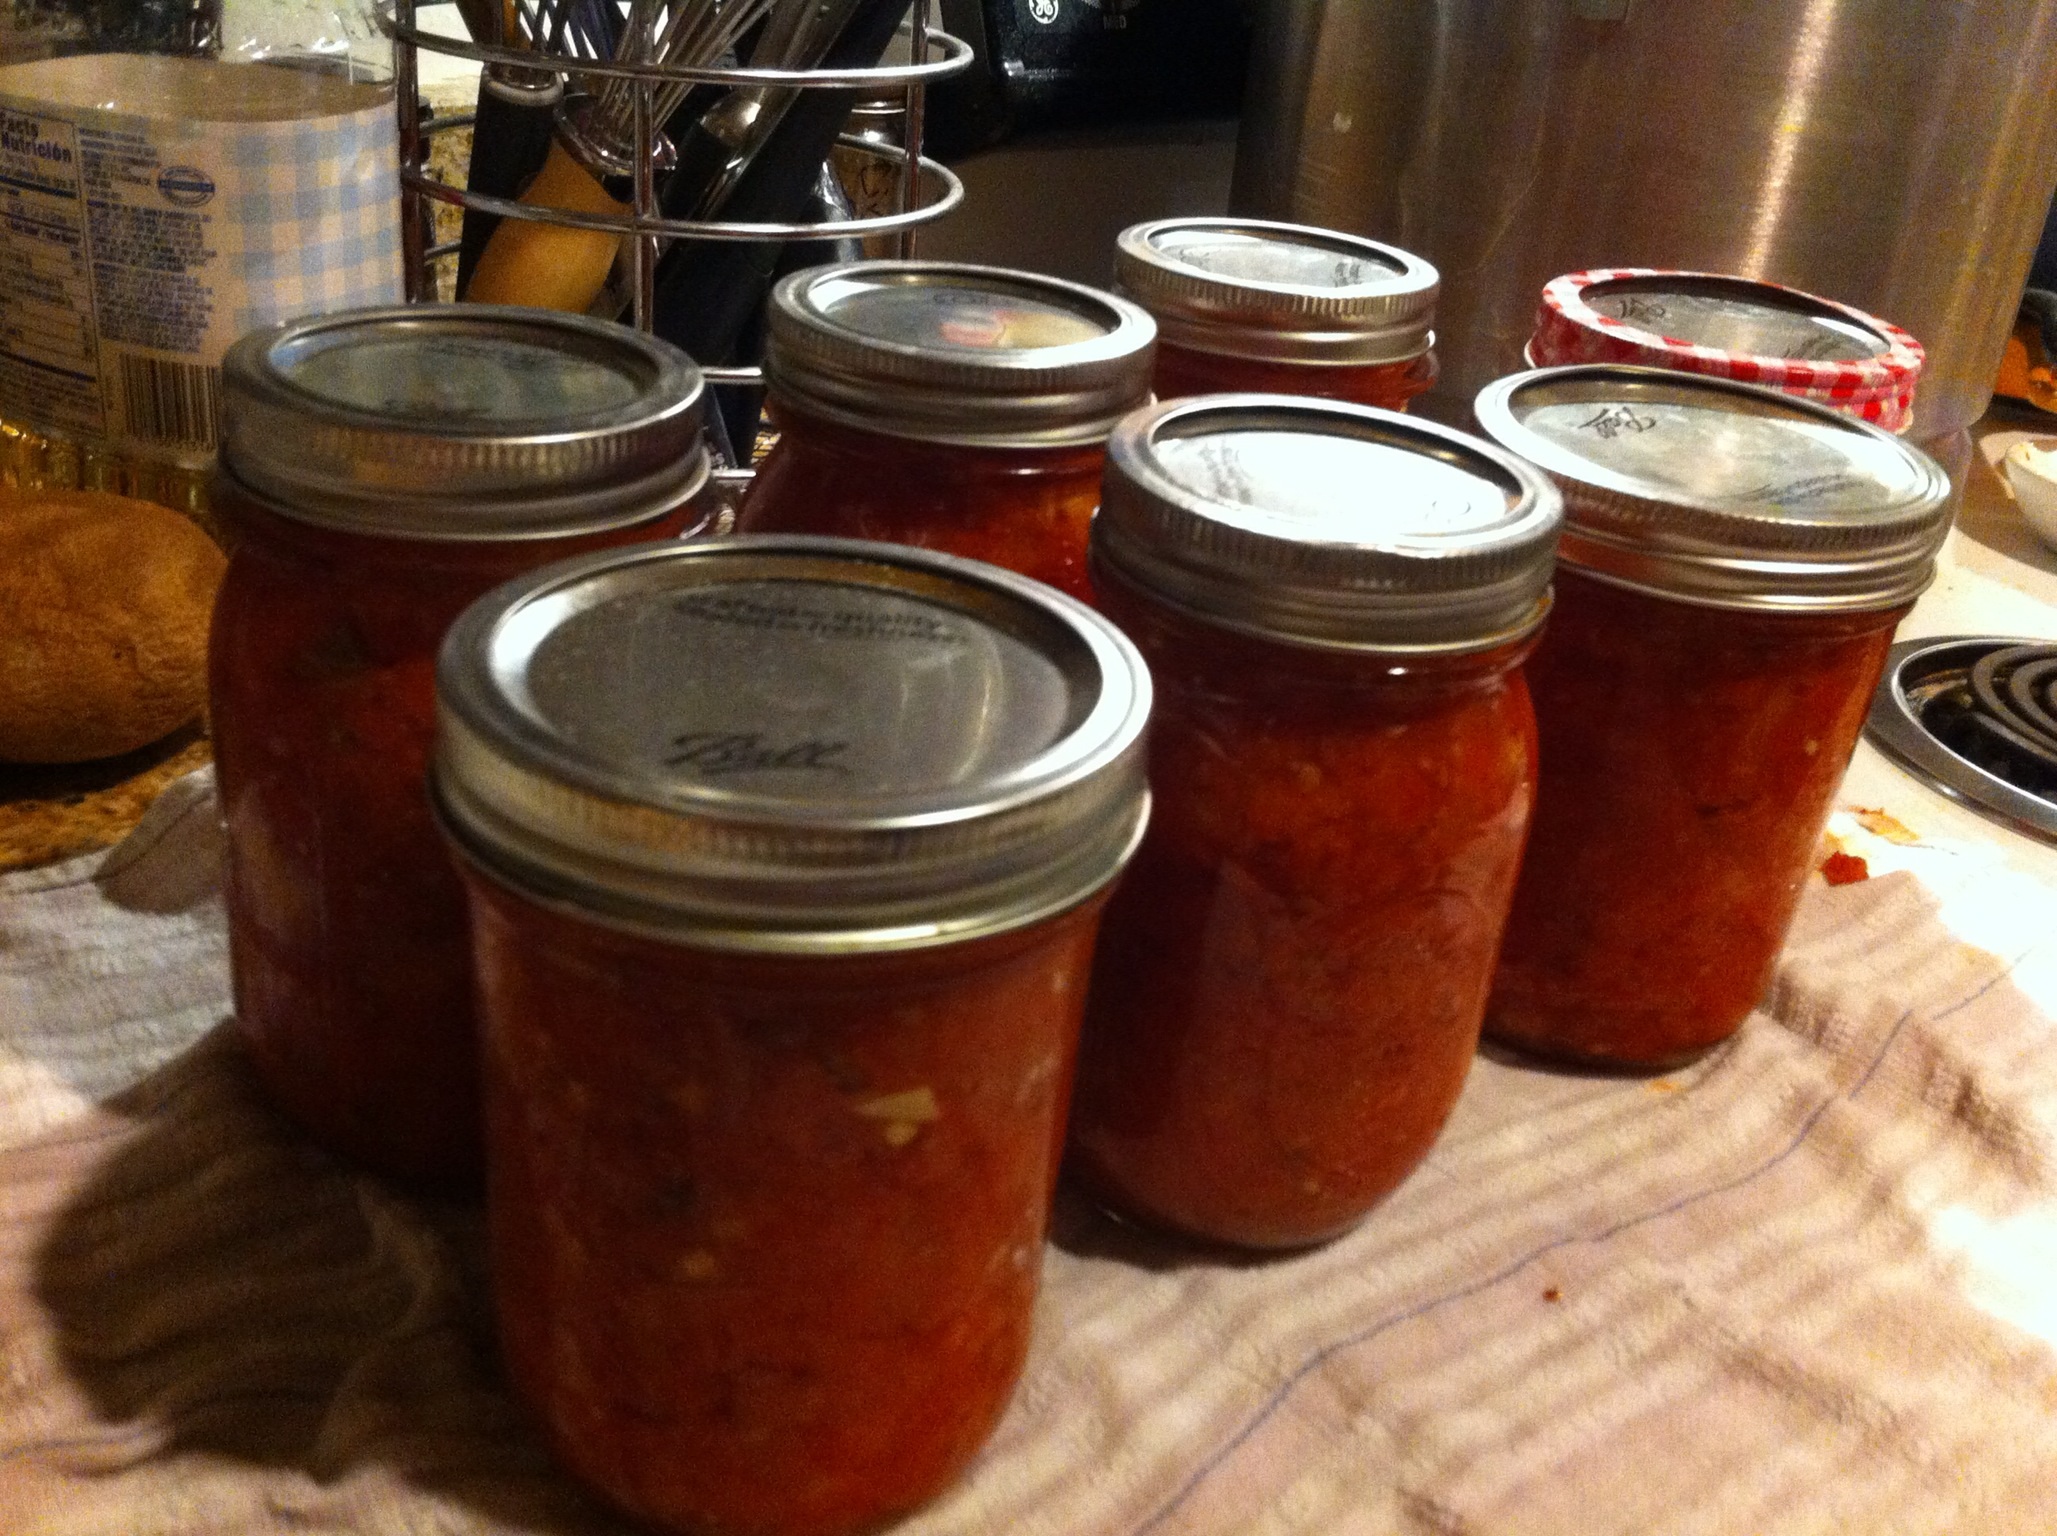
Better than Pace by a long shot!
Now, you see that pretty little plaid ring? That’s the one the bride and I use for our sample jar! Seldom do all jars get perfectly filled, so we add this ring to the jar with the least amount to sample out of ASAP!
Want to make your own batch? The recipe below will get you started, just follow the process above and get busy!
8-cups of chopped tomatoes
2-large onions chopped
2-3 cloves of garlic minced
1/2-cup of jalapeños chopped (remove some or all seeds if you want milder salsa)
However much cilantro you want (optional)
Salt to taste
Good luck and let me know if you have any questions!
until next time, Bone Appetite!
Smoked Chuck Roast and Babyback Ribs!
Last weekend I fired up the big vertical smoker since the bride had requested some baby back ribs. Since I have plenty of rack space on the smoker, I figured I’d add a couple of chuck roasts to the smoke as well. Chuck roasts love to be slow smoked to the point where they shred perfectly for shredded beef sammichs!
I tuned the smoker to around 250 degrees, slathered and rubbed the ribs and chucks, put them in the smoker and left it alone for 2 hours. I also slathered and rubbed a few cook snacks, but I’ll get to those later!
At the 2 hour point, I opened it up, spritzed all of the meats with my magic mop sauce, and then wrapped the ribs in some smokers duct tape (aluminum foil).

Just prior to mop and wrap
Magic mop spritz
Since I was following the 2-1-1 process for the ribs, I closed the door and waited an hour. Didn’t peek at all! That’s hard to do when you have a wonderful smell emanating from the smoke stack!
After an hour, I opened the smoker up, un wrapped the ribs, put them back in the smoker, spritzed everything, and then removed the cook snacks from the smoker to see how my rub tasted! Ok, I was just being greedy and wanted some good smoked pork early!
Cook snacks are nothing more than the trimmings from the ribs. With the baby backs, I didn’t get much to snack on, but with full spares, you can almost make a meal from the trimmings! I slather and rub the trimmings, put them in the “hot spot” in the smoker, let them cook for about 3 hours, and then sample my work! In the past, I would have shared them with my smoker cat, Buster, but sadly we lost him a few weeks ago.
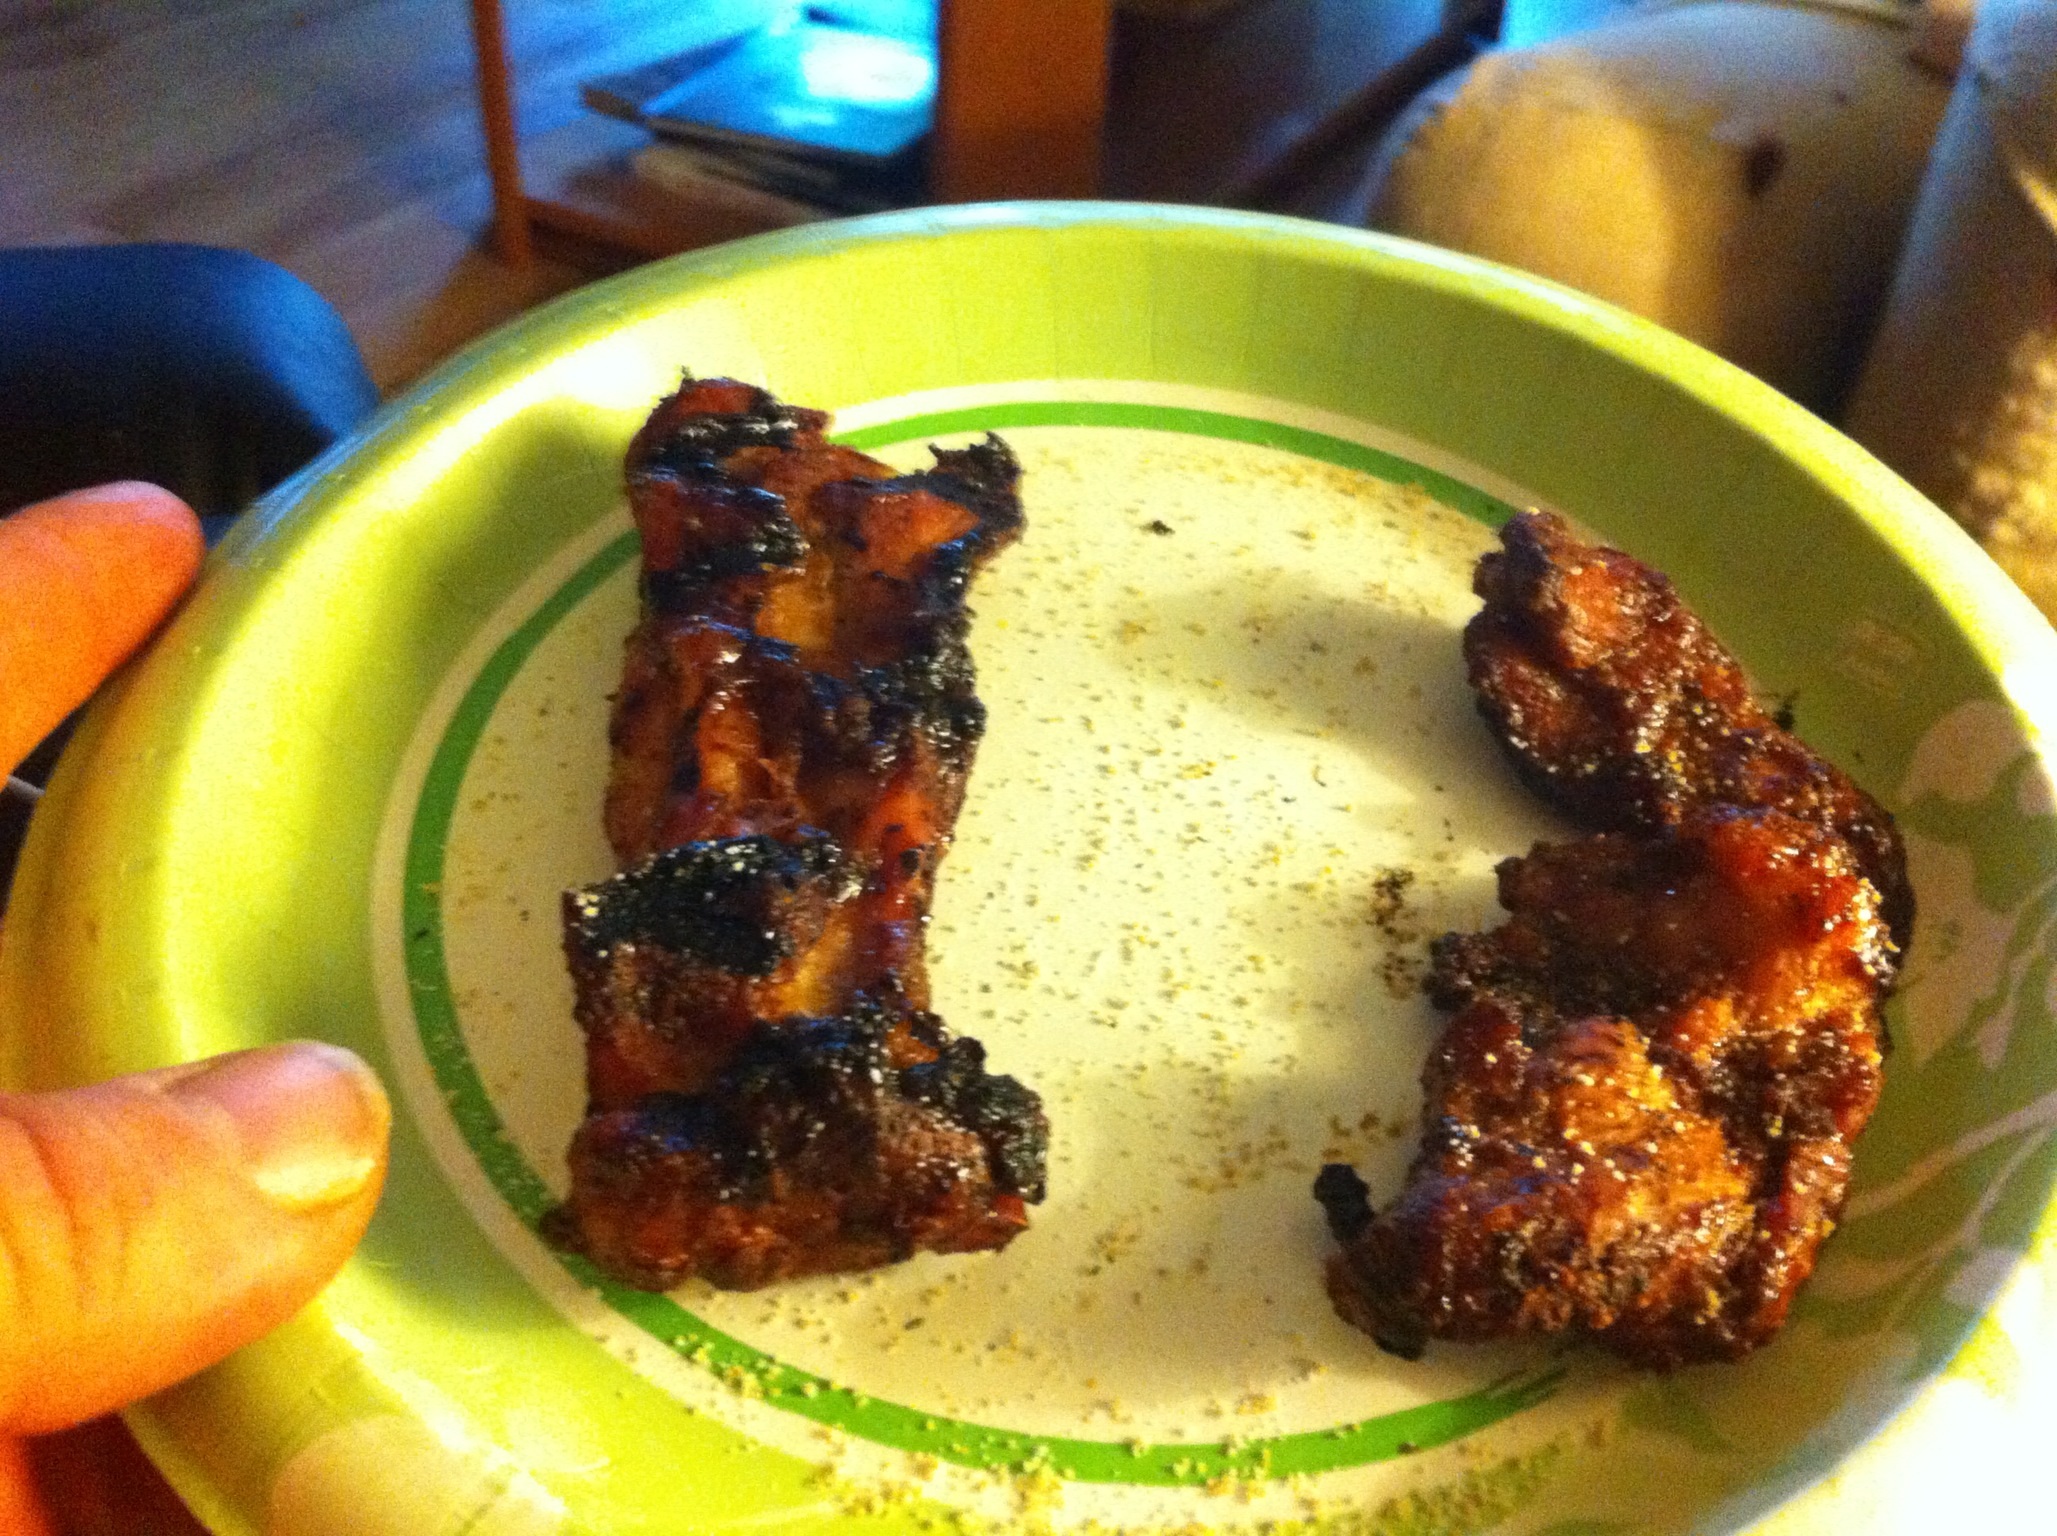
Cook snacks!
After waiting one more hour, a long hour at that, it was time to pull the ribs off the smoker. I opened the door and my mouth began to water! The cook snacks were good, but I couldn’t wait to bite into some of that meat still on the bone! A lot of people think that the meat should just fall from the bone, but I like to have the meat where it’ll release from the bone after a little tug with the teeth! Well, I cooked a bit too long! If you notice in the picture below, when I went to put the ribs on a tray, one end of them fell off and into the driveway! Buster would have LOVED me had he been here!


Broken ribs?
We dined upon the ribs as the chuckies continued to cook and tenderize!
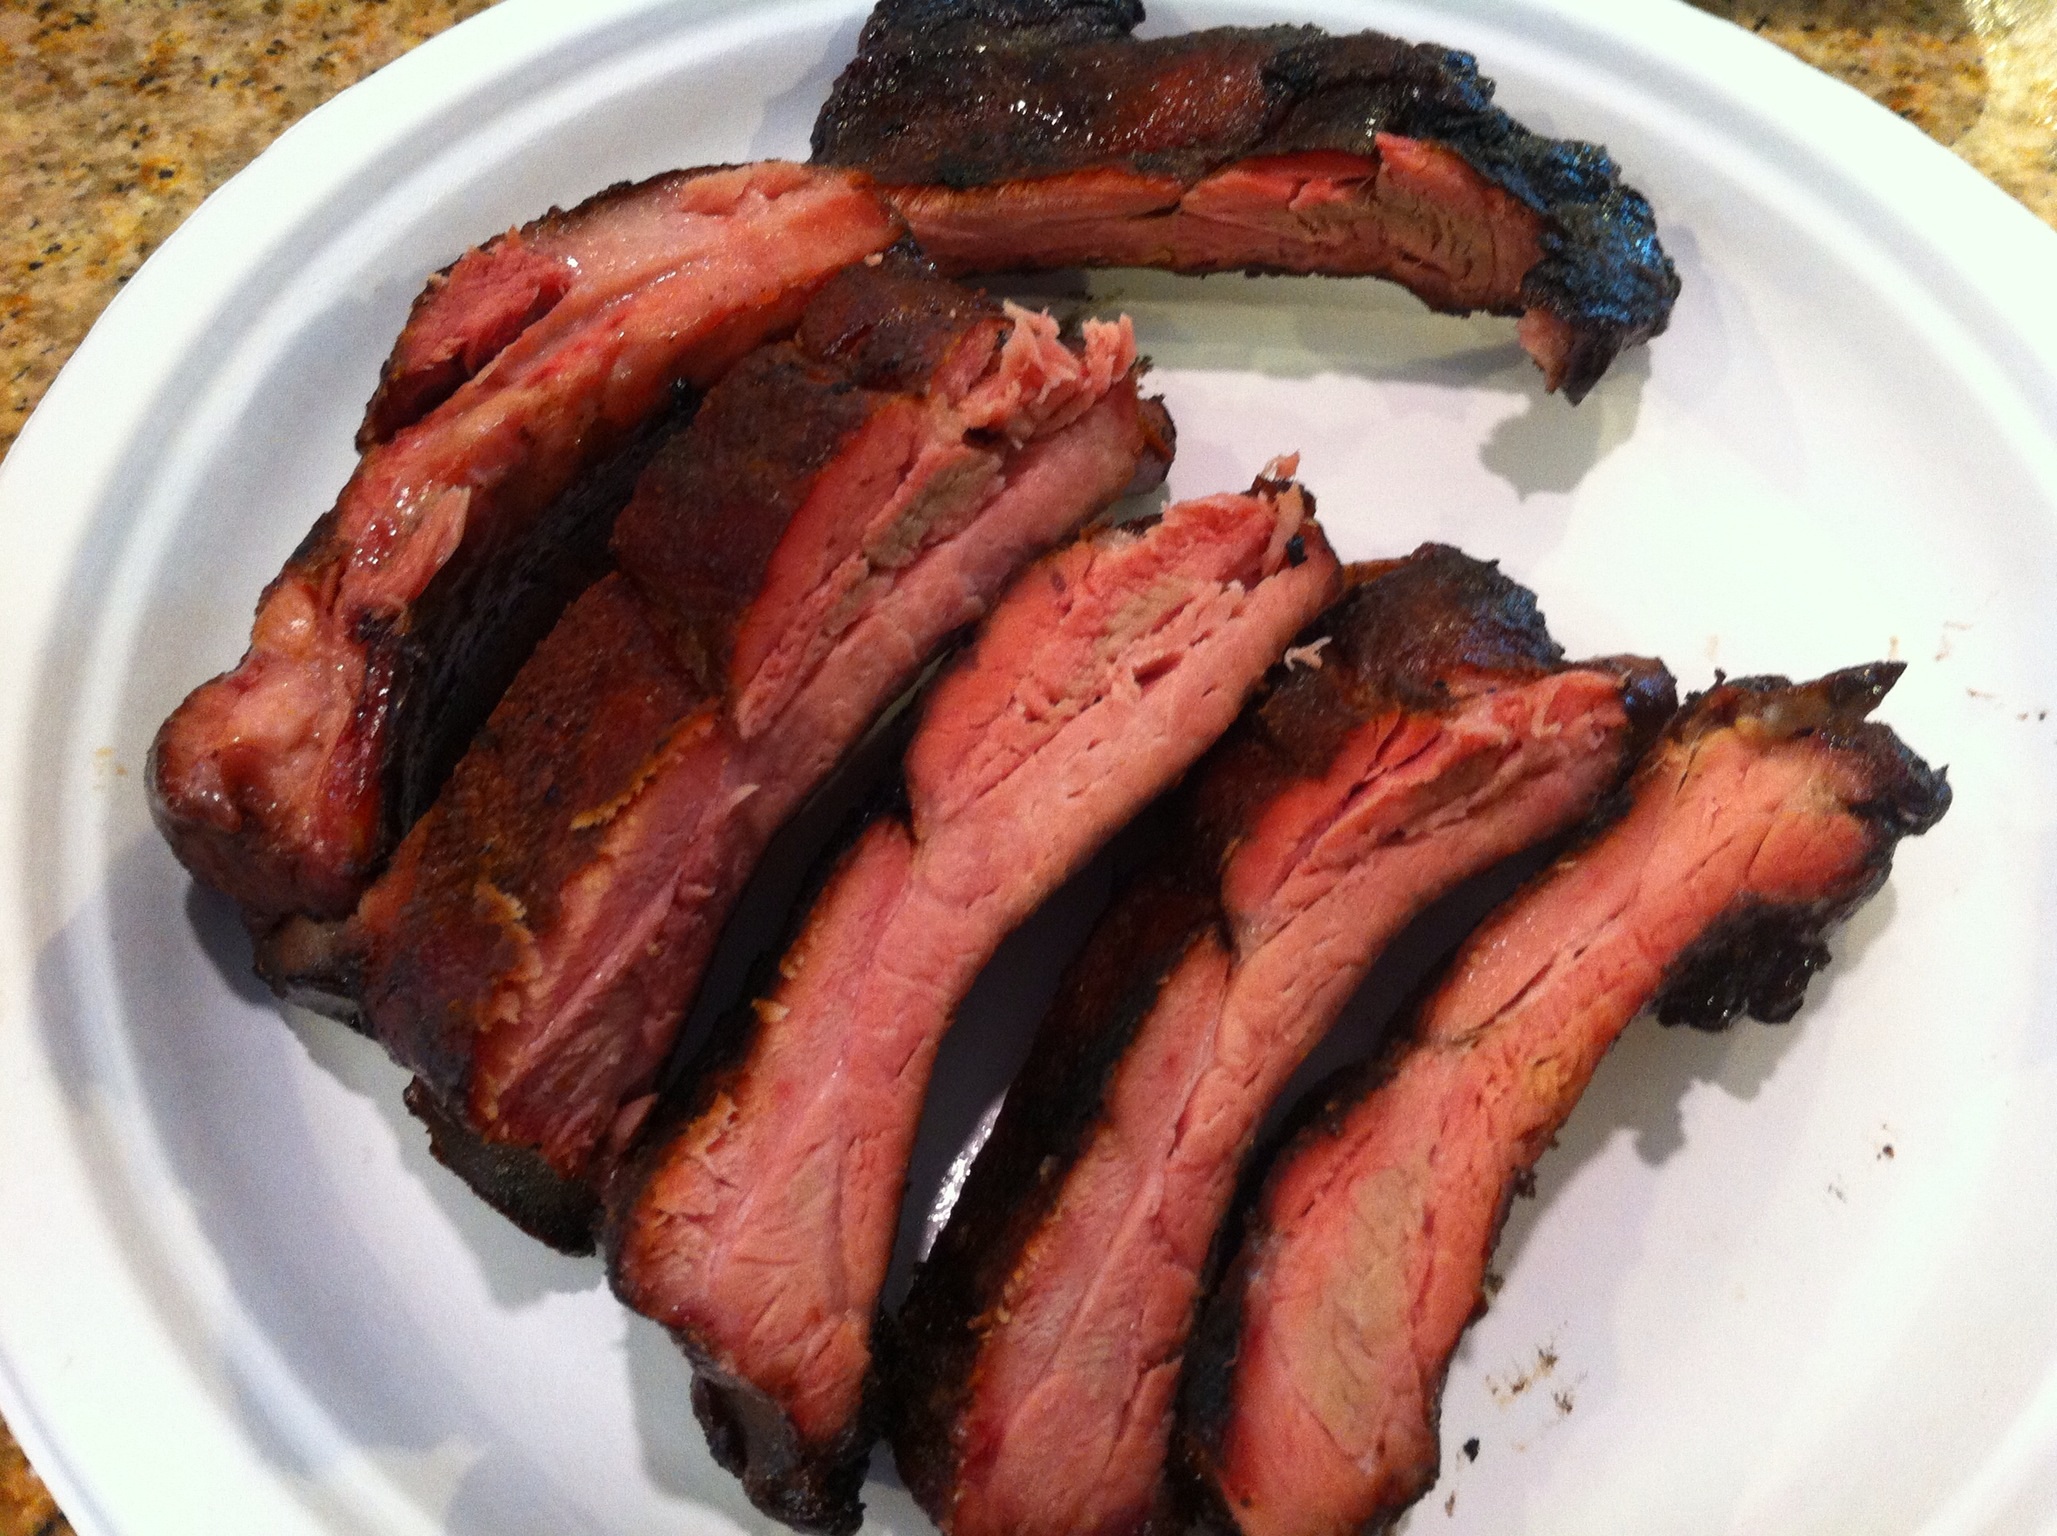
Ribs are ready!
The ribs were wonderful! Smoke penetrated almost all the way through and the meat was very tender! Even our new kitten loved them! She wanted a bone, so I gave her one!

I failed to get a picture of the chuckies when they came out of the pit. Since we weren’t eating them that night, I vacuum packed them while still hot, allowed them to cool and then refrigerated. Last night, we decided to dine upon them!
I’ve told people how to do this before, but I’ll say it again, when warming meat that has been vac-packed, leave it in the vac-pack, under vacuum, and place it into a large pot of cool water.
Place the pot on the stove top, with the vac-packed meat in the pot, turn the heat to high, and allow the water to come to a boil. Yes, the meat is straight from the refrigerator and cold when it goes into the pot of cool water.
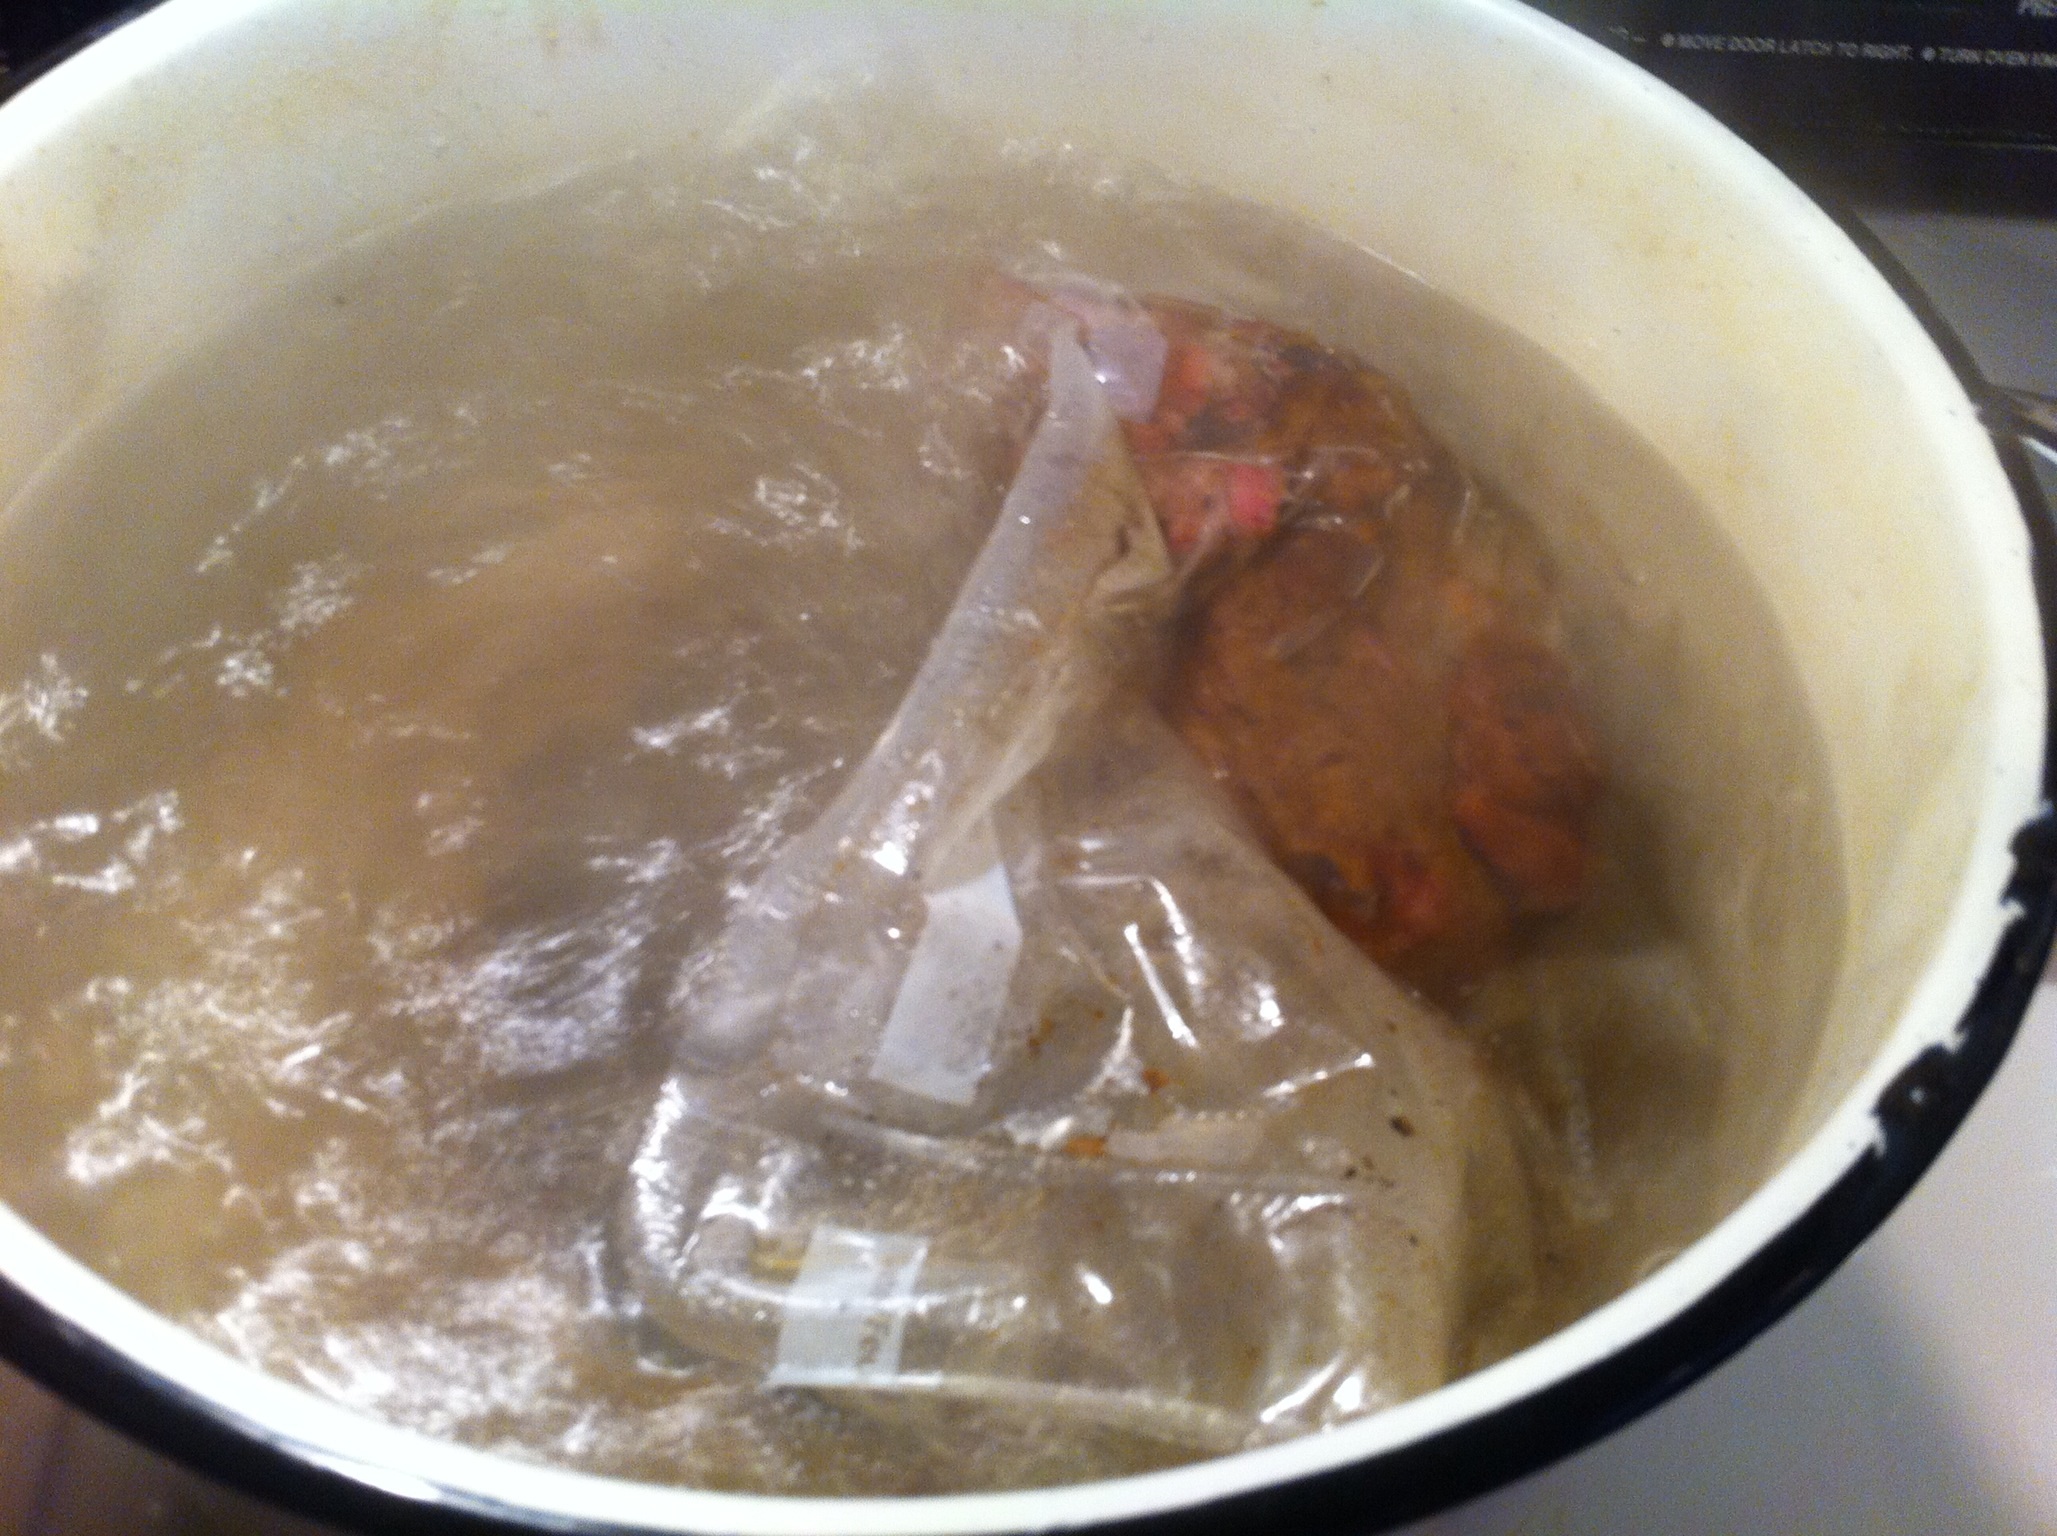
Vacpack in the water at boil
After reaching a rolling boil, allow to boil for 5-minutes more, then remove the bag from the water.

CAREFULLY cut open the bag to dump out the meat. Now, this meat contains moisture, it’s been residing in an atmosphere that is less than normal atmospheric pressure, there will be steam escaping from this bag when you cut it open! Use caution, steam burns suck!

Once that bag was opened, it smelled like I had meat straight from the smoker! Vacuum packing is the way to go for meat storage! If you look at the picture above and below, you’ll see that the “smoke ring” is still visible on this chuck roast. Normally, when refrigerated or frozen, and not vacuum packed, the cooked meat loses this “ring”.

Shredded smoked chuck roast
I added a little of my homemade BBQ sauce to the meat, mixed well, and then piled it onto some bread for a sammich!

Yep! Mayo and cheese on whole wheat bread! Grew up with it like that and still love it to this day! Oh yeah, the other stuff on the plate, some cook named Candis made homemade Mac and cheese, but we’ll talk about that some other time!
Hope you enjoyed this post, and until next time, Bone Appetite!
This blog entry is dedicated to the only BBQ partner I’ve ever had that didn’t tell me how to cook, he just ate it and loved it!

Buster the BBQ Cat
Pickled Eggs, Quail Eggs that is
I love me some pickled eggs! Hand me a jar of them and a couple of my 22 oz homebrews, and I’ll be a happy redneck! The bride on the other hand won’t be happy seeing my impromptu feast knowing that there may be some fermentation effects later, but, I digress!
While perusing the isles of my favorite food store, Fiesta, I ran across a can of lovely goodness, quail eggs in water! Already boiled, already shelled, and perfect for pickling!

Once I got home, I opened the pantry, the spice drawer, and then raided the bride’s canning jars! It was time to make some pickled quail eggs!
To make the eggs, I used the following ingredients and process…
1 – 15 oz can of quail eggs
1.5 cups of white vinegar
1 Tbs pickling spice
1 bay leaf
1 highly minced garlic clove
Put all of the ingredients, except the eggs, into a sauce pan and bring to a boil. While the spice juice is getting ready to boil, add all of the eggs to a sterilized one quart Mason jar.
Once the pickling juice is boiling, remove it from the fire and pour it into the jar full of your quail eggs, filling to the bottom of the neck of the jar. Put the cap on, screw the ring down gently, and do one of the following; just let the jar cool if you plan to eat them right after the waiting time of one week is up, or water bath them if you plan to let them sit for a couple of months. I water bathed mine.
Here they are all canned and waiting!

I made 2 jars of these and dined upon the first one about a week after canning, they were good, but today’s event was scrumptious! I made these back in February and opened jar number 2 today! The pickling juice has now penetrated fully into the egg white and the yolk is still firm and flavorful!

I ate several of these and was amazed at the difference several months made! I made myself stop eating since I want to take this jar out to the farm to share with my dad. Oh, and for the record, not drinking beer tonight, so the bride is safe….
Got any questions, need more info? Drop me a line!
Until next time, Bone Appetite!
Homemade Chipotle Seasoning
Going out on a limb with this entry, I’m going to try a video since it seemed the natural thing to do for this recipe.
I made some chipotle peppers a few days ago so that I could make some chipotle oil to cook with, and also to make some chipotle seasoning that I like to use in my BBQ rubs, or as a stand alone seasoning.
If you make this spice mixture, beware, fits of sneezing and coughing could come your way very soon!
Adobo De Puerco (pork in chili sauce)
I haven’t made anything worthy of a post in the last few days, so I thought I’d show a meal that is a favorite of mine to cook, and I haven’t posted about here before; adobo de puerco.
To make this dish will require a little work, possibly a burning eye or two, and a desire to make a meal that tastes almost as good as you’d find on the Texas/Mexico border. If you Google this recipe, the first page of links is all Spanish! Yeah, it’s an authentic Mexican entree for sure.
Here’s my ingredient list:
2 – pounds pork cubed (what ever cube size you like)
4 – ancho chilies de seeded and stems removed
6 – arbol chilies de seeded and stems removed (more if you want more heat)
1 – small yellow onion quartered
1 – white onion chopped
6 – cloves garlic (3-whole and 3- chopped with white onion)
1 – green bell pepper chopped
1 – red bell pepper chopped
1 – Tbs dried Mexican oregano
2 – bay leaves whole
2 – cups water for rehydration of peppers
2 – Tbs cooking oil of choice
Water required to add to pot
Cumin to taste if you want
Salt and pepper to taste
Ready? First of all, a toast! Not toasting with a drink, we shall toast our peppers in a cast iron skillet, or whatever skillet you have on hand.
Place the deseeded peppers into the skillet that has been preheated on high for about 3 minutes. This is where the eye burn can come in! DO NOT inhale the vapors or look directly over the skillet! Turn on the vent above the stove top.

Turn and toast the peppers until they begin to turn about 2 shades darker than they were originally. Once you reach the desired color, put the toasted chilies into a bowl that has your 2-cups of water. Let them sit while you do the rest of the process. This is the rehydration step for the peppers to blend good later on.
Get your yellow onion, 3 garlic cloves, and your green bell pepper looking like this, and then set aside.
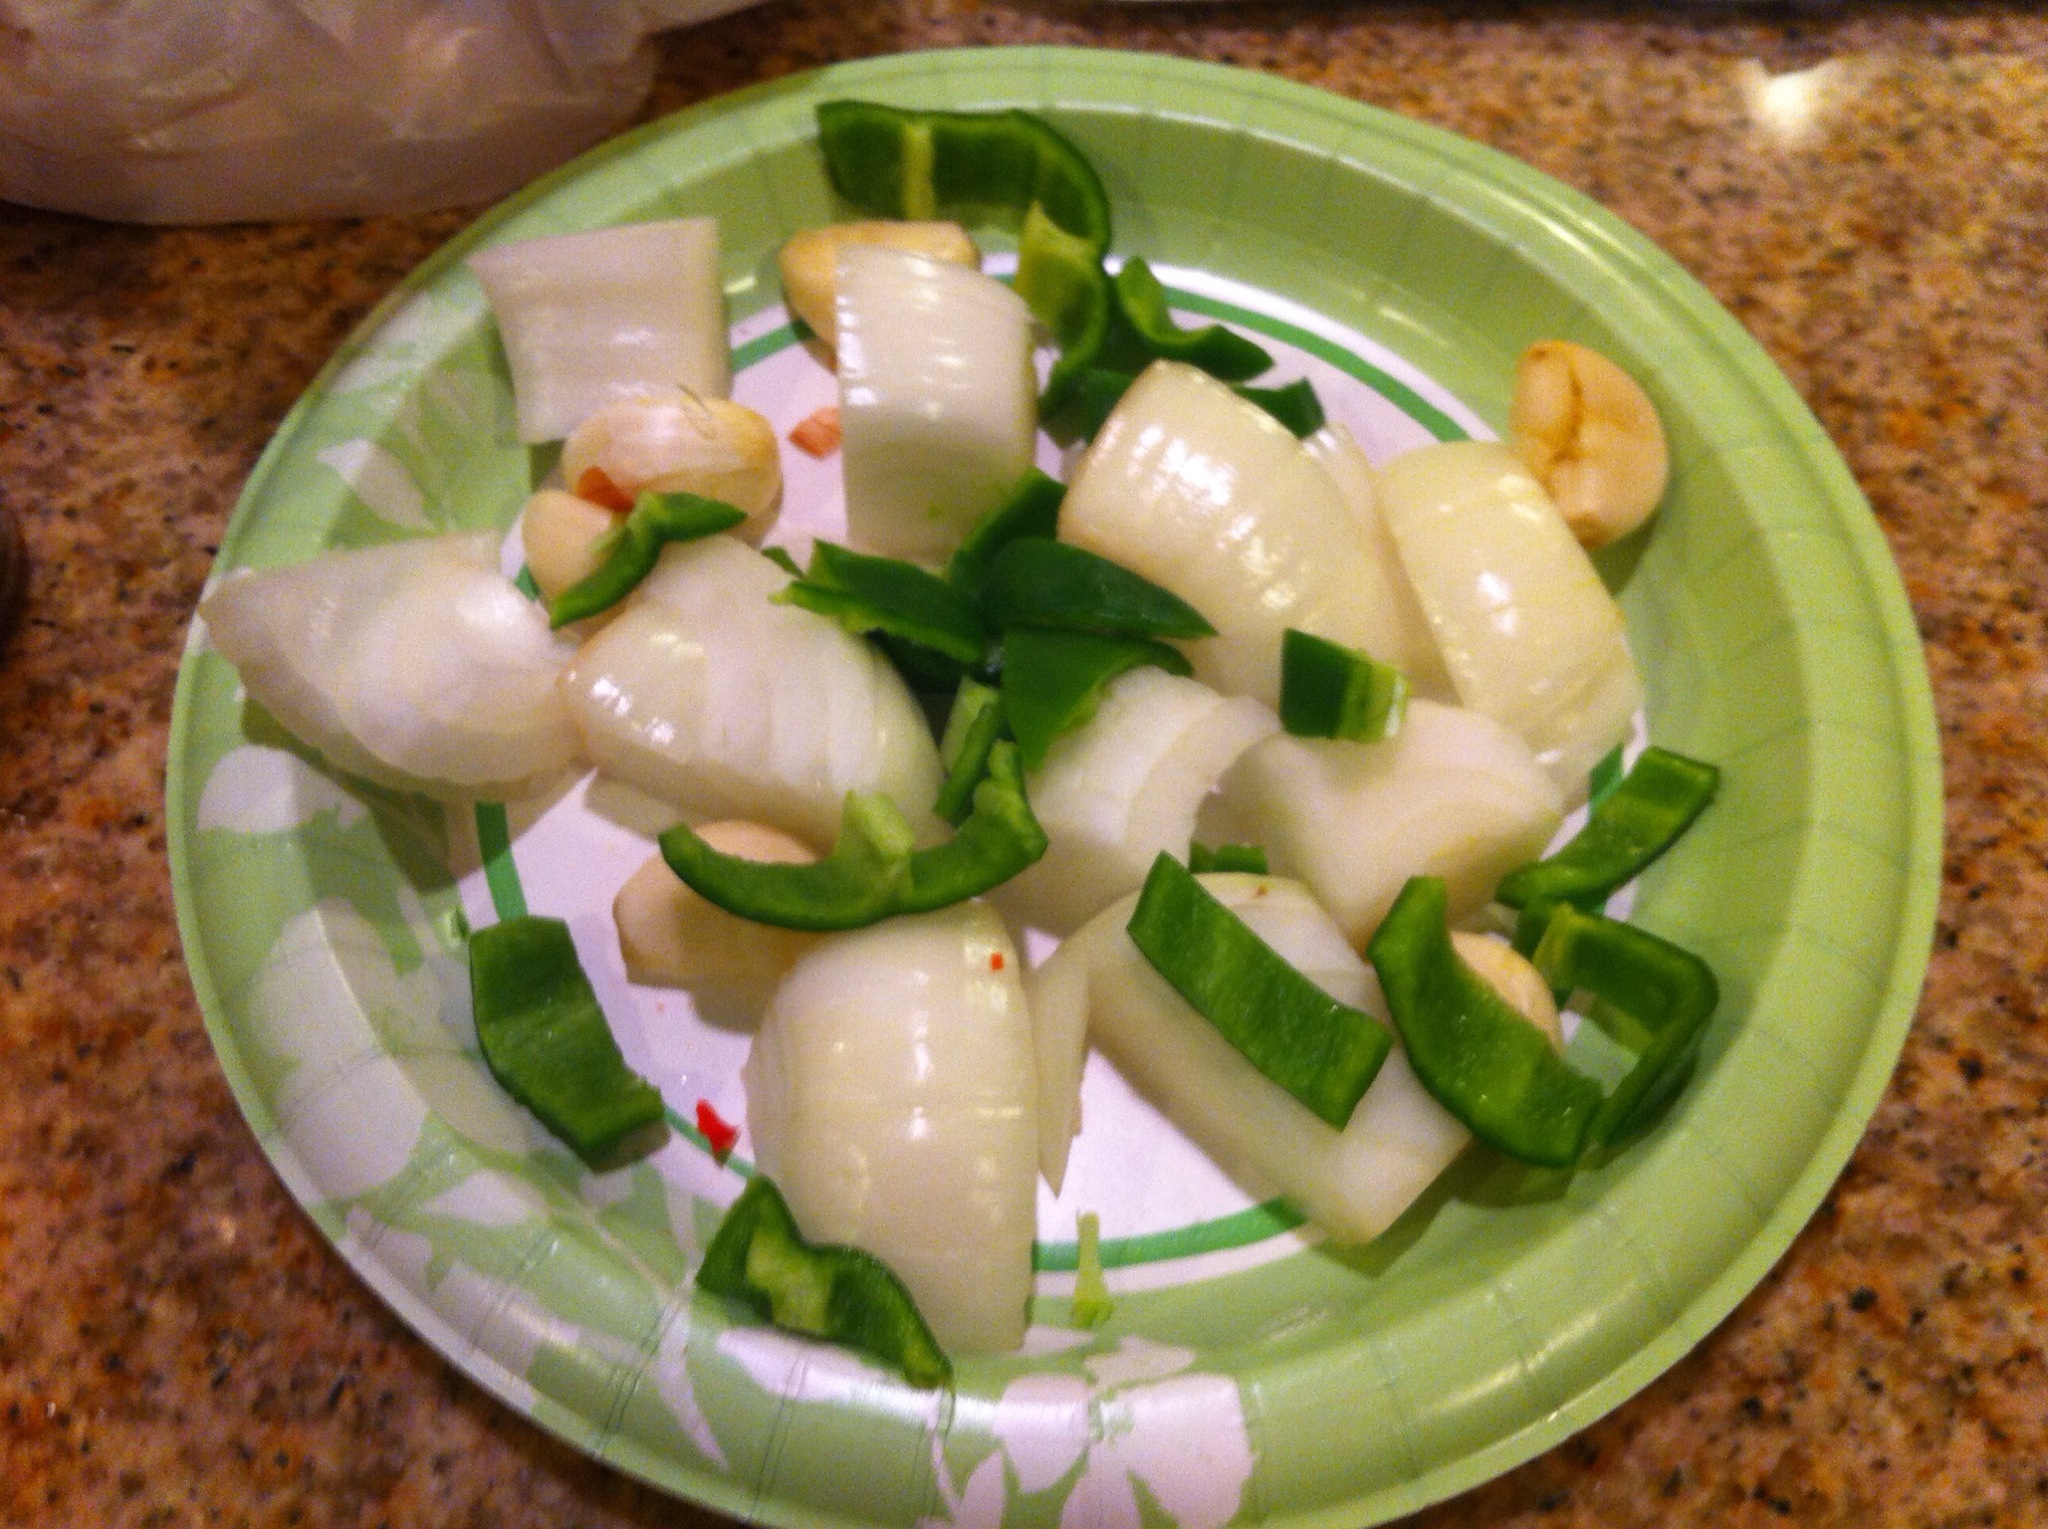
Chop the white onion, red bell pepper, and remaining garlic, and set aside separate from the previously cut veggies.

It’s now time to get the pork from the frig and cube it up. Mine were about 1.5″ x 1.5″, but you can do strips, or what ever you want, as long as it’s in pieces that will cook evenly. I had a pork loin chunk left over from something else and used it.

Place the cubed pork and the chopped white onion, red bell pepper, oregano, and chopped garlic into a large skillet with about 2-Tbs of oil. I used olive oil, but even lard would work. Cook on medium high heat until the meat is browned a bit on the outside and the onions and garlic begin to get a bit translucent.

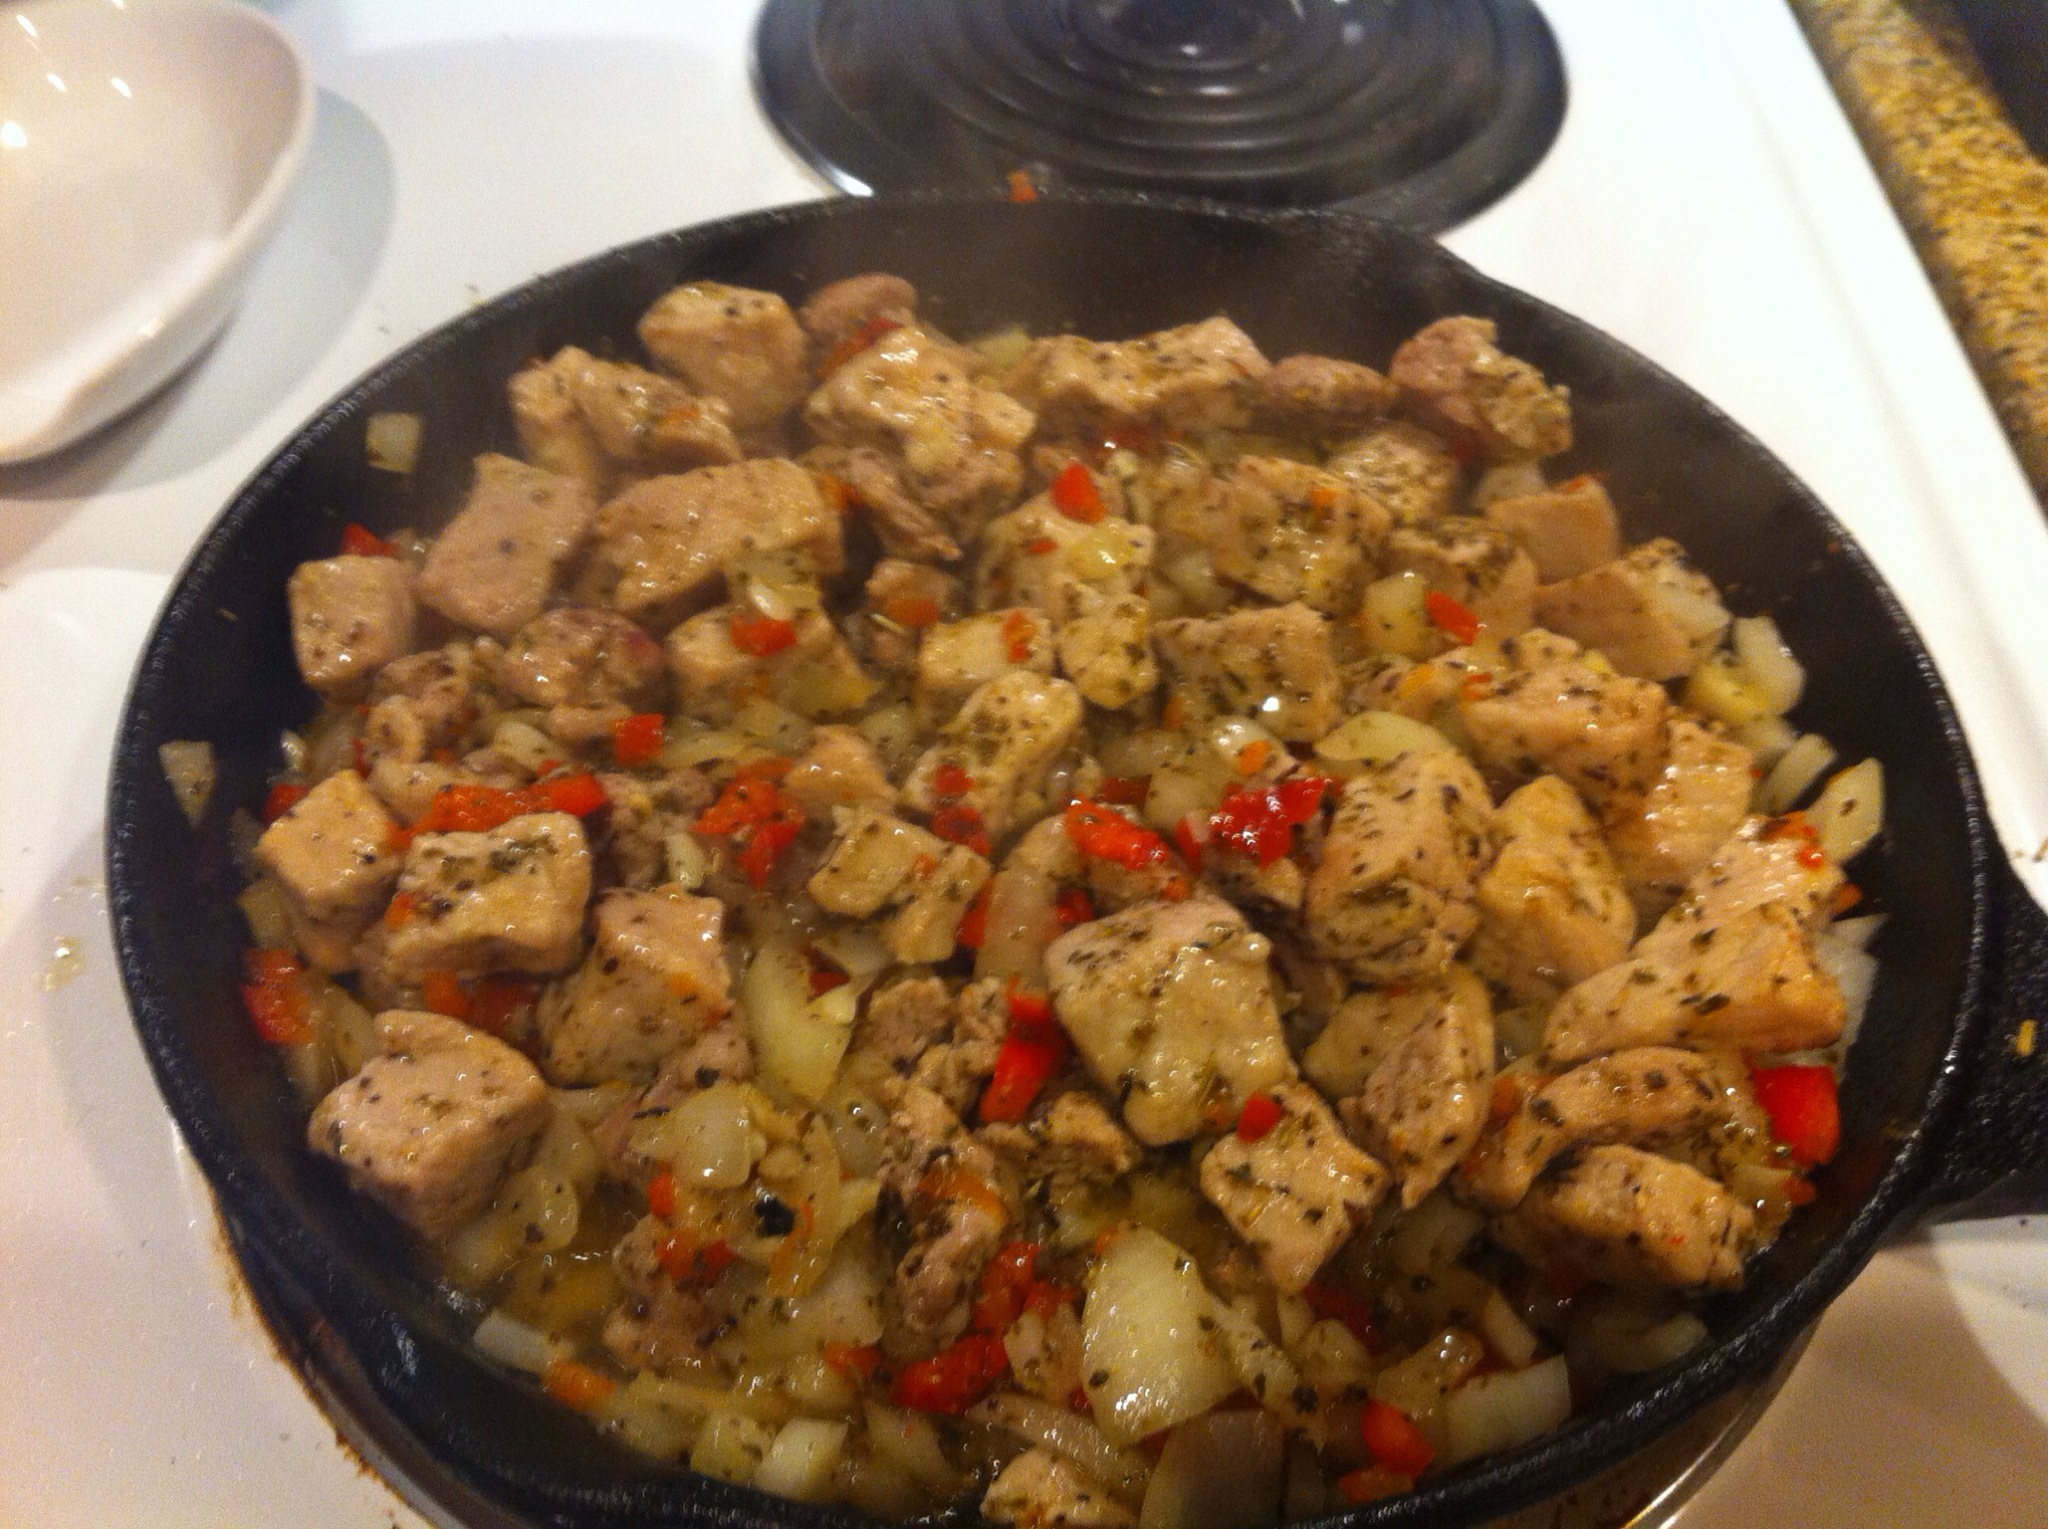
After the pork and veggies are where they need to be, pour them over into a big stock pot, and then add enough water to cover the meat and veggies. Just cover it, you still have stuff to add! Turn the burner to medium high and place the pot on it.

Time to make a mess in the blender! Pour the bowl of water and peppers into the blender and then add the yellow onion, green bell pepper, and whole garlic.

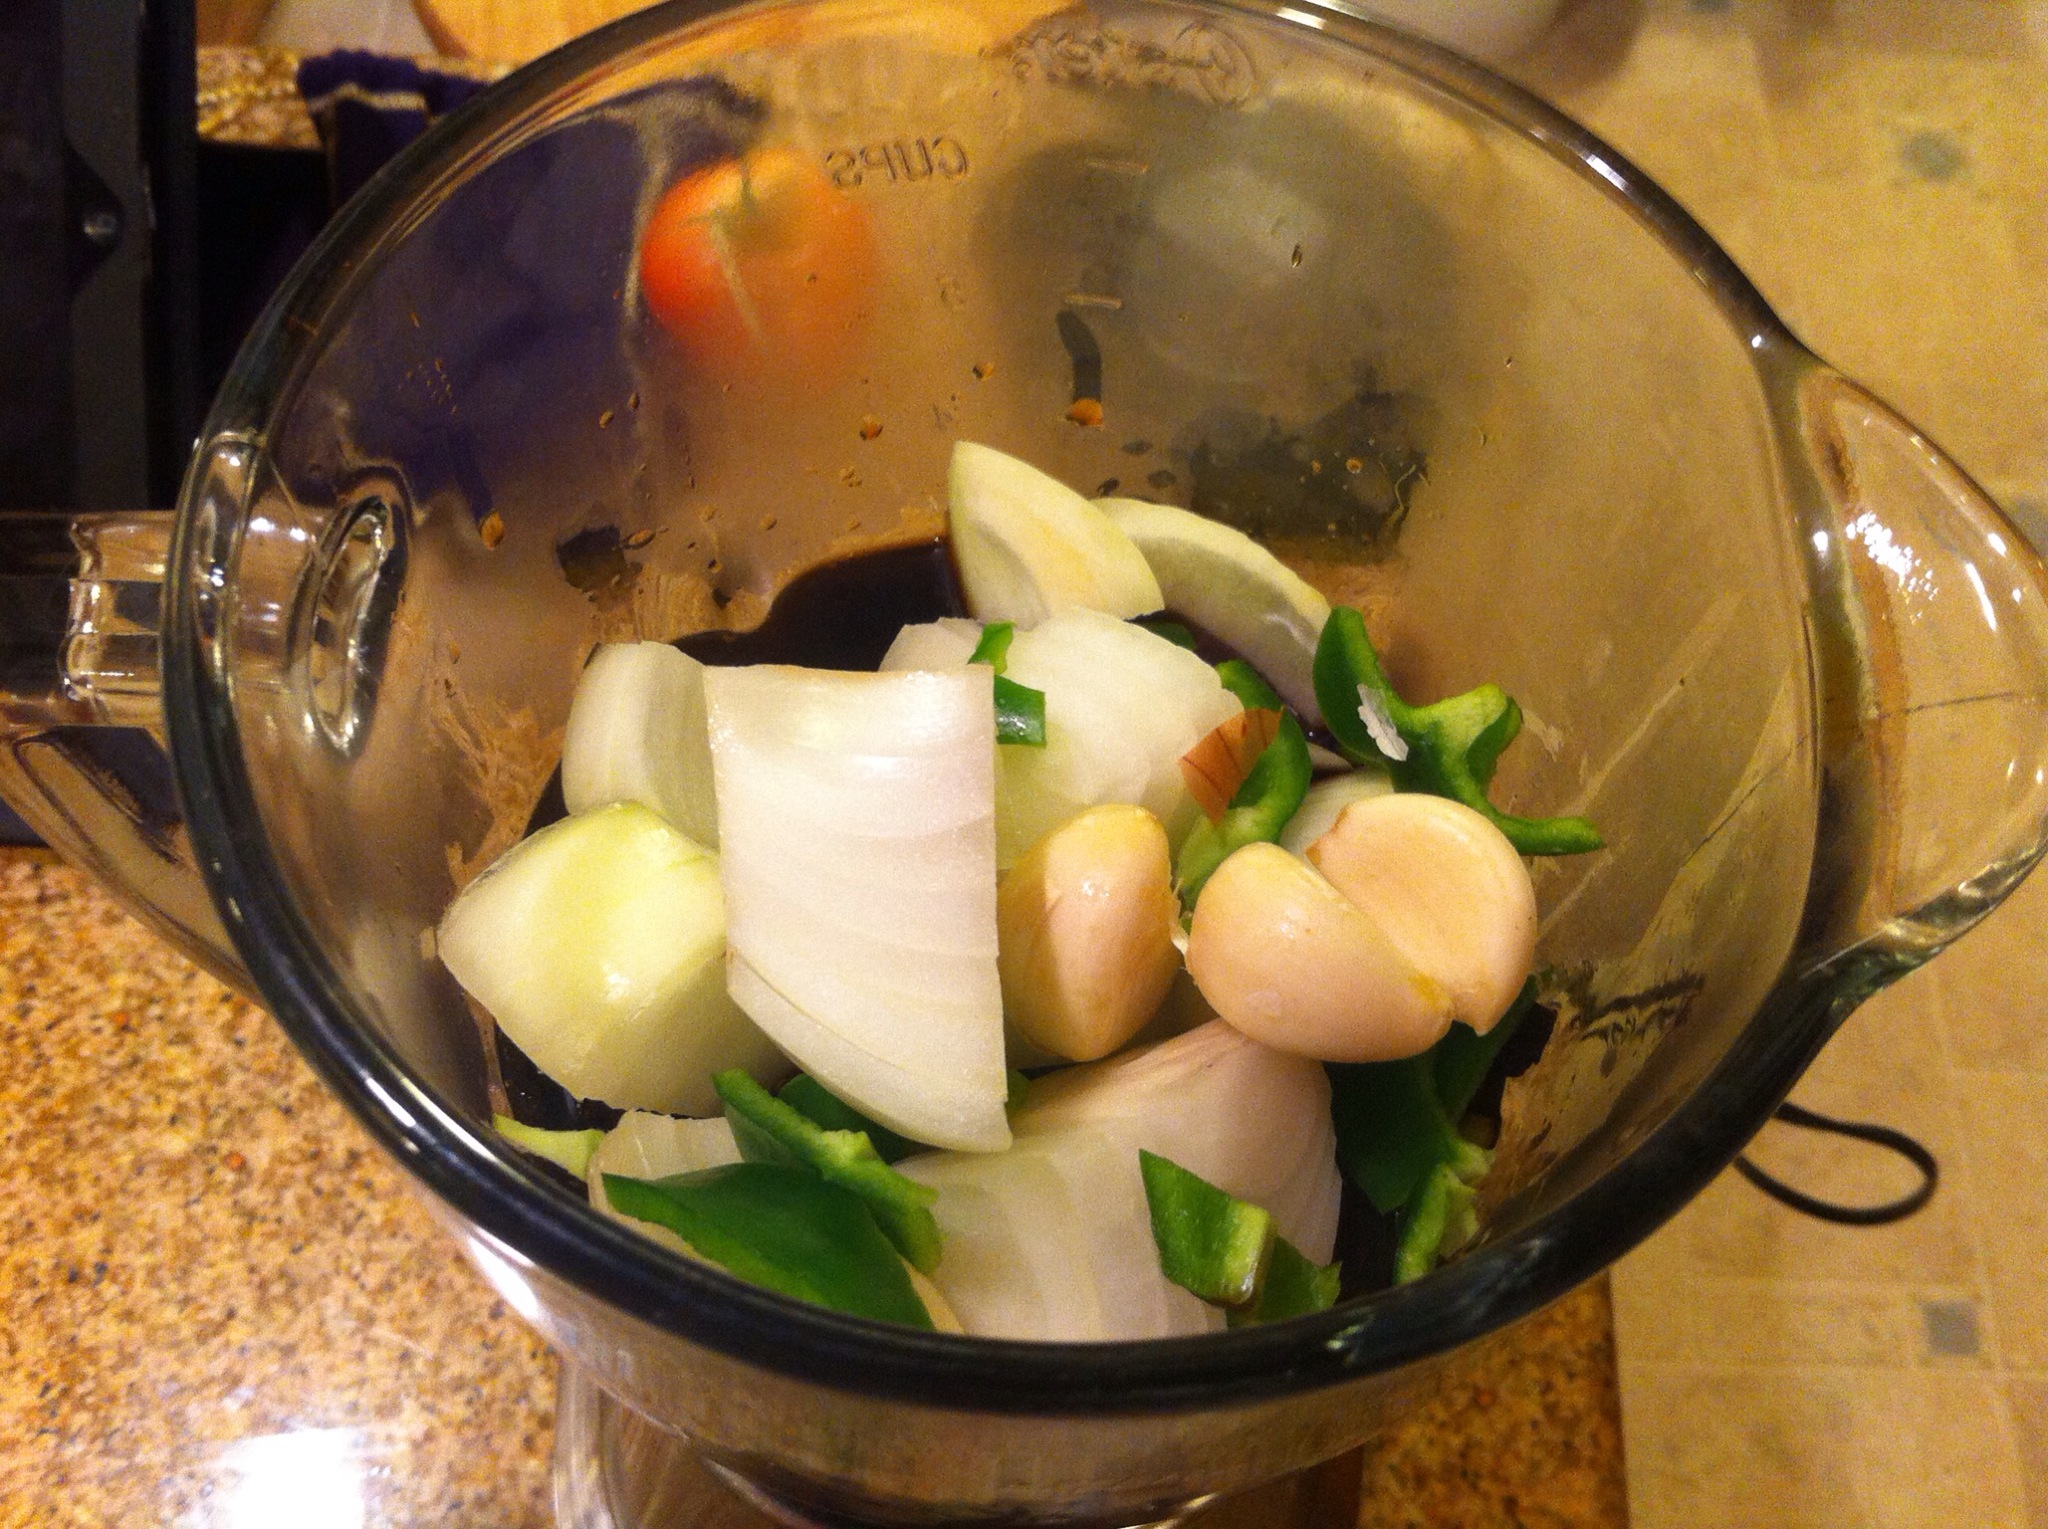
Now that all the makings of the adobo are in the blender, cover it up, and purée until it is very smooth! You want everything turned to juice pretty much.
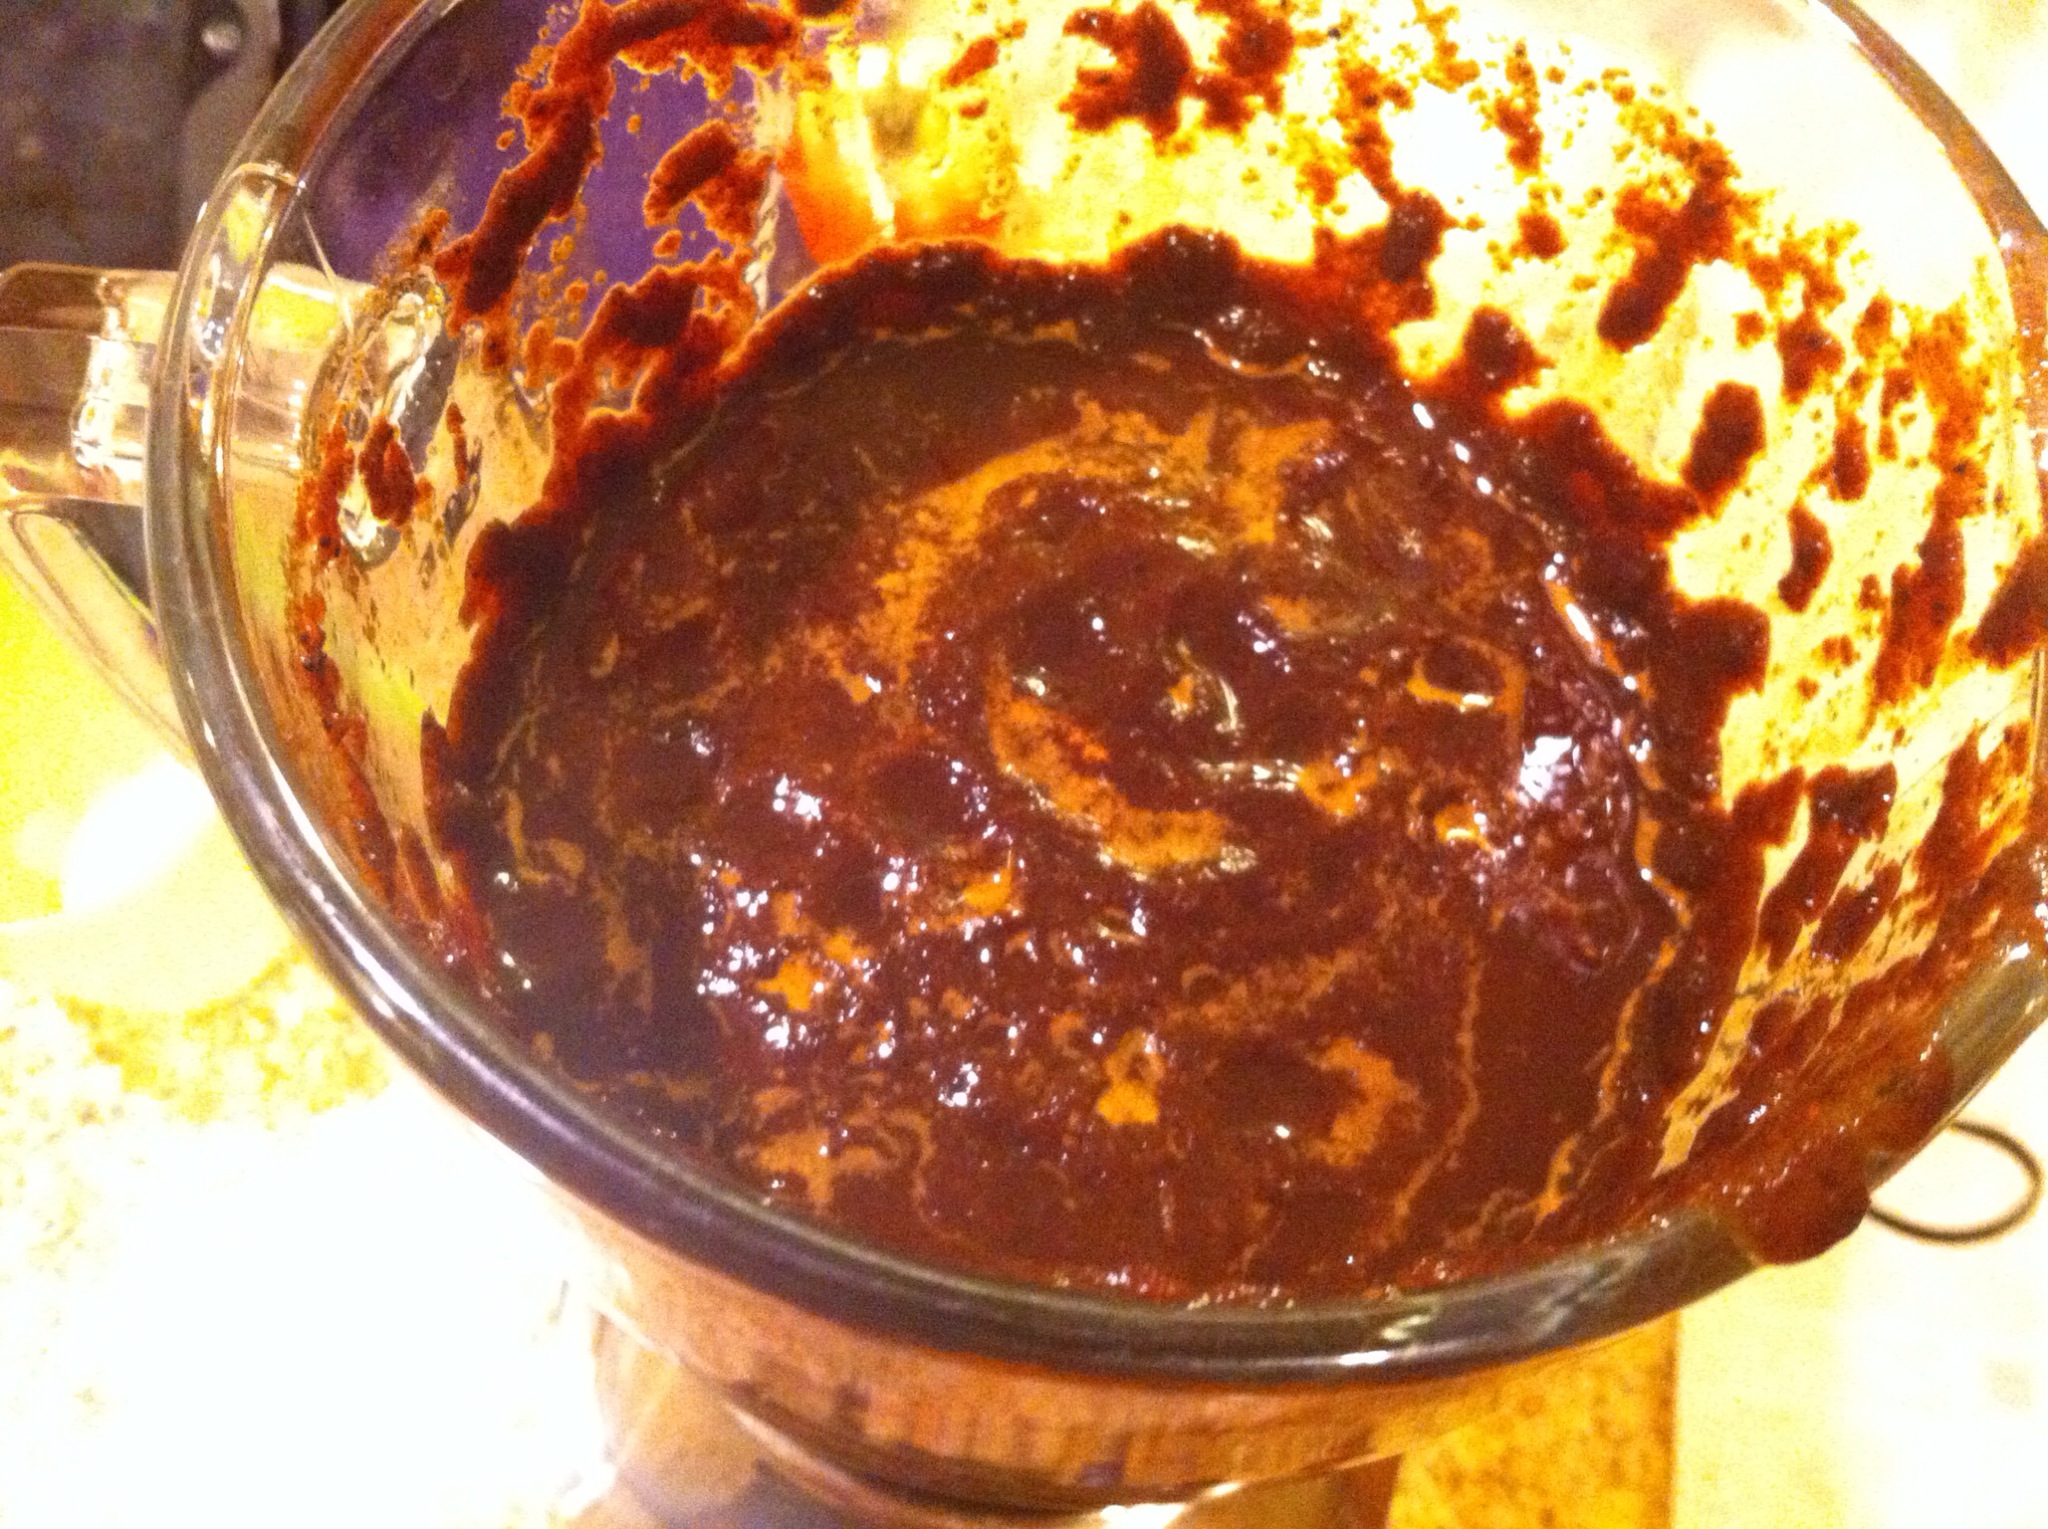
OK, at this point you can pour the liquid from the blender straight into the stock pot, or you can strain it. By straining it you will remove seed pieces and other gunk that didn’t blend well. The pics below show why I like to strain mine, LOTS of left over solids.

After straining, add the bay leaves, give it a good stir, and bring to a boil.

After you’ve reached the boiling point, reduce the heat to a simmer and let it go until you’ve reduced the amount of liquid by at least 1/4. Yes, it takes a while, but it really brings out the flavors and makes the meat fall apart tender. Notice the color difference below after simmering for a few hours and reducing down.

Well, we’ve reduced it down, the house smells great, and it’s time to eat! Sorry about the partial bowl pic, I was ready to dig in! You’ll understand after you make your first batch of adobo de puerco!

Until next time, Bone Appetite!
Beer is proof that God loves us!
“Beer is proof that God loves us, and wants us to be happy!”
Benjamin Franklin has been credited with that phrase, but there’s no proof that he said it. Now, since ol Ben liked to tinker a bit with things, I’d bet he said something like it while he was lifting a pint, or perhaps after a few pints!
Today I did something that I really enjoy, I home brewed some beer. If you’ve never had a homemade beer, you need to find someone that brews, and savor the difference between a company making large batches and someone individually taking the time to make a special small batch of their own just for the experience and flavor!
I hadn’t planned on brewing any beer until it started cooling off a bit, but this gent on Facebook, that I’m somehow related to by marriage, posted some pics of his kettle in action and then went on to describe how he was making it! His blog is found here; http://www.patheos.com/blogs/christianpiatt/?wref=bif trust me, you’ll love it!
So, after seeing his pics, reading his descriptions, and imagining the wonderful smells emanating from his brew kettle, my mouth was watering for some homebrew!
So this morning, I decided to get busy. I met my bride for lunch at 11:30, dropped her off at 12:40, visited my local home brew supply house, and was making beer at 1:30… All done and fermenting by 4:00! That left me time to clean up before she got home! So far, so good!
Now, before I tell you how to make beer, let me start with this; this is only for people over 21, and for those over 21 that are responsible enough to do this without burning down the house, making a sticky mess all over everything, and to make sure everything is clean before the significant other gets home! Trust me on the sticky and cleaning part! My bride finds sticky EVERY time after I make beer, regardless of how much I clean!
To make my beer I start out with good water, not the stuff from the tap, but real spring water, at least that’s what it says on the bottles I buy. Ozarka is what I used, but any spring water will work. Distilled water is a NO GO! You need minerals in the water, but not the chlorine that you find in city water.
I put the water into my 4 gallon pot and begin warming it up to 160 degrees.
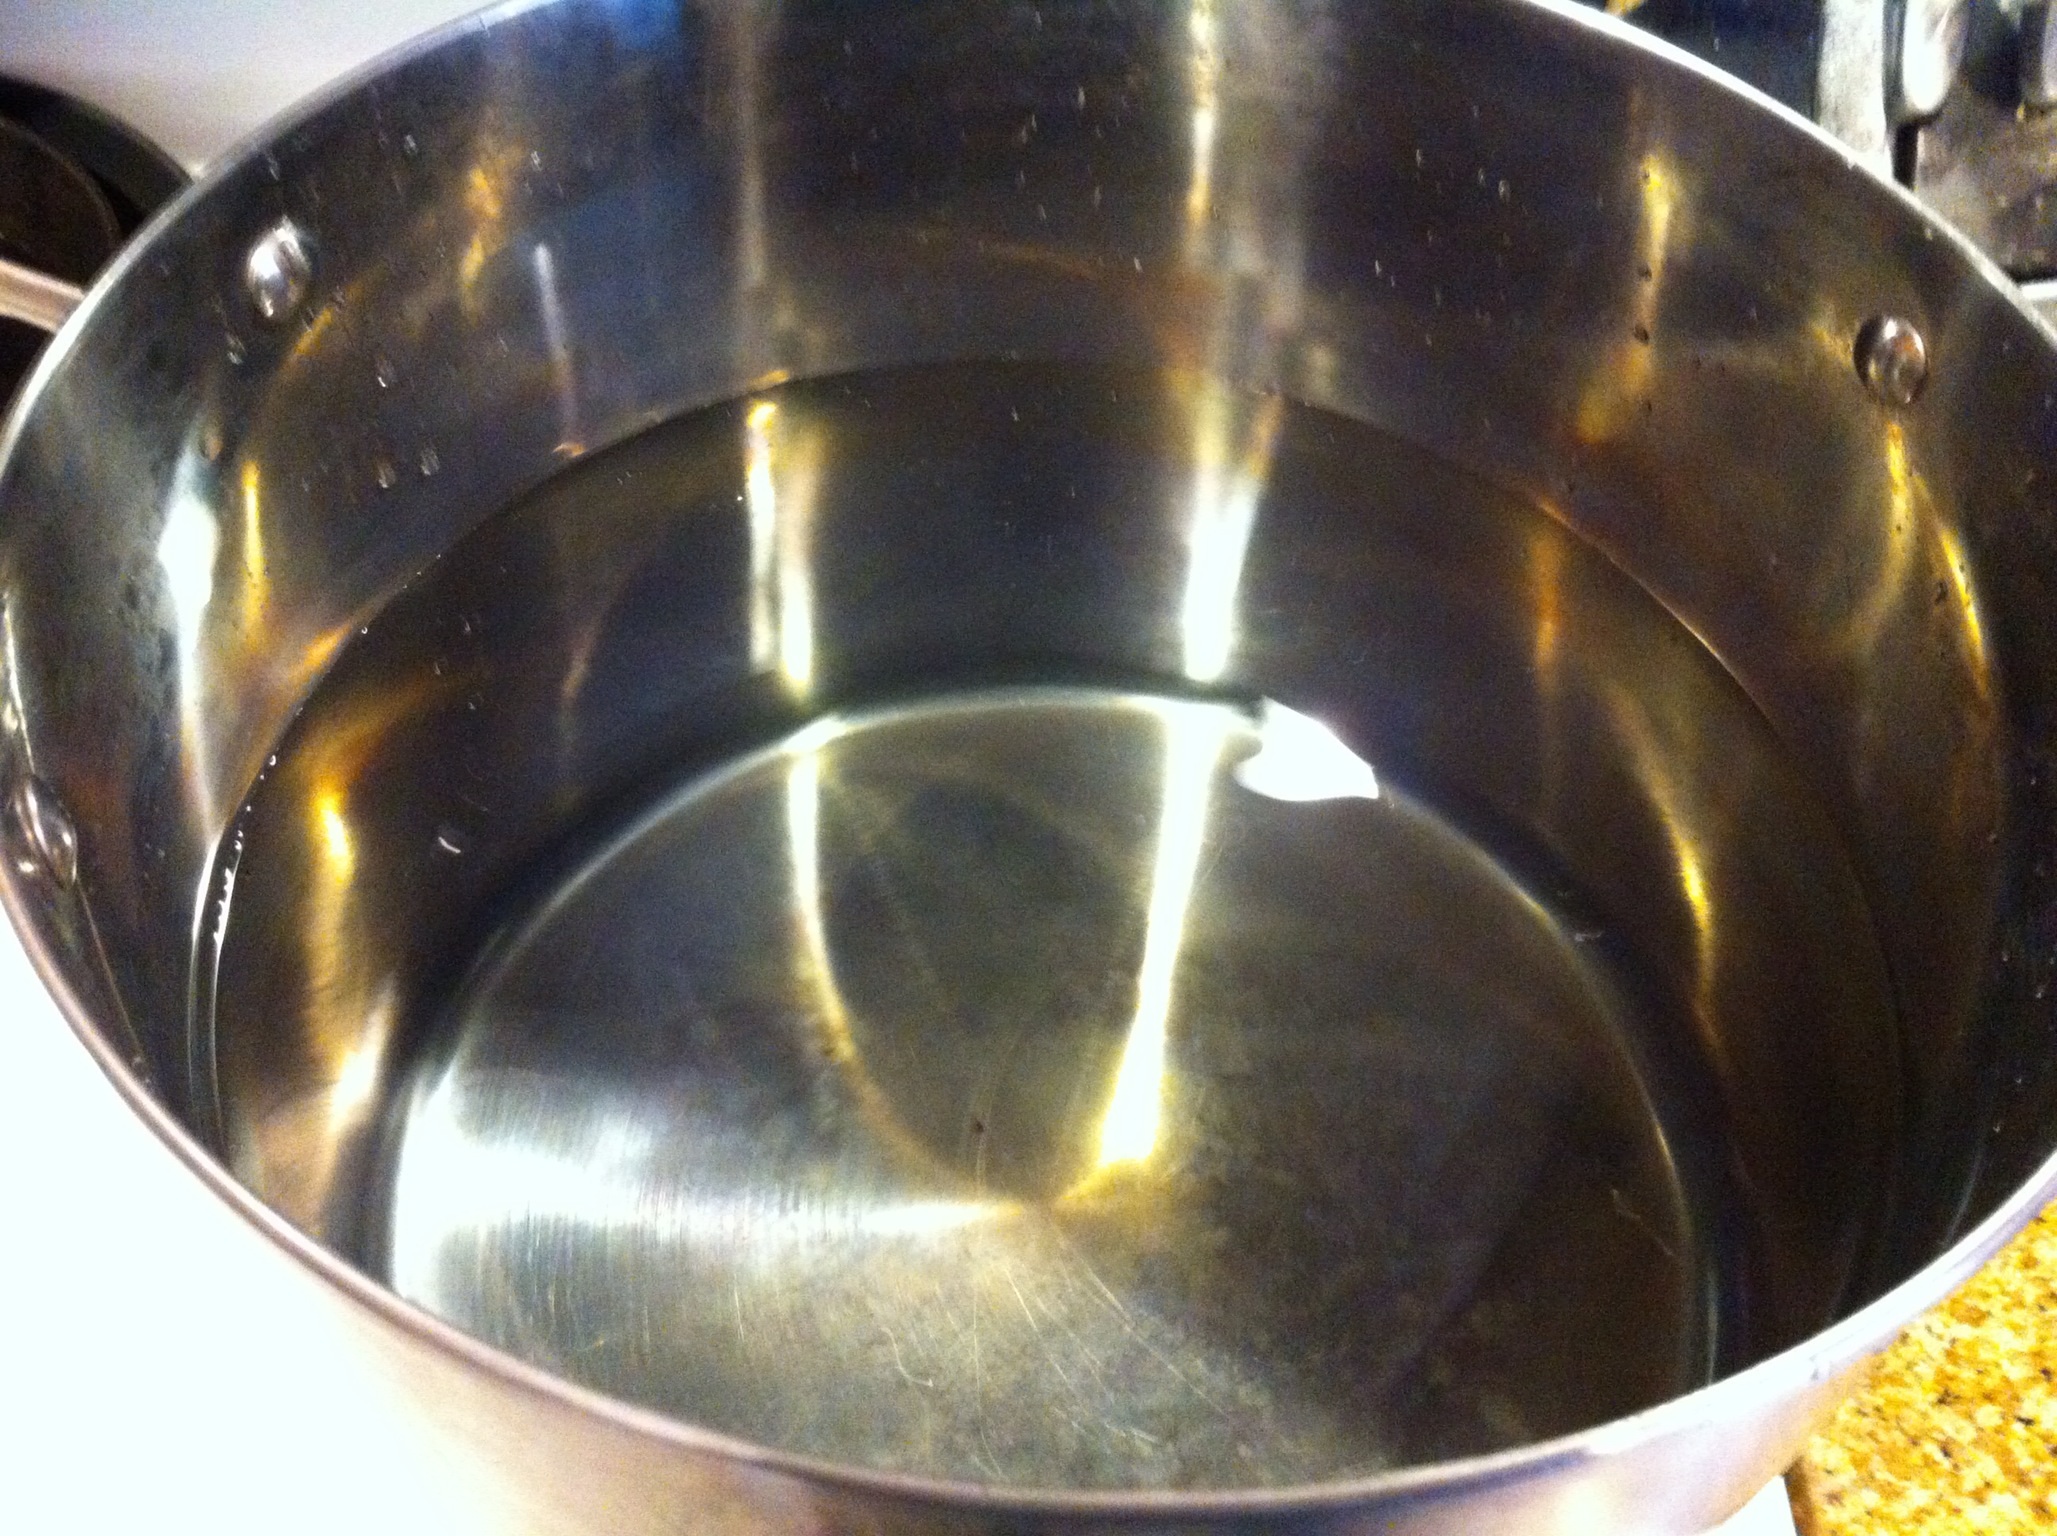
Water heating up
While the water is heating, let’s talk about the grains we plan to steep soon. I buy my grains already malted and the supplier cracks them for me at the time of purchase. Malted means that the grains have been allowed to sprout and then they are dried. The type of grains you buy are determined by the type and flavor of the beer you want. This is an ale, so I went with some light grains.

Grains are malted prior to sale and then cracked at the time of sale
To make removal of the grains from the pot after steeping a lot easier, I like to place them in a grain sock.

Grains all sacked up
When I hit 160 degrees in my boiling pot, I turn off the burner, insert the bag full of cracked grains to steep a bit, and then cover the pot to save the heat.

Time to steep
During the steeping process I get busy disinfecting EVERYTHING that is going to come into contact with my brew! I use idophor to sterilize my stuff, but there are many others out there, even plain bleach and water will work. Once everything is cleaned, I see that my steeping time is about up, and I get ready for the fun part; the boil!
I pull the grain sack from the pot and allow it to drain and drip a bit, but I don’t squeeze it like you would a tea bag. Squeezing the grains at this point could result in tannins being released into your wort, that’s a bad thing! Tannins are nasty tasting!
Oh, by the way, now that you’ve steeped your grains, your water is now called wort, basically pre-beer soup.
I once again apply high heat to my pot and bring the wort to a boil. Note the color of the wort in the picture below, as of now we only have a “tea” from steeping the grains.
The wort boiling before extract and sugar added
Once a rolling boil is achieved, I turn off the heat to add my liquid malt extract and my corn sugar. By turning off the heat, I prevent the scorching of the sugars before they are dissolved into the wort. I add the extract first, and then pour in the corn sugar.

Corn sugar

After extract is added
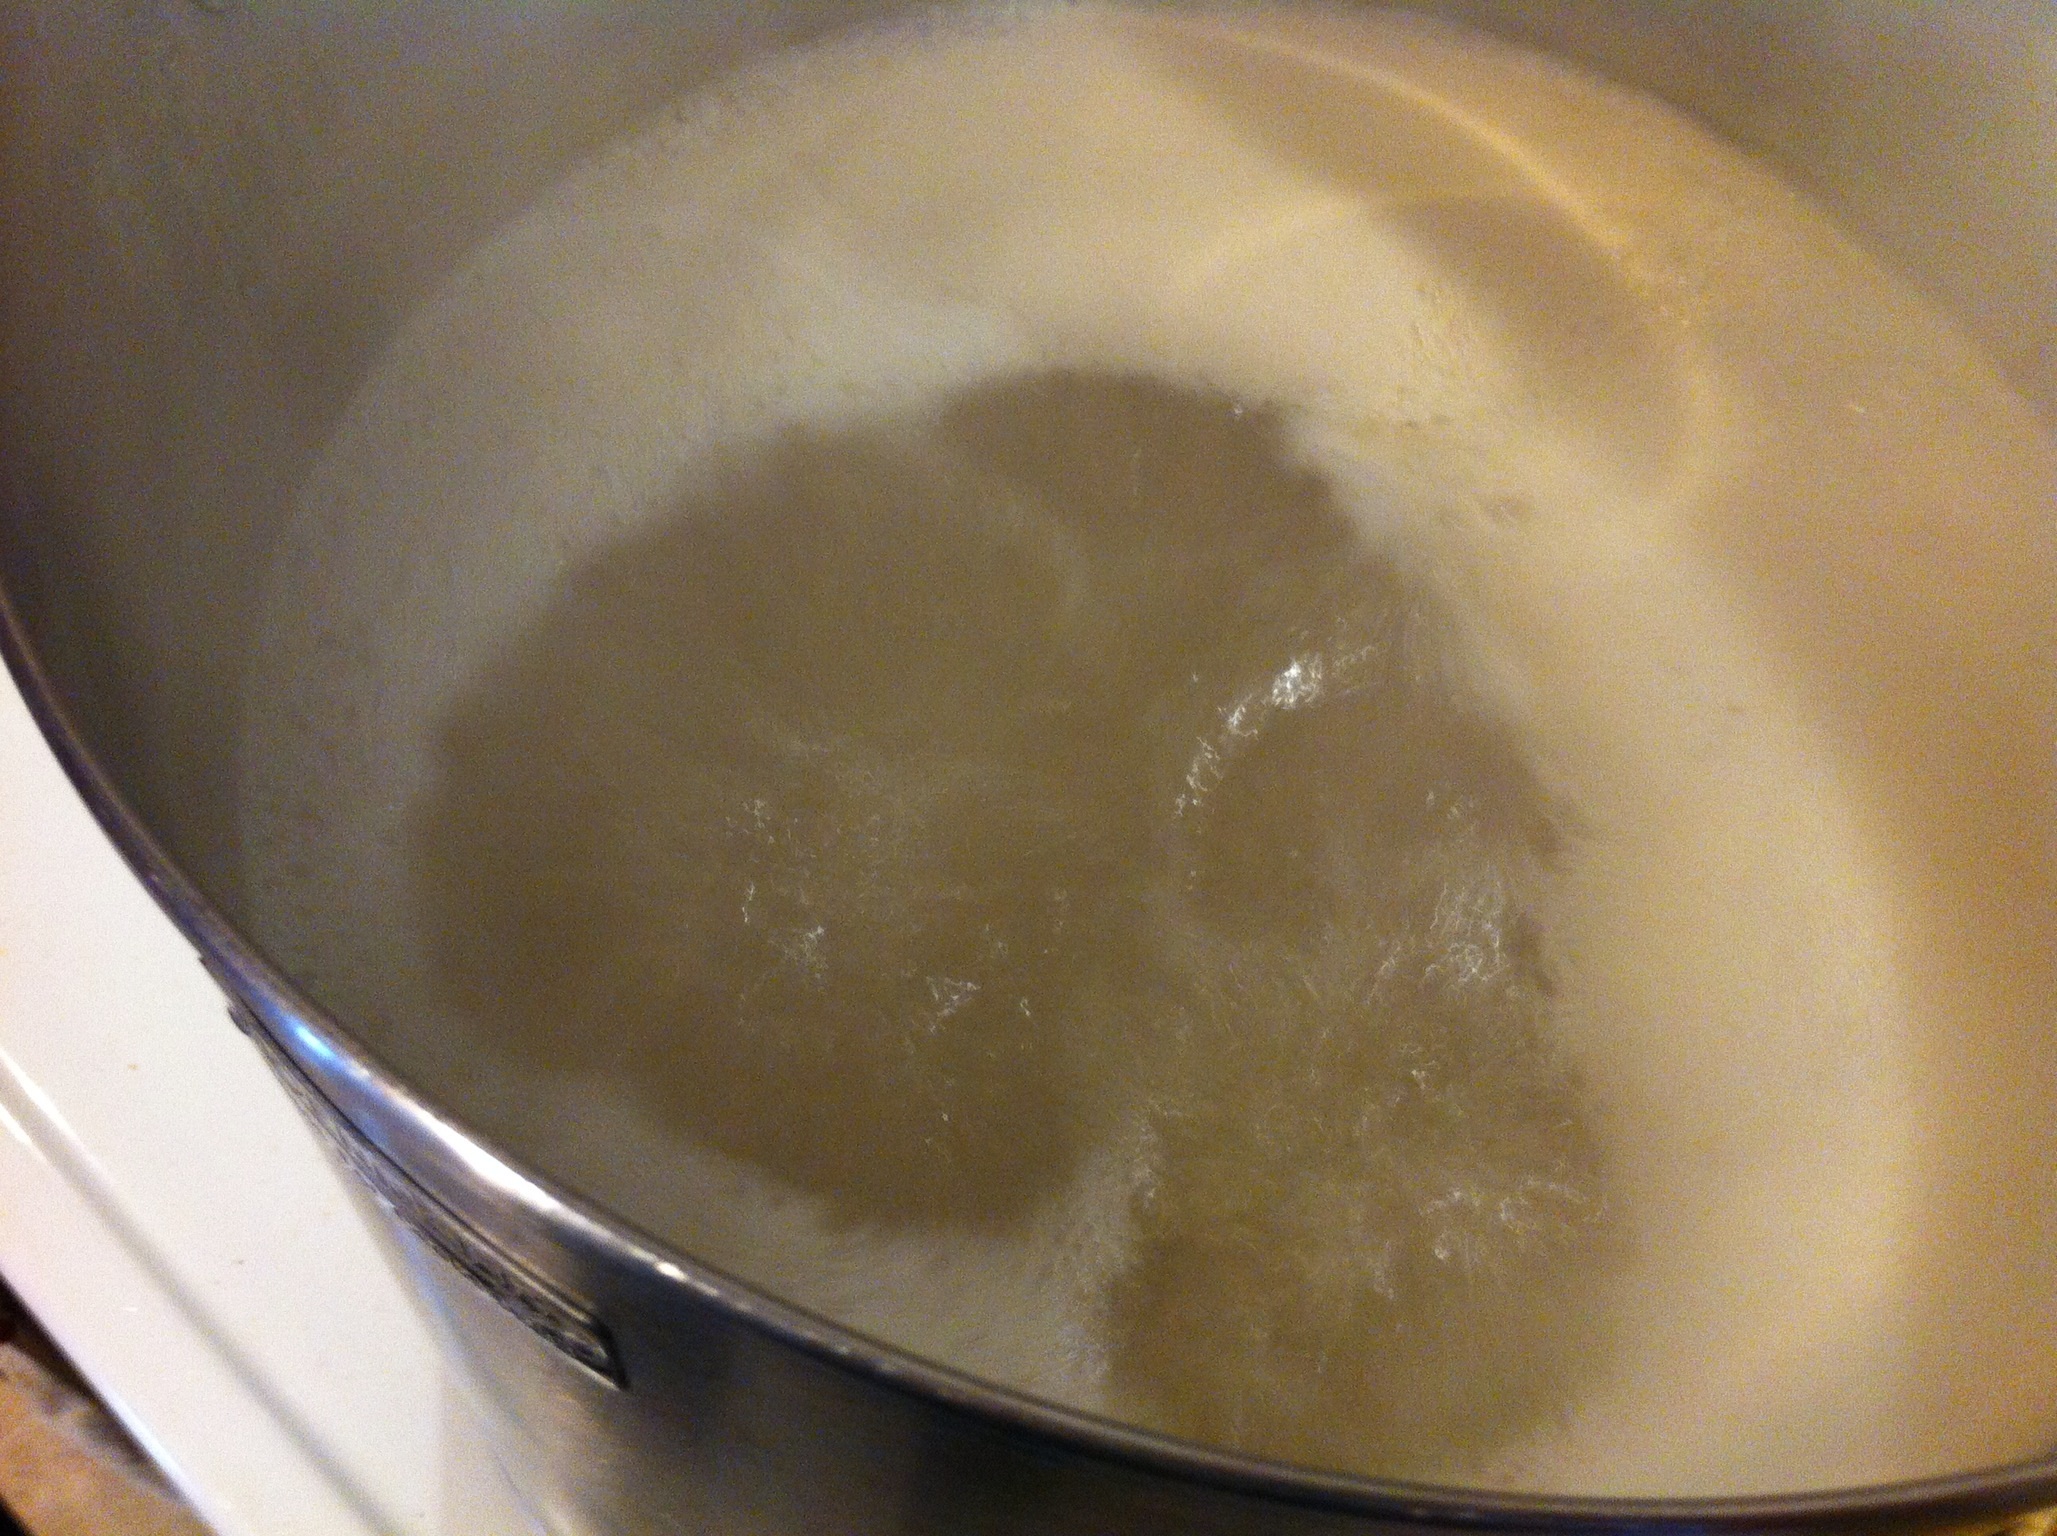
WOW, look at the color now! Yep, looking like a beer I’d like to drink! However, drinking it now would provide you with a very sweet, non-alcoholic, and flat cup of liquid that pretty much tastes like liquid bread, not even a beer taste at this point, to get the beer flavor going, let’s hop it up a bit!
Now we’ll slowly bring this wort up to a rolling boil and add our bittering hops! Now, don’t freak out over the bitter word. Bittering is one of the things that gives beer it’s distinct beer flavor. But, all hops don’t make it bitter! Some add flavoring and others add aroma! We plan to use all 3 today!

Hops are in
The first round of hops will boil in the wort for the entire 60 minutes, flavoring hops go in at 50 minutes, and aroma hops at 55 minutes.
Well, our hour is up and we have 3 gallons of wort to chill before we can pitch our yeast! But first, let’s get rid of the hops in the pot. Just pull them out and put them with the grains that we will no longer use, but will love each time we savor a bottle of this brew!

Grains and hops all used up
Into the ice bath it goes! We need this wort chilled to 75 degrees as quickly as possible. Since I don’t have a wort chiller I use a sink full of ice and water. Primitive, but it works!

Chillin
Well, I messed up a bit and forgot to take pics of the last few actions, mostly since it took 2 hands and coordination to do everything. Once the wort had chilled to around 85 degrees, I transferred it to a 5-gallon carboy. Basically a 5-gallon glass bottle. After transferring the wort, I added just over 2-gallons of water to the carboy to get me up to the 5-gallon mark. I started with 3-gallons of water, but some evaporated during the boil…
After adding the water and swishing it all together, I took a 1/2 cup sample so I could take a specific gravity reading. My specific gravity reading was 1.040, I had planed for 1.042, so I’m pretty close!
Then I “pitched the yeast”! Basically, that means I poured the yeast mixture into the carboy and shook it up… Shook it for 5 minutes! Guess what, 5 minutes of shaking a 7 pound glass bottle full of wort is WORK! In reality, I shook for about 1 minute and agitated the remainder of the time!
Why did I shake and agitate? The yeast needs oxygen to really work well, so I did what I could to feed the yeastie beasties! After all the shaking, rolling, cussing, and oxygenating was done, I added a blow off tube to the top of the carboy, and placed the other end of the tube into a small bucket of water. This makes for an airlock. The airlock allows the fermenting beer to burp and release gas, but doesn’t allow air back into the carboy.

Let’s ferment
Now, give me about 8 weeks, and I’ll tell you if this brew is good or not!
Complete recipe will be in my next post, this one is a bit long already….
Questions, comments, or winning lotto numbers, drop me a line or comment..
Until next time, Bone Appetite!
